Facebook Lead Plugin
How to Setup Facebook/Instagram ad leads?
Data from Facebook/Instagram ad lead forms can be ingested on Chakra using the Facebook Leads plugin. The integration works in realtime, so whenever a form is filled in a Meta ad form, a new lead will be created on Chakra.
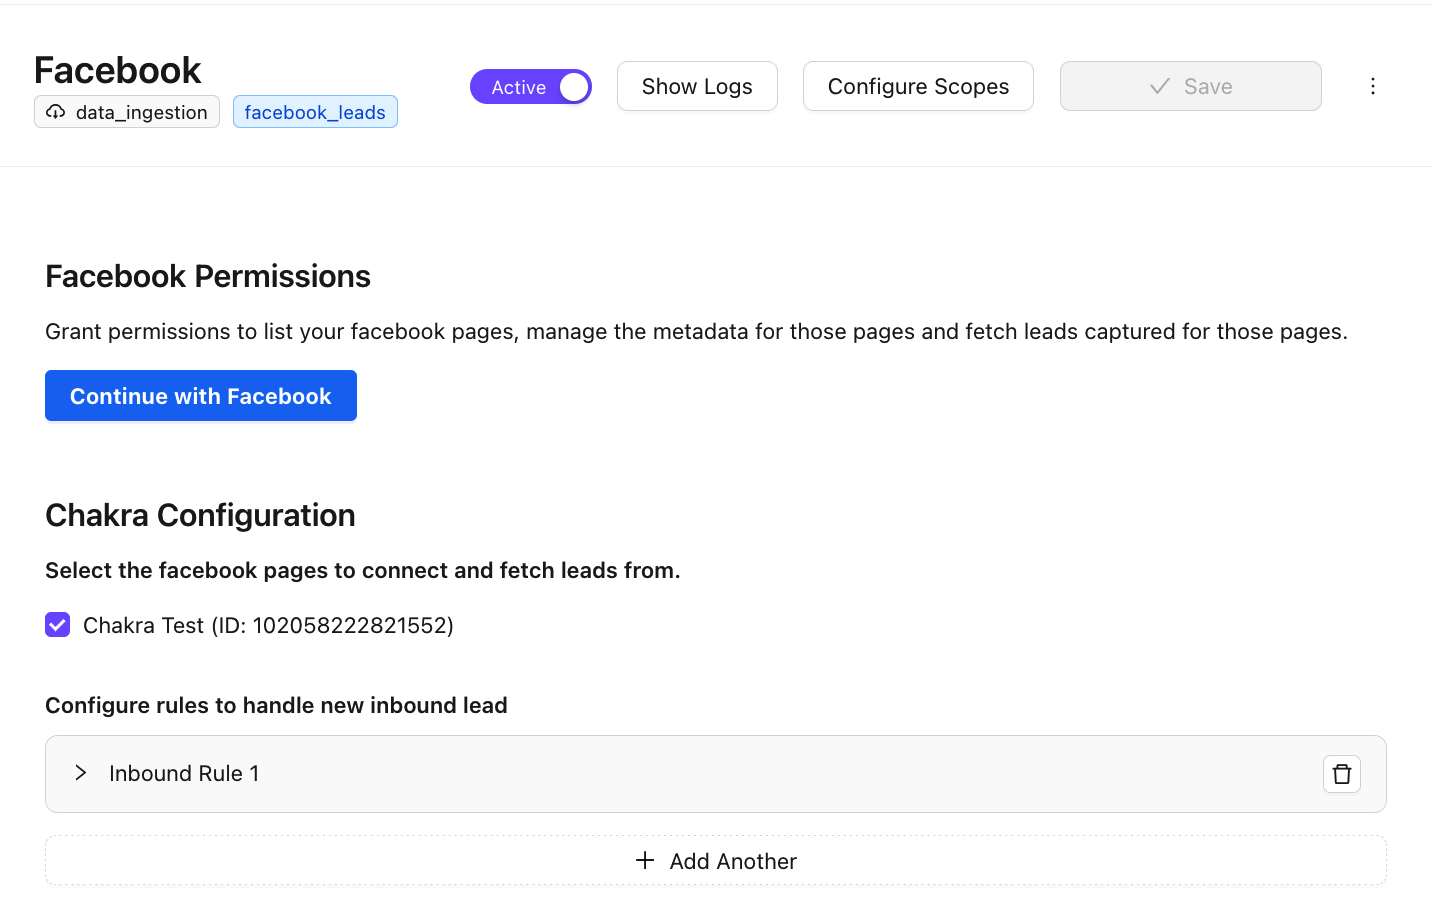
Create Facebook Lead Plugin
The plugin can be created by following these steps:
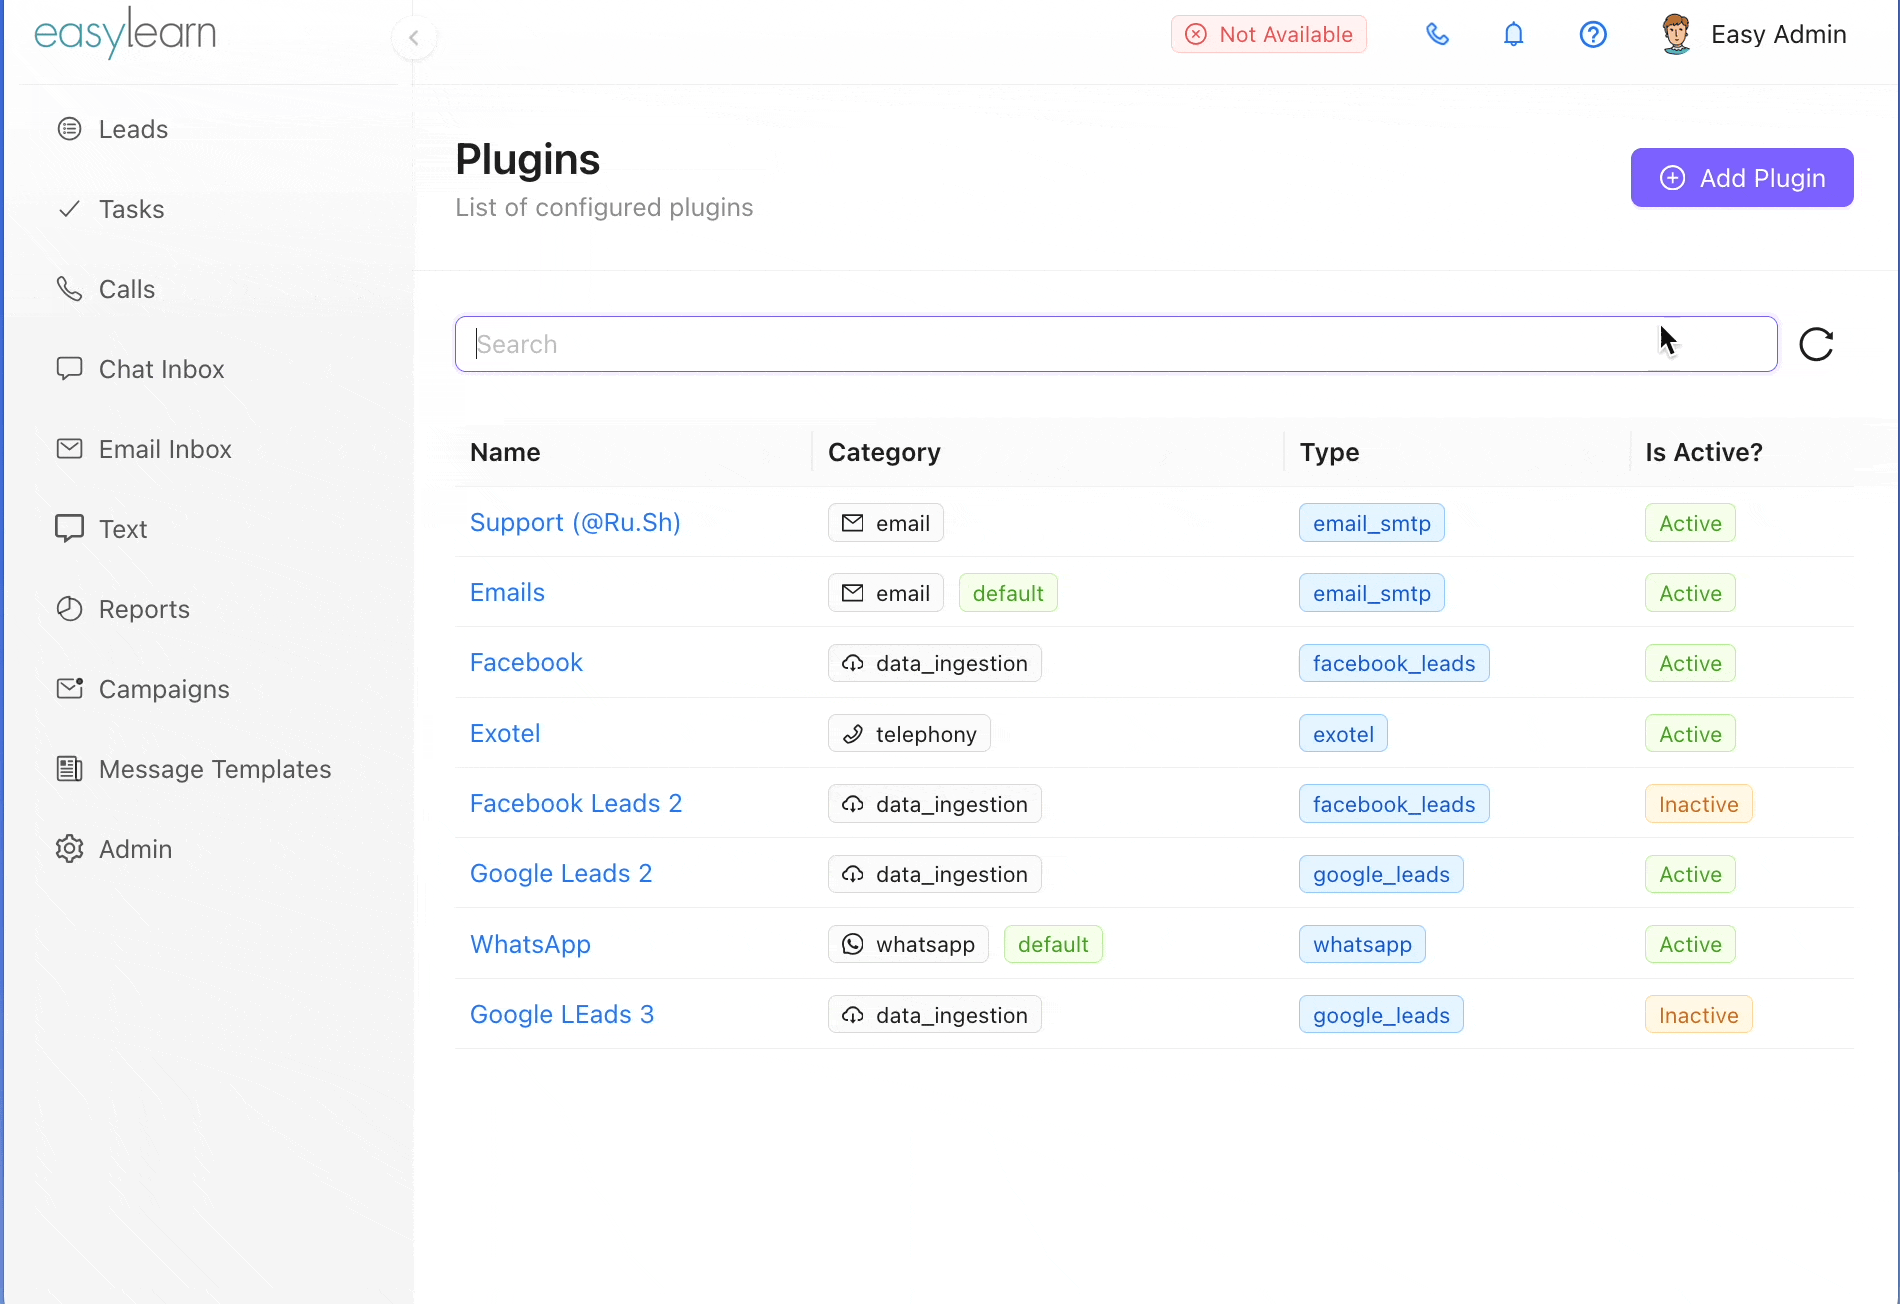
- Go to
Admin -> Plugins.

- Click on
⊕Add Pluginand search forFacebook Leadsplugin. - Click on the
Facebook Leadsbox. - In the popup that opens, provide the
Plugin Nameand clickSubmit.
Grant Facebook Permissions
After creating the plugin, we need to grant the permissions on facebook in order to create the lead on Chakra directly through Facebook. That can be done by:
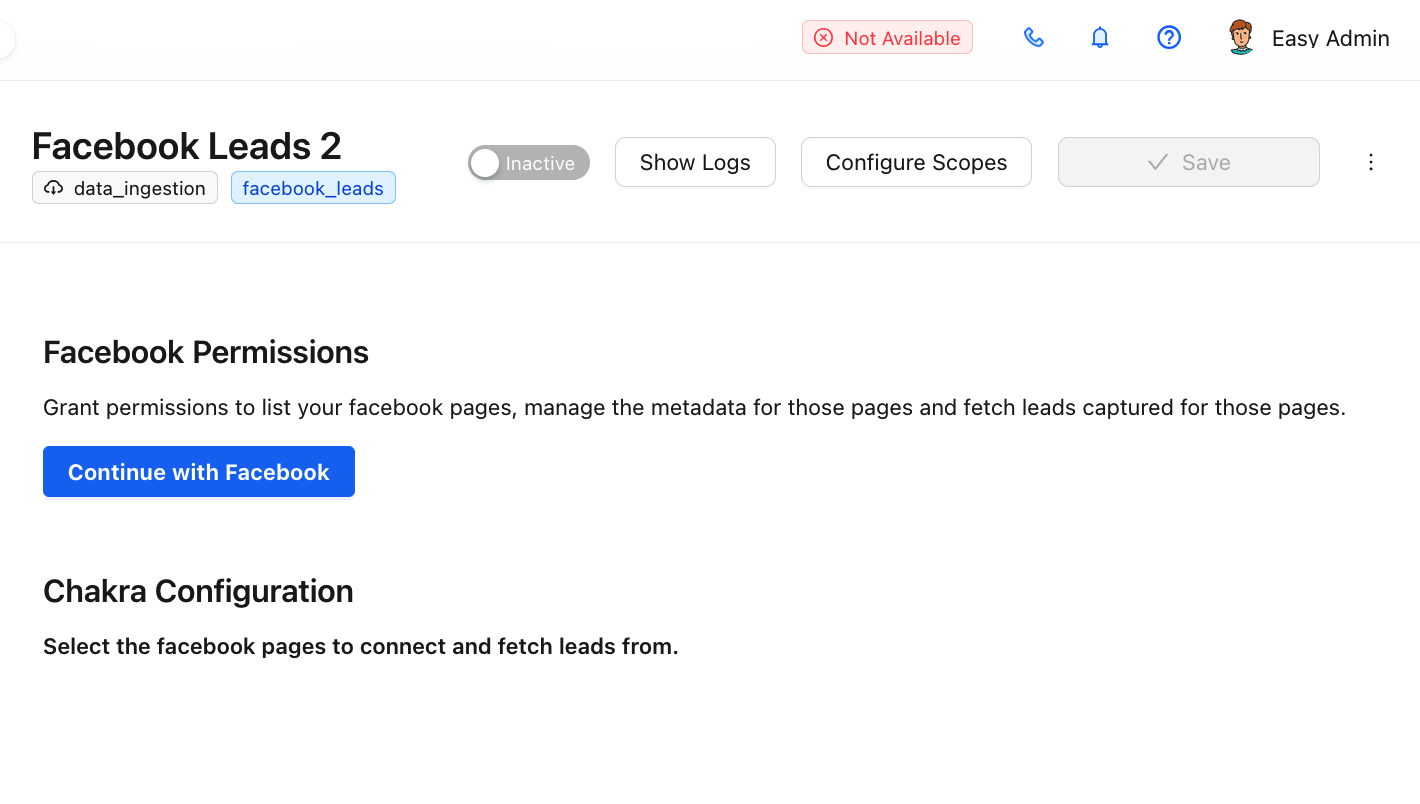
- After the plugin is created, the plugin details page opens up.
- Click on
Continue with Facebookbutton
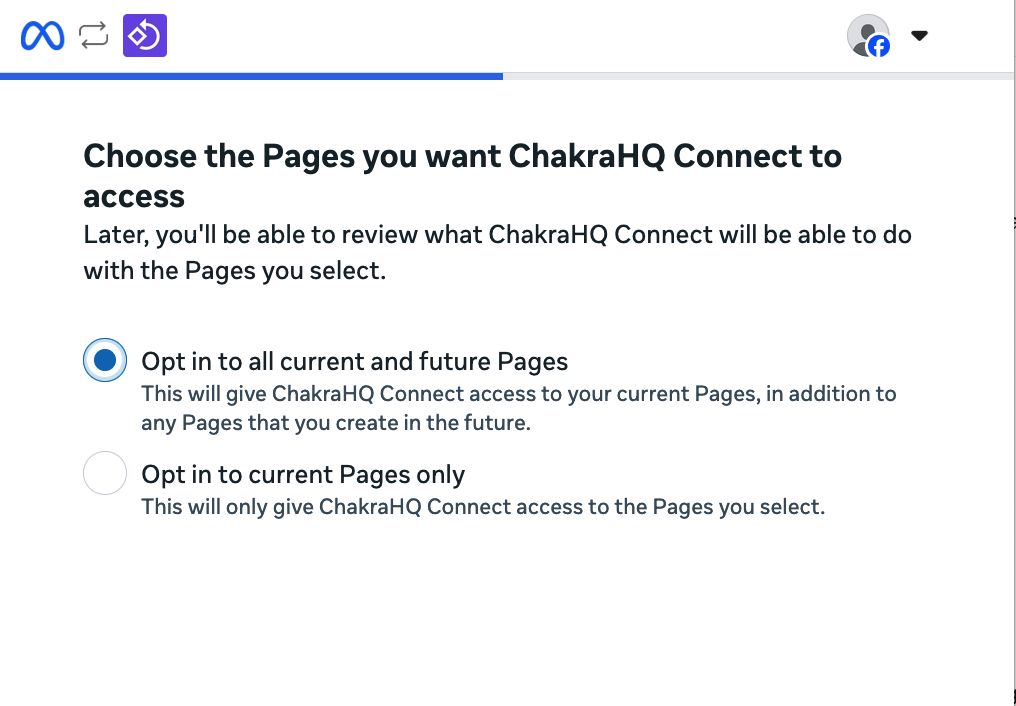
- In the Permission popup window, select the Facebook page you want to link & click
Continue - Choose the Page Access type
- Opt in to all current and future Pages: This will give ChakraHQ Connect access to your current Pages, in addition to any Pages that you create in the future.
- Opt in to current Pages only: This will only give ChakraHQ Connect access to the Pages you select.
- Choose the Business to Connect
- Opt in to all current and future Businesses: This will give ChakraHQ Connect access to your current Businesses, in addition to any Businesses that you create in the future.
- Opt in to current Businesses only: This will only give ChakraHQ Connect access to the Businesses you select.

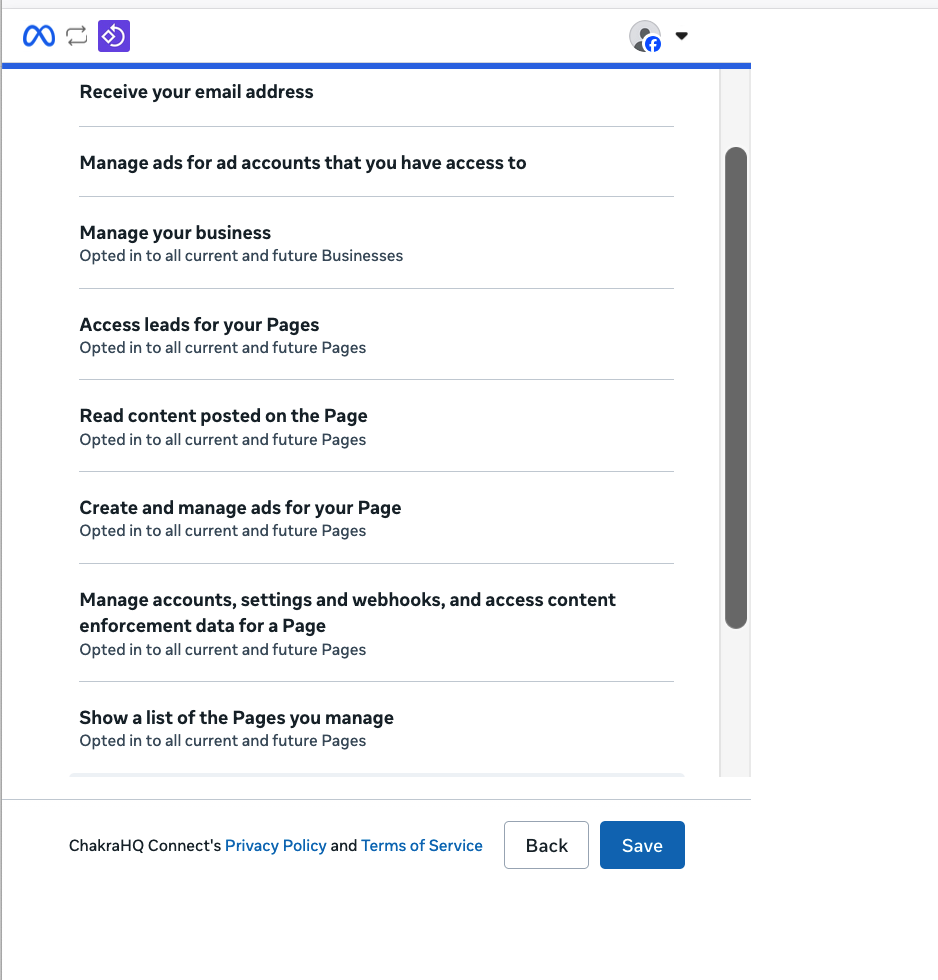
- Review Meta Permissions. Click Saved
- Wait for the linked pages to get listed.
- Enable Pages: Select the checkbox against the page you want Chakra to subscribe leads for
Configure Lead Mapping
To handle the behaviour of the lead on Chakra from Facebook , below steps needs to be followed:
- Click on
Add Another - Add
Order as 1 - Select pages: <<Your Page>>
- Select
ActionasCreate Process - Select
Procedure as Lead. Here Lead is the name of the procedure where you want the Facebook leads to be created
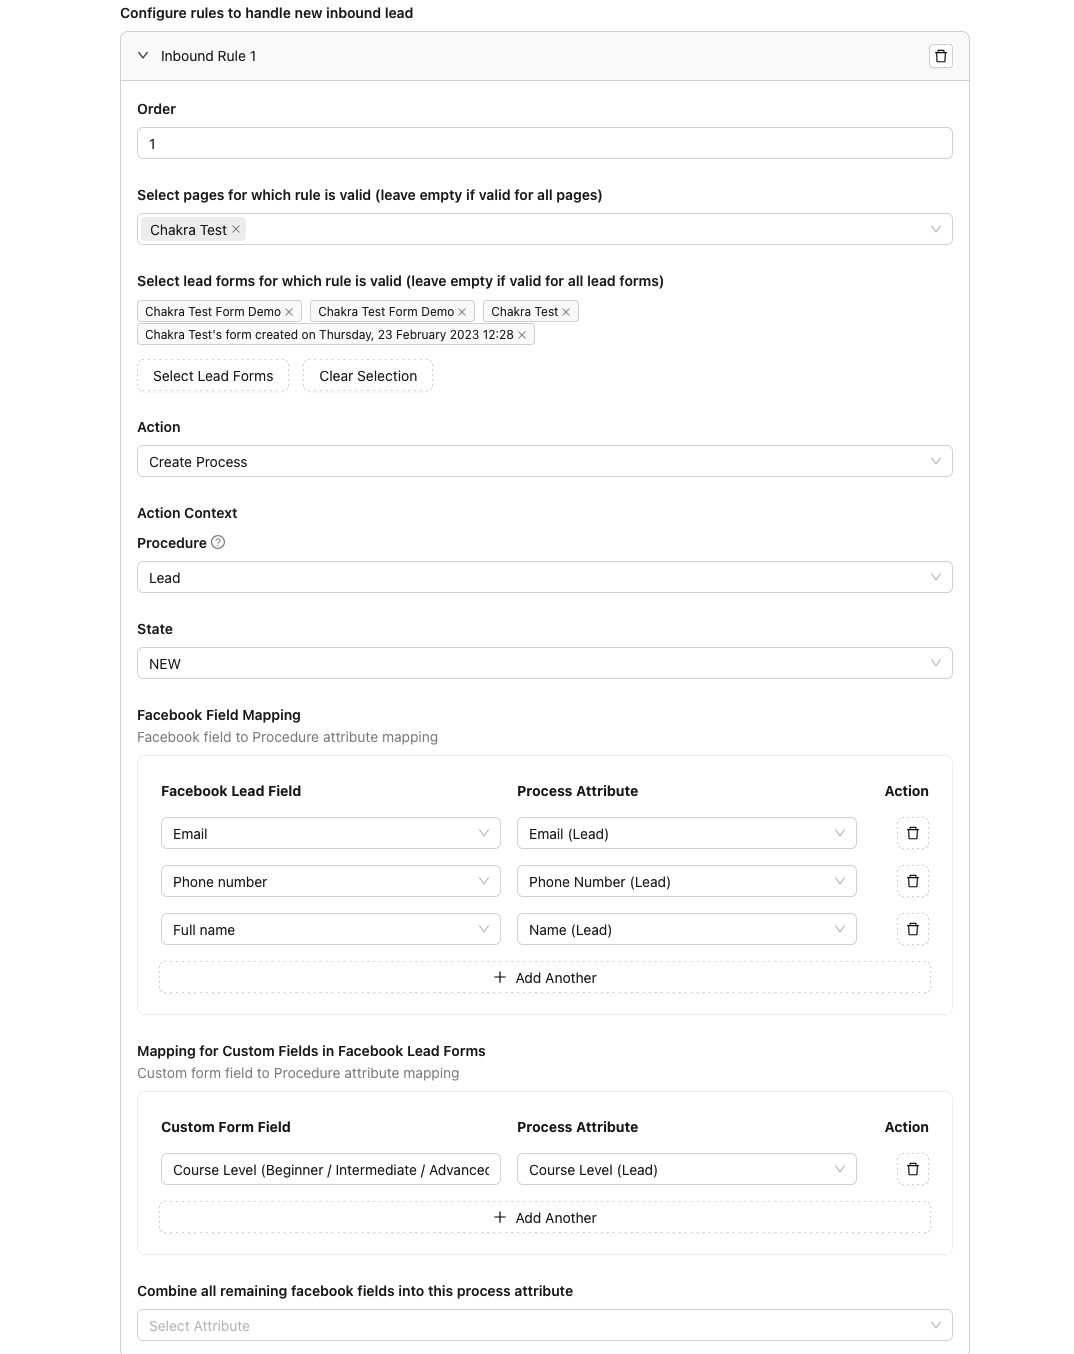
- Select
State as NEW Facebook Field Mappings- Here you need to map the fields which are there in your facebook to that on Chakra. For Eg:Email <> Email: Here first Email is the Facebook attribute and the second the attribute on ChakraFull Name <> Customer Name: Here Full Name is the Facebook attribute and Customer Name the attribute on Chakra- Set Plugin as
Activeby using toggle option and click onSave
Create Test Lead
Below are the steps to create a test lead on through the plugin:
- Click on
Open Lead Ads Testing Toolbutton, a New Tab will get opened - Select the
Productand theForm - Click on
Preview formin the Form section
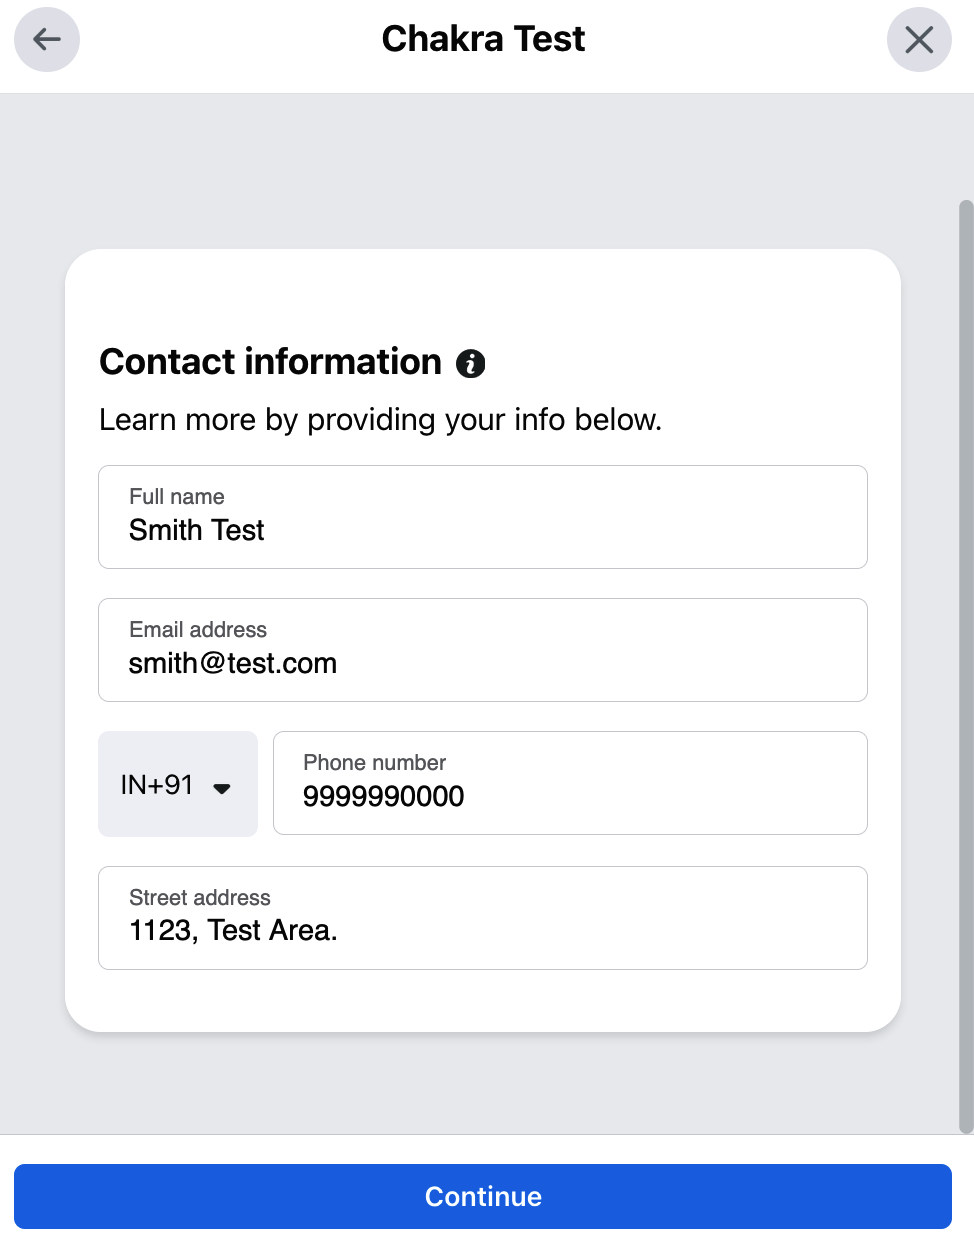
- Fill in the
Lead formvalues. It should haveEmail & Full Namesince we configured those in the earlier step. - Click
Continuethen clickSubmit. - Click
Canceland then click onTrack Status
Validate Test lead
To validate the test lead:
- Go back to the Chakra Dashboard in the
Leadtab - You should see the newly created test lead in the
Lead List - You can go to L
Lead Details Page(By clicking on the link in lead id) to see more details.