Automate Chat Allocation
Automatically assign or allocate incoming or outgoing chat created to your team members
Auto-Assigning Chats in Chakra Chat
This guide explains how to set up automatic chat assignment in Chakra Chat to streamline chat allocation to available users. Follow these steps to create a Chat Inbox, add an allocator, map the inbox, and configure user roles.
Quick overview of how the autamated chat allocation works using the Chat Inbox, Allocator for mulitple connected WhatApp Numbers.
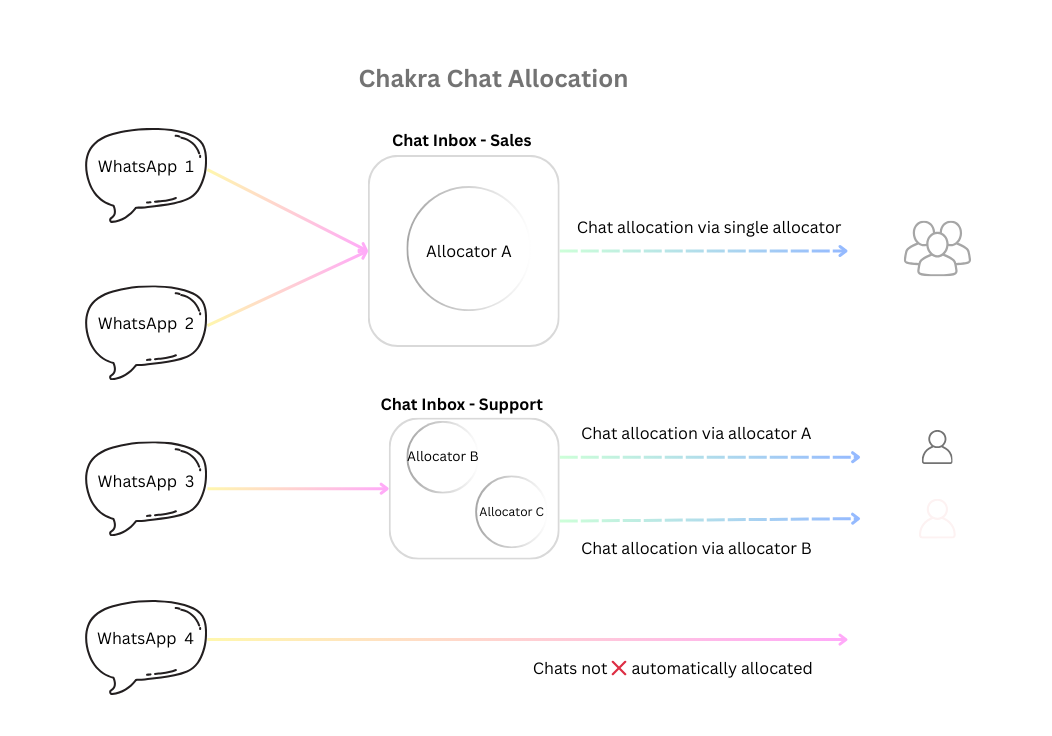
Note: Chats are assigned only to users marked as AVAILABLE.
Chat Visibility by User Role
By default, chat visibility is governed by user role type:
- Admins 💼: Access all chats.
- Managers 👨🏻💻: Access all chats.
- Users 🙋: Access only chats assigned to them.
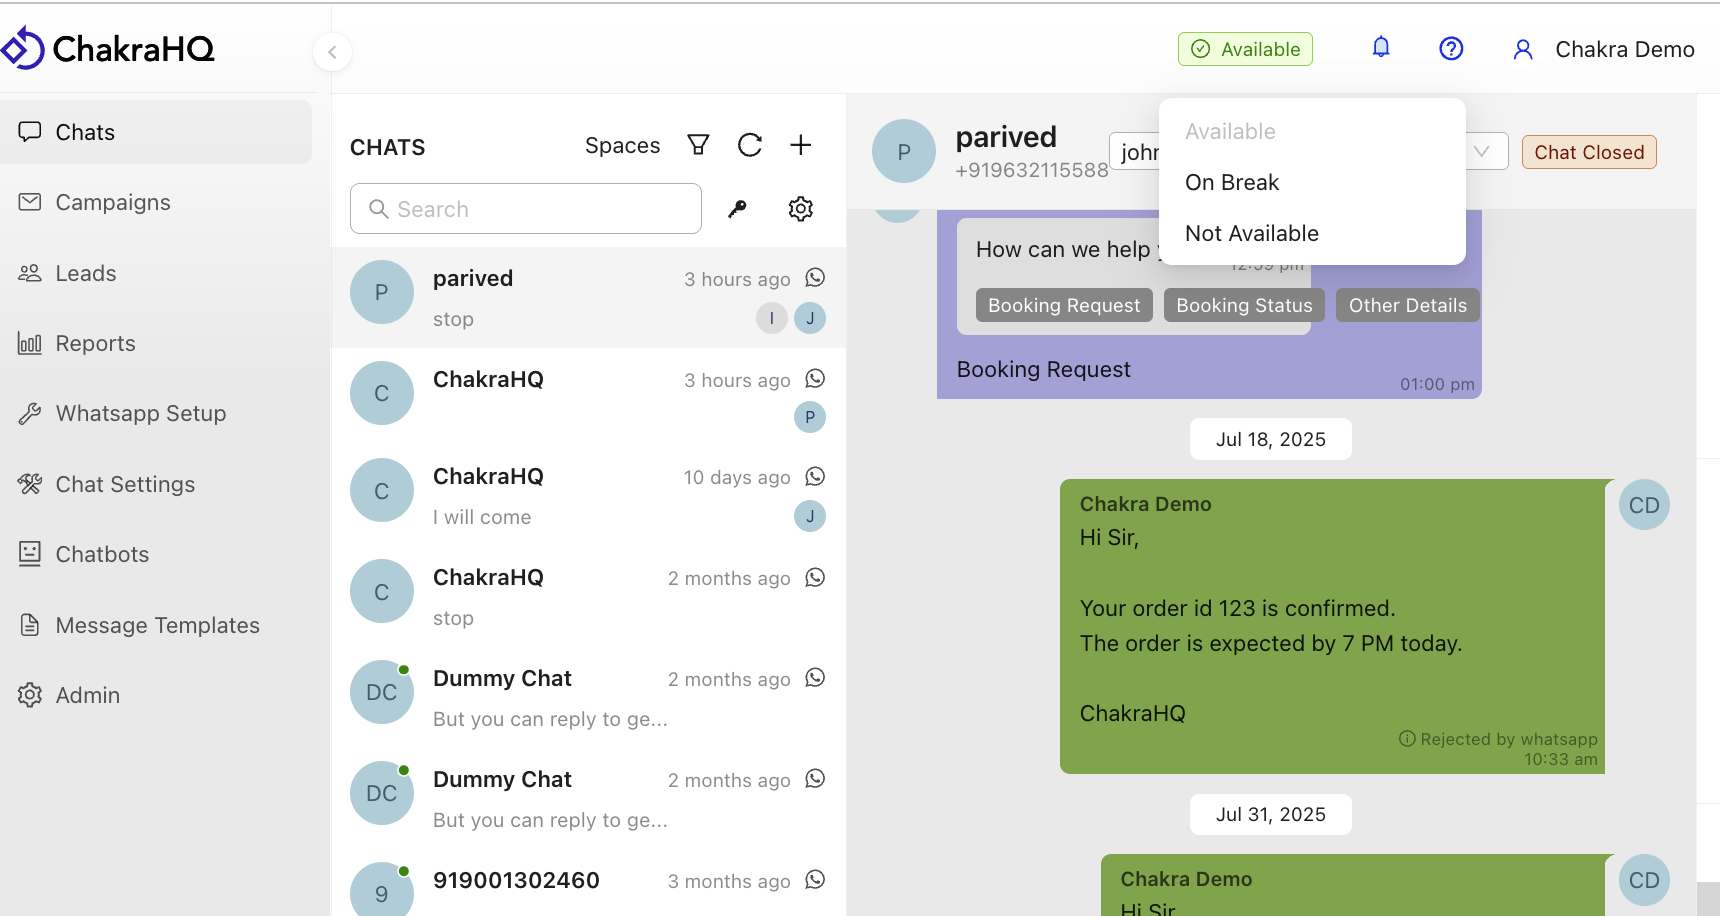
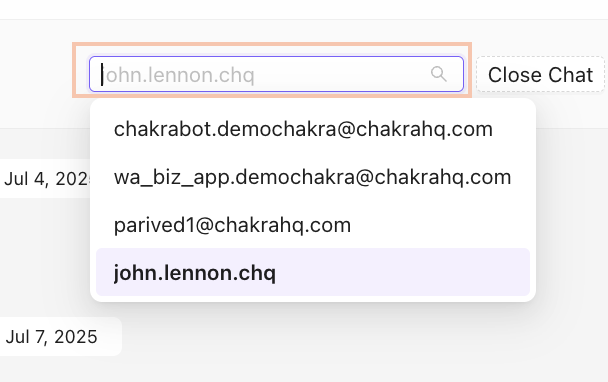
Chats can be manually assigned from the chat section using the Select Assignee dropdown at the top of the chat window.
Tip: For high-volume scenarios, manual assignment can be tedious. Use auto-allocation to save time!
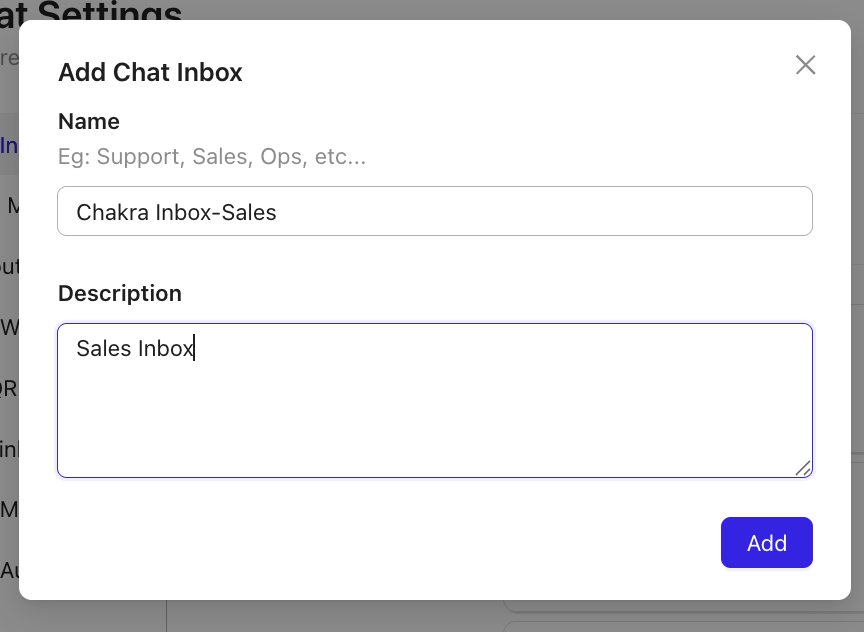
Step 1: Create a Chat Inbox
- Navigate to Chat Settings > Chat Inbox List.
- Click Add to create a new chat inbox.
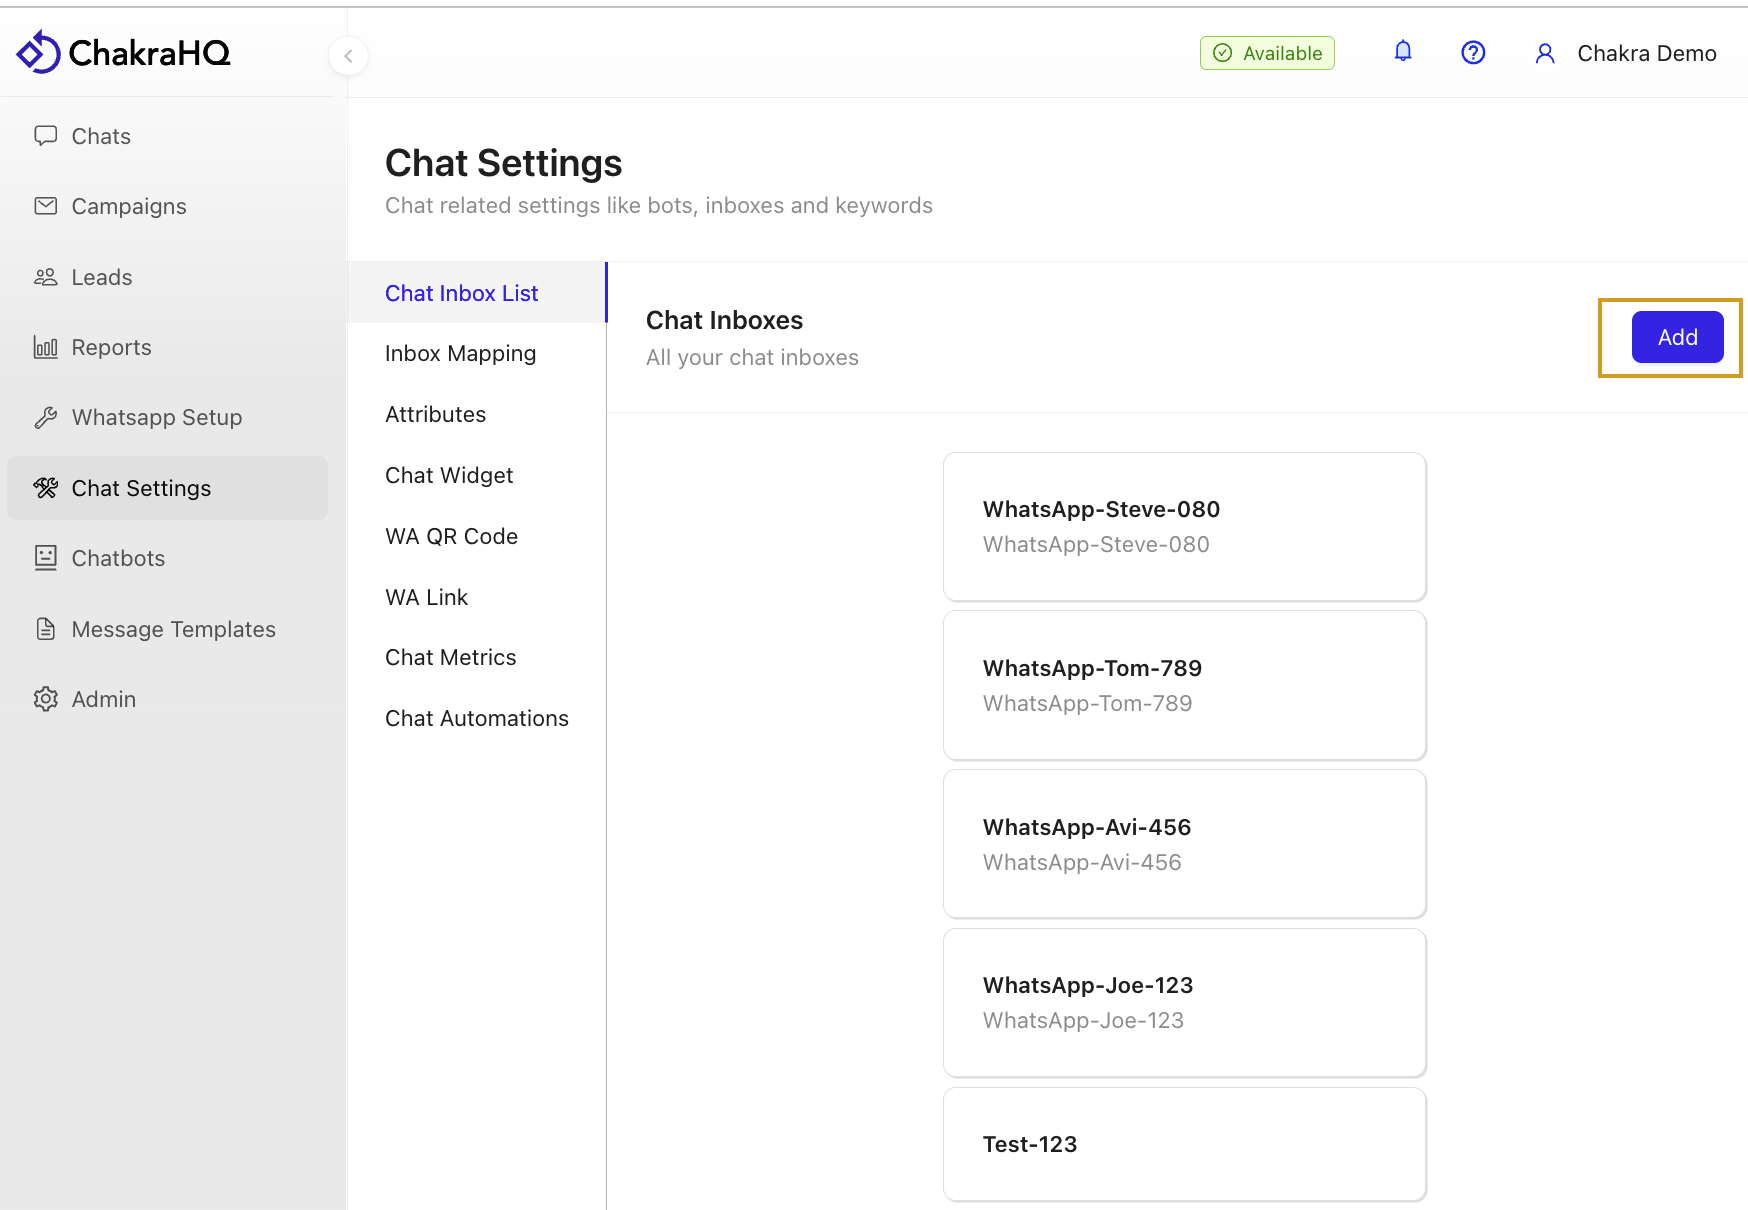
- In the Add Chat Inbox pop-up:
- Enter a Name for the chatbot.
- Add a Description (optional).
- Click Add to create the inbox.
Step 2: Add an Allocator to the Chat Inbox
- Open the newly created Chat Inbox.
- Click Add Allocator.
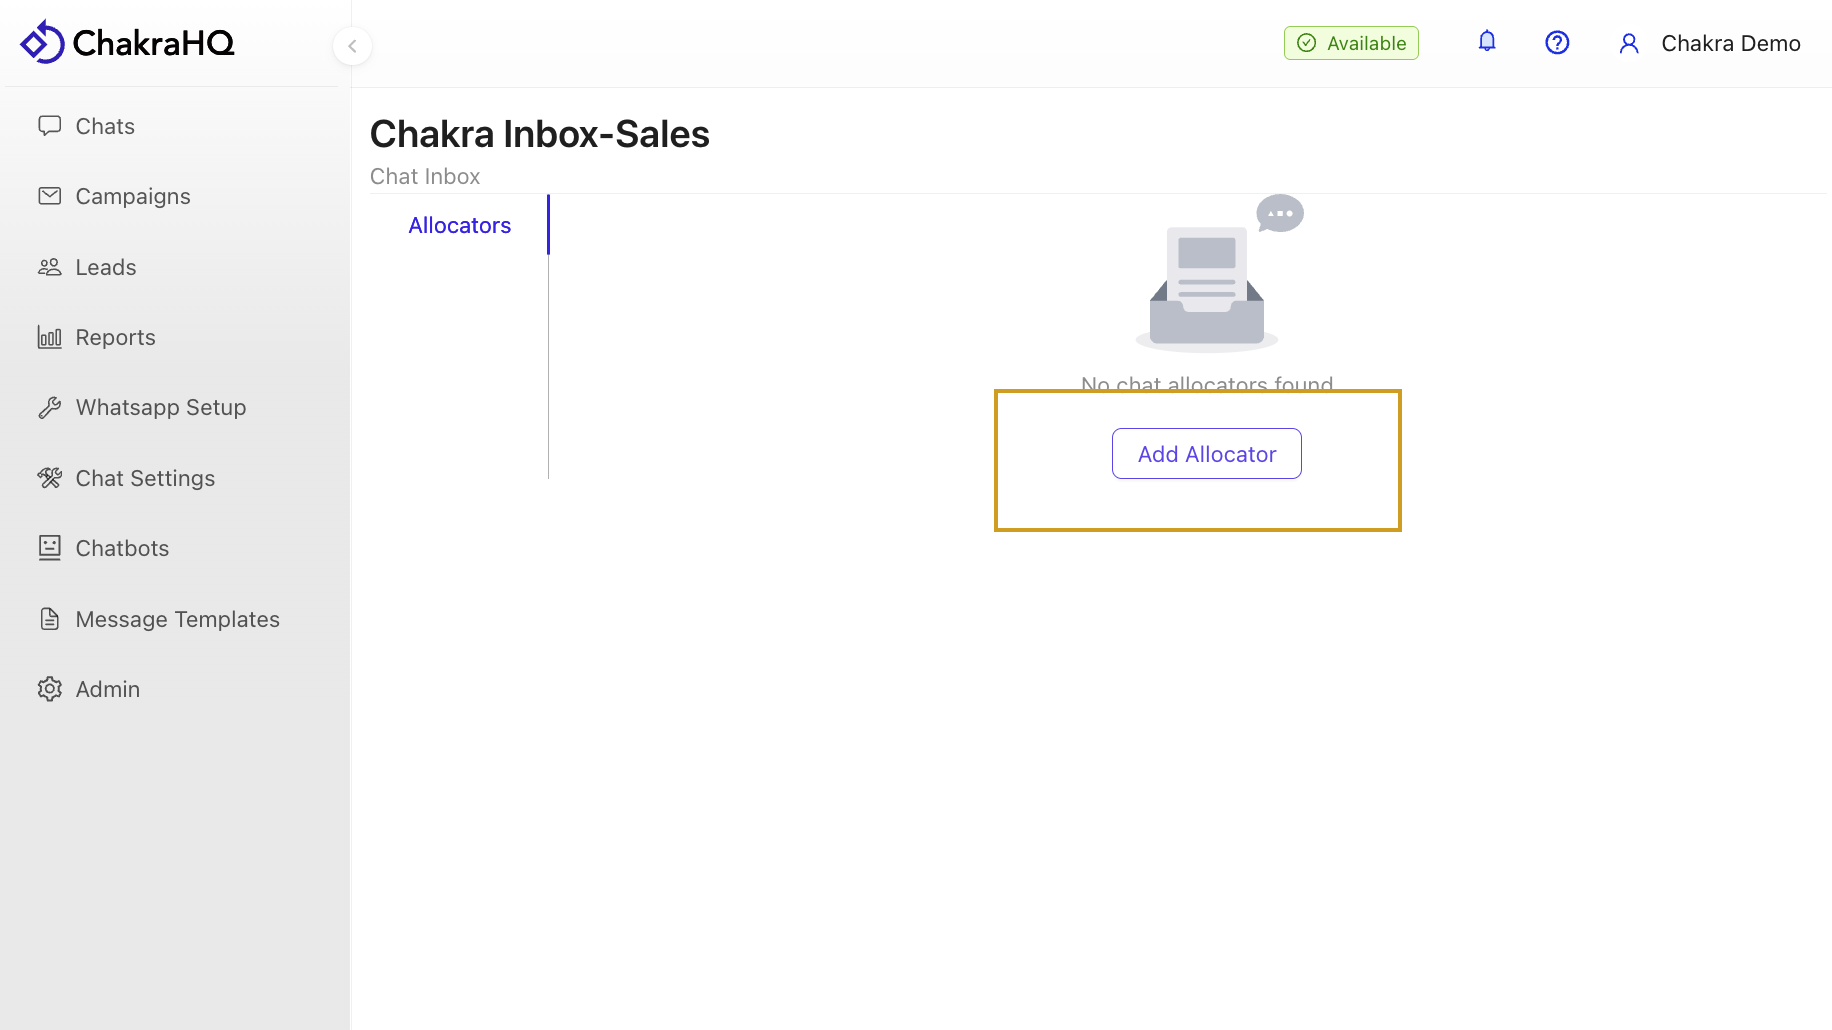
- In the pop-up:
- Enter a Name for the allocator.
- Click Add.
- Go to User Roles and select the roles (multi-select) to allocate chats in this inbox.
- The allocation strategy defaults to Round Robin.
- Click Save and toggle Allocator Is Active to enable it.

**Advanced Feature: Chat Filters**\To selectively allocate chats, use Chat Filters to define eligible chats for automated allocation. For issues, raise a ticket with the Chakra team.
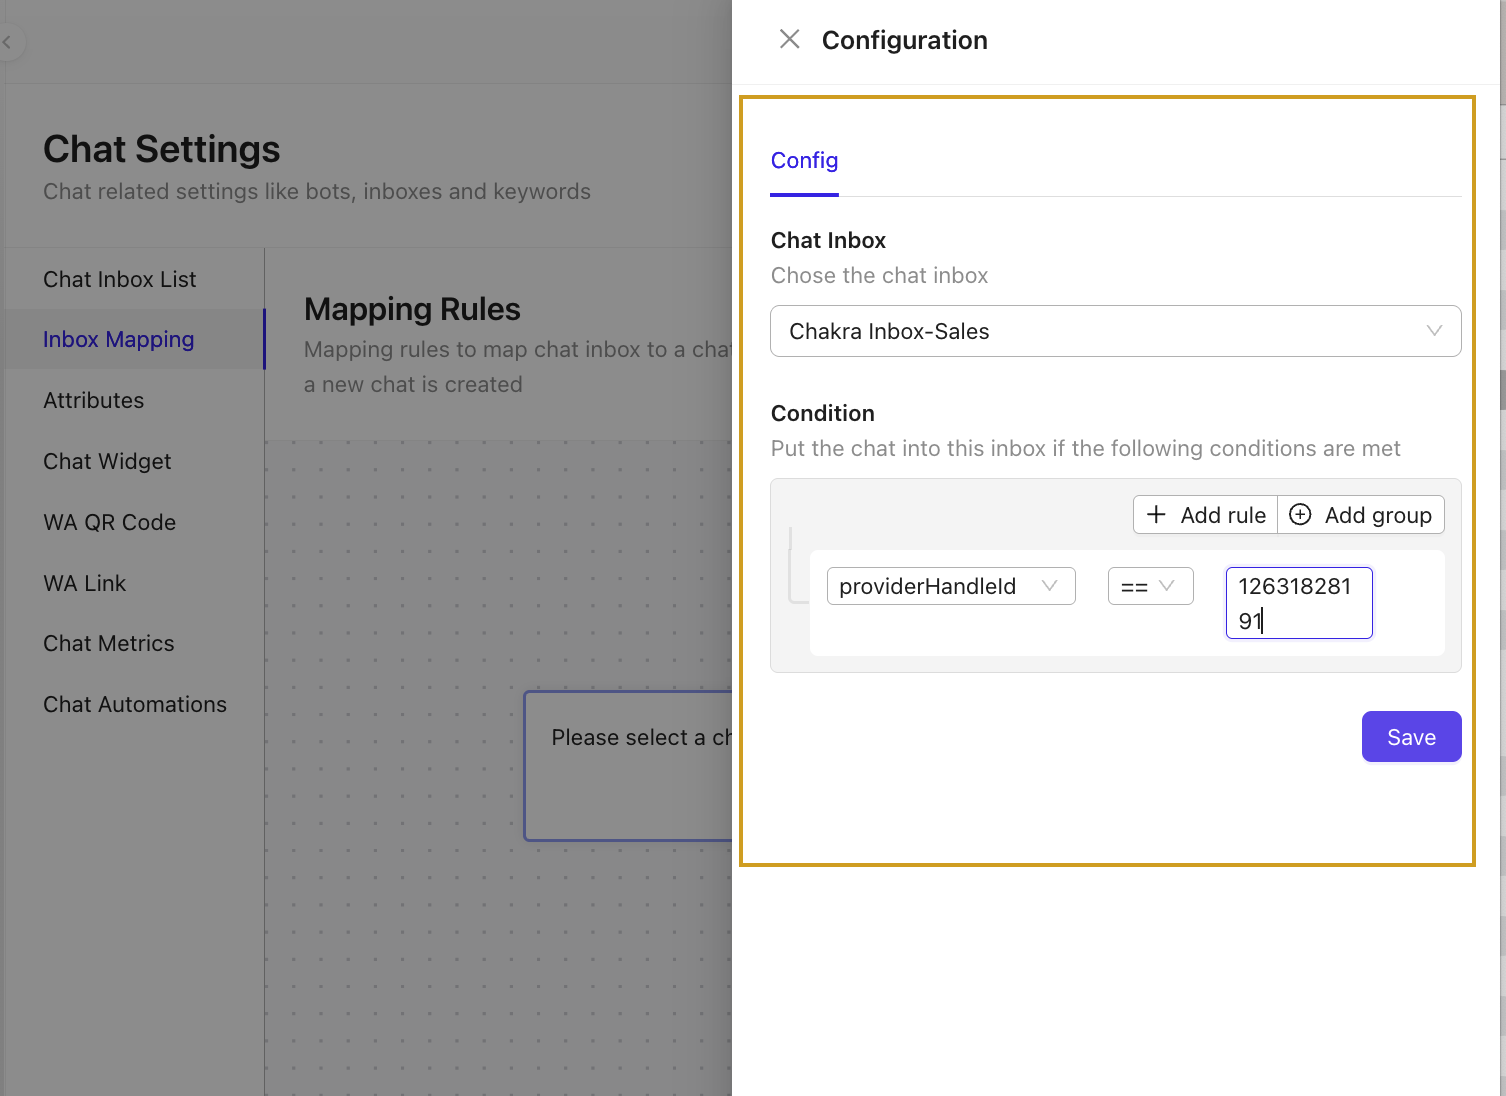
Step 3: Map the Chat Inbox
Map incoming chats to the appropriate Chat Inbox:
- Go to Chat Inbox List.
- Click the ➕ icon below the START block.
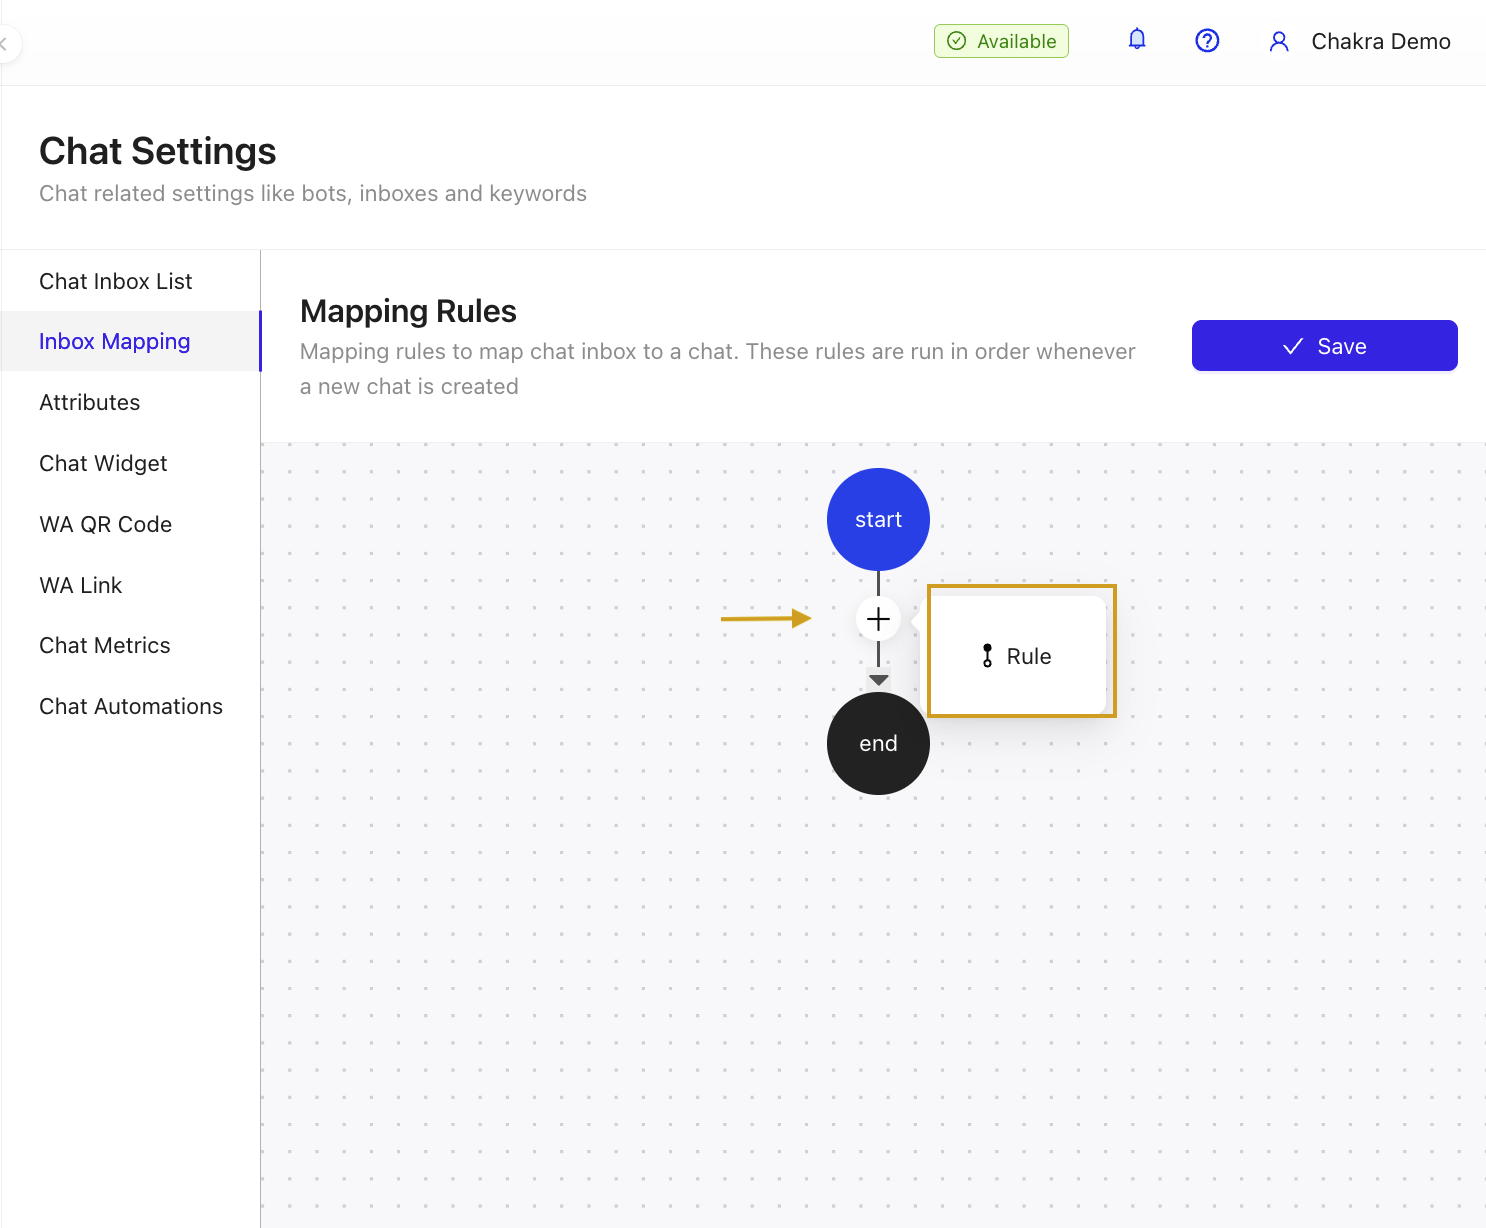
- In the Rule pop-up:
- Select the relevant Chat Inbox.
- Add a Condition to route chats to this inbox (e.g., map a specific WhatsApp number or handle ID).
- Click Save in the condition drawer.
- Click Save in the Chat Inbox mapping section.
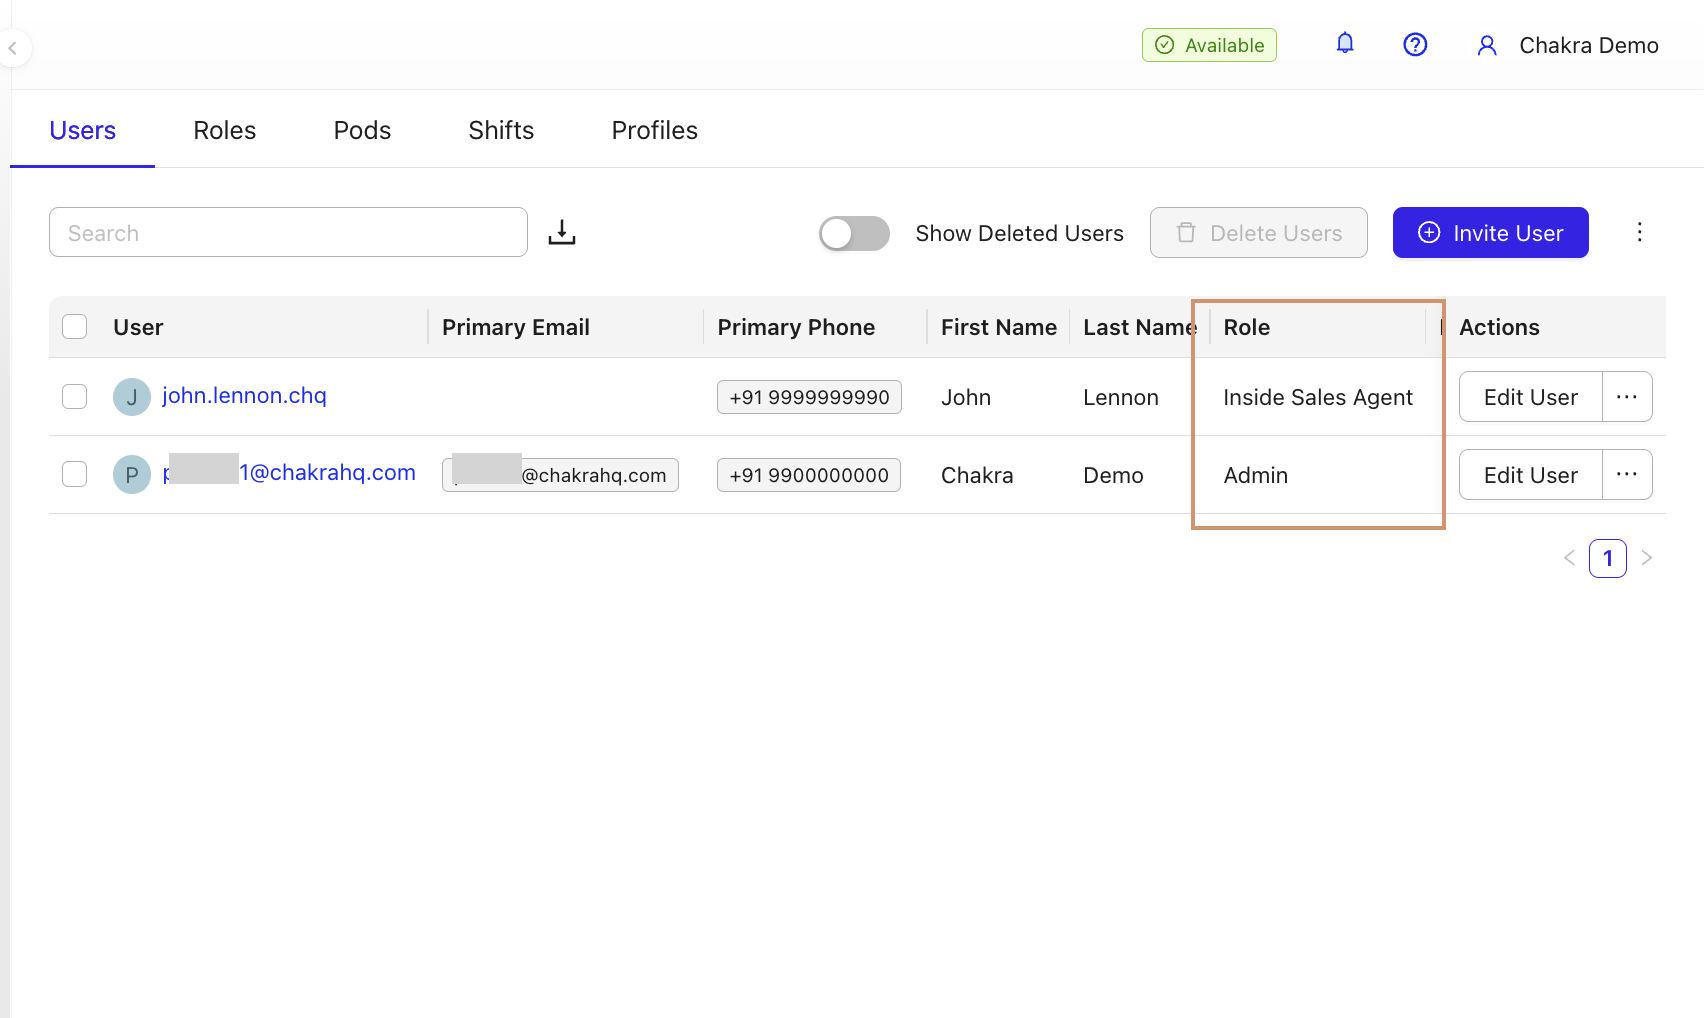
Step 4: Verify User Roles
Ensure users are correctly mapped to roles for chat allocation:
- Navigate to Users Settings.
- Check users and their assigned roles.
To Add a New Role
- Go to the Roles tab.
- Click ⊕ Add Role.
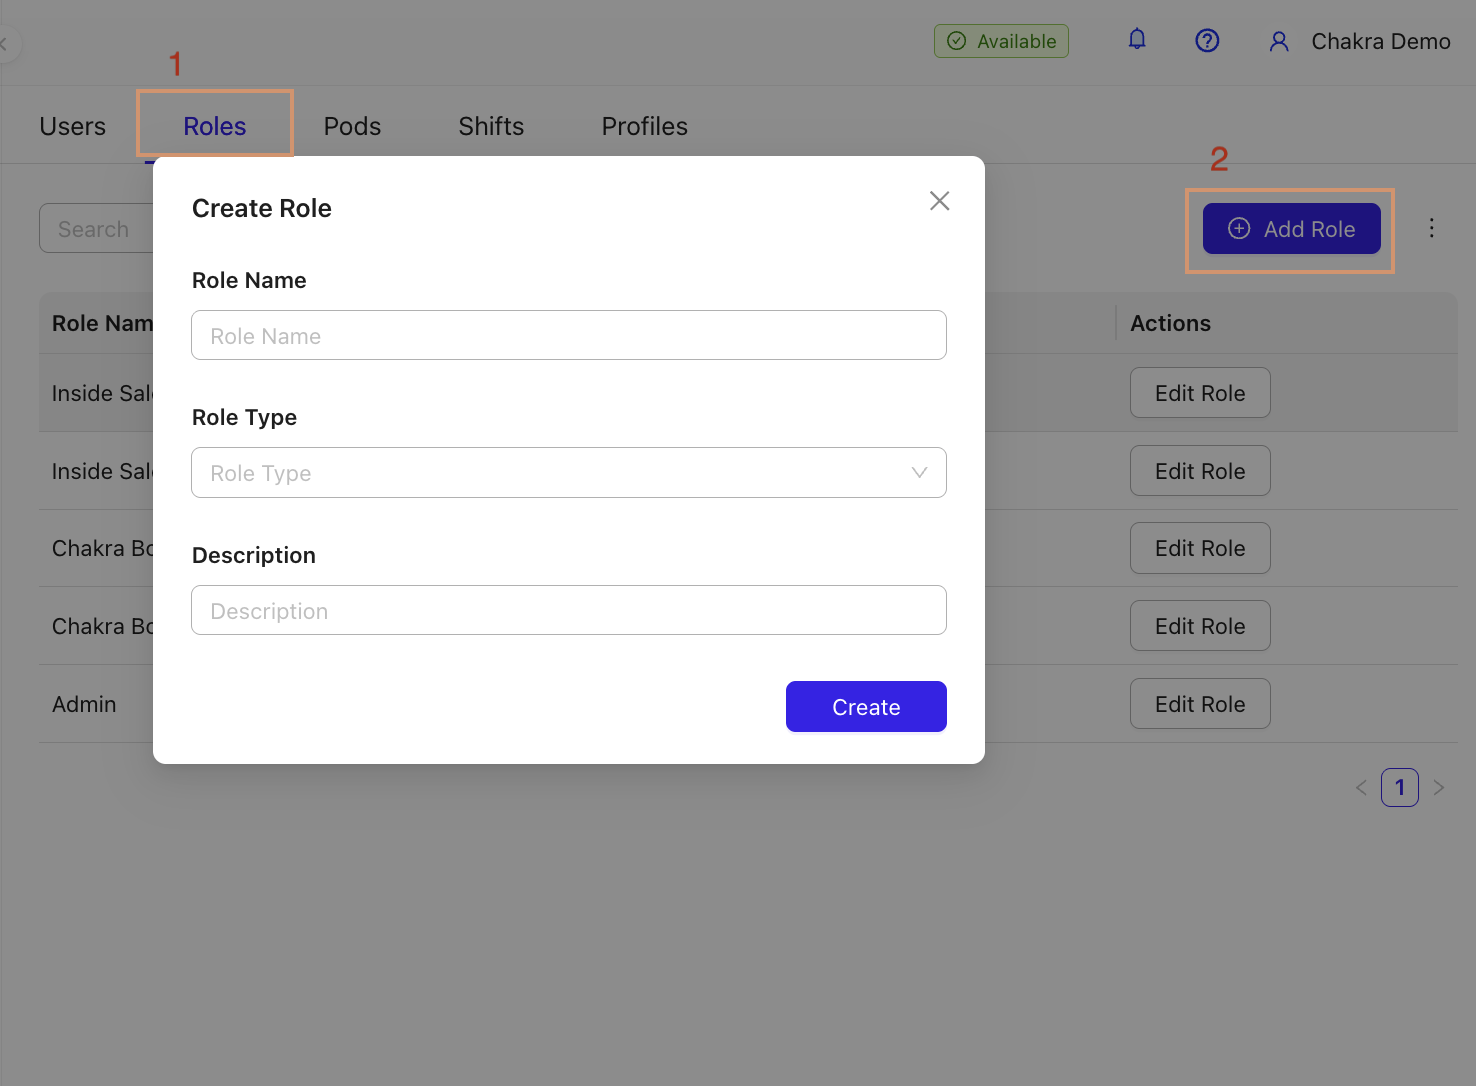
- Enter role details (Name, Type, Description).
- Click Save.
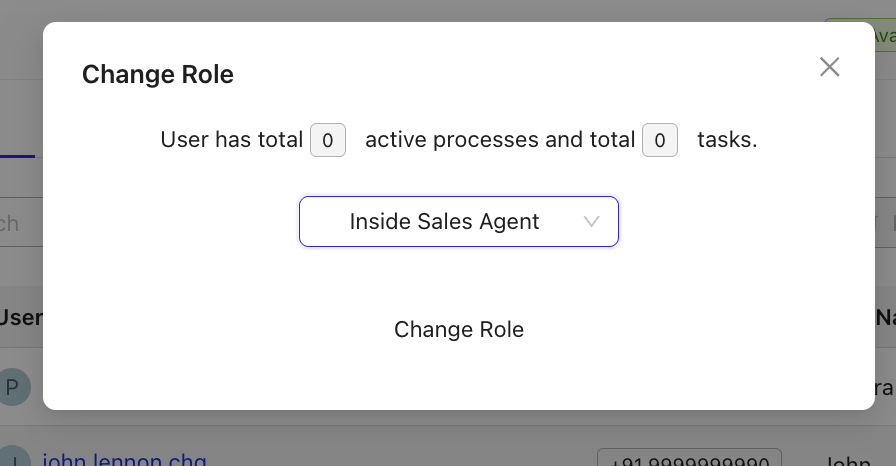
To Change a User’s Role
- In Users Settings, click the … next to the user’s Edit Role option.
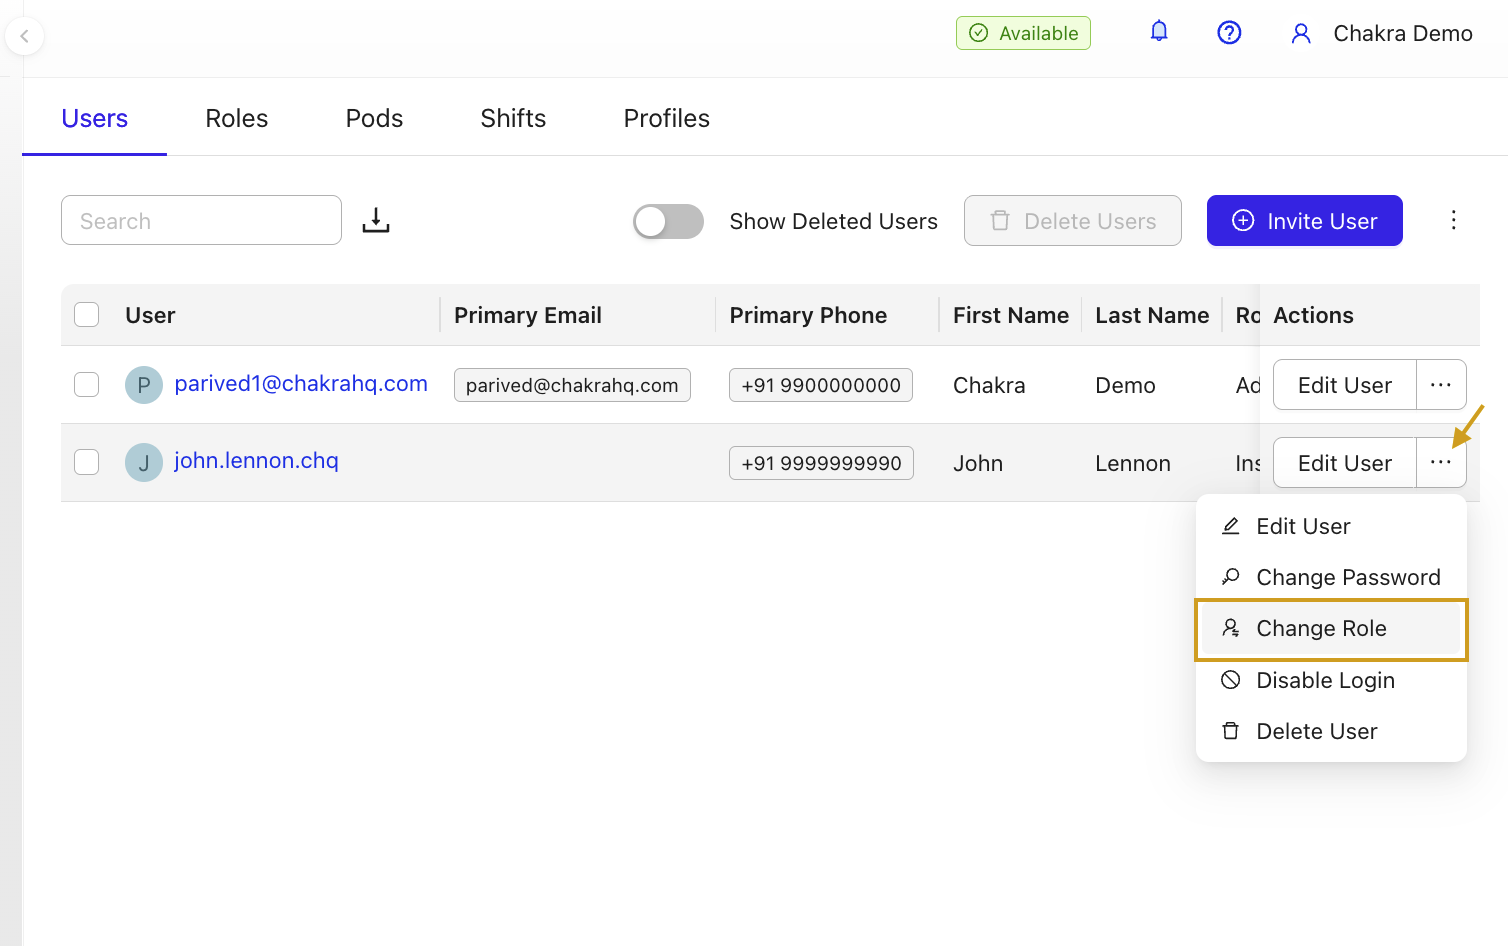
- Select Change Role, choose the new role in the pop-up, and click Change Role.
Final Notes
Ensure the following for successful auto-allocation:
- Users are mapped to an appropriate Role.
- The Role has the correct Role Type.
- The Chat Allocator in the inbox includes the relevant roles for chat allocation.
Your incoming chats should now be automatically assigned to the configured users.
For further assistance, raise a ticket.