Automation SettingsCampaign Automations
Auto Appointment Reminders
Send automated appointment reminders by appointment date
This guide explains how to set up automated appointment reminders for customers using the Campaigns feature. Follow these steps to capture appointment timestamp, create appointment reminder templates and configure the campaign
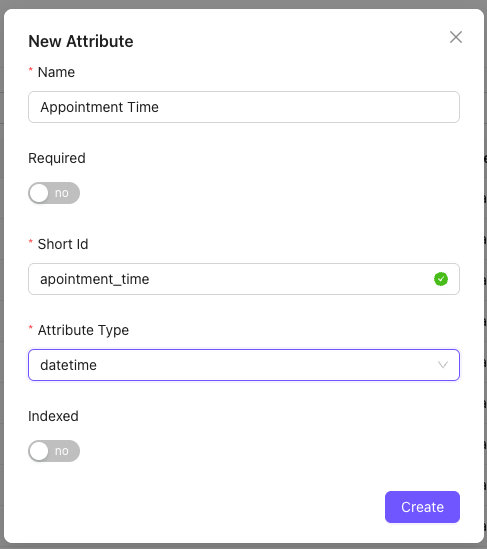
Step 1: Add a Apppointment Time Attribute to Leads
- Navigate to Admin > Leads in the Chakra dashboard.
- Click Add and select Standard Attribute.
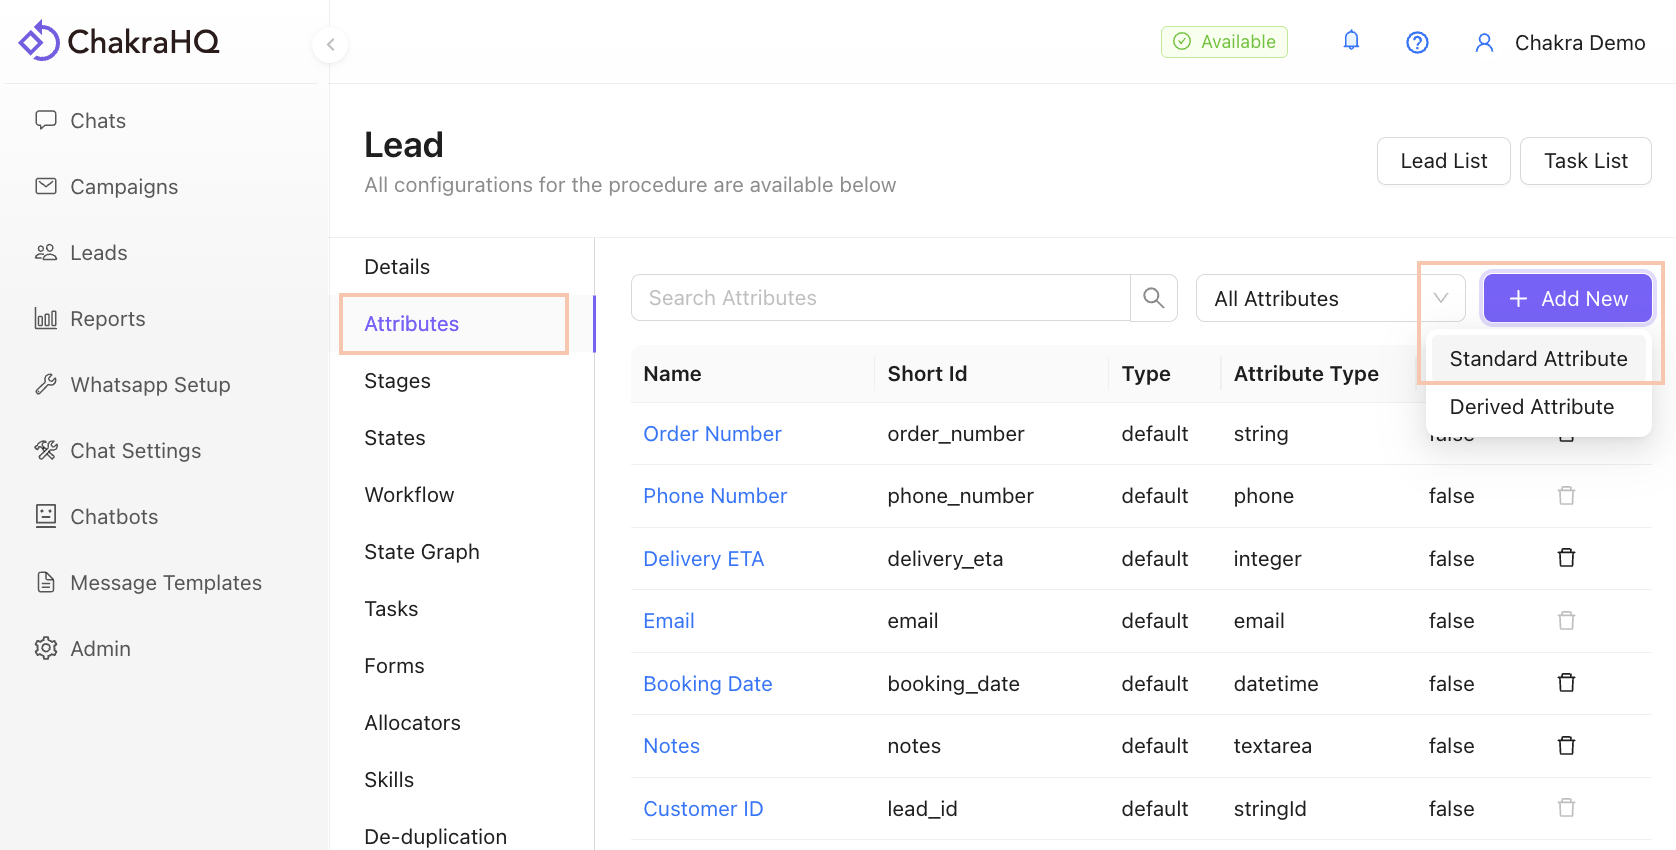
- Configure the attribute:
- Name it
Appointment Time(or similar). - Set the field type to
Date Time.
- Save the attribute.
Step 2: Create leads with appointment time or update exising leads to have a specific appointment time
Create leads
- You can upload a csv file with reklevant lead details including a column for appointment time
- Ensure to supply a well formatted datetime value like
2025-12-17 09:00:00 - Find more information about bulk uploading leads in this article
Update leads
- Visit the lead details page
- In the left sidebar, locate the newly created attribute and click the edit icon
- Select the specific time and click the "check" icon to save the selected time.
Step 3: Create an appointment reminder template
- Go to Message Templates in the Chakra dashboard.
- Click Create New Template to design a appointment reminder template
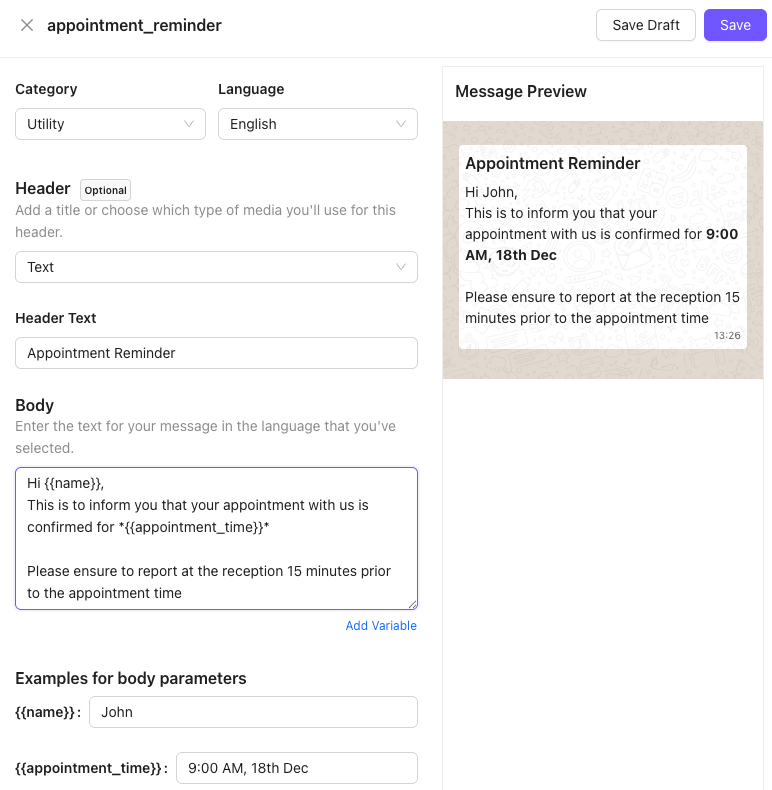
- Customize the template with personalized fields, interactive buttons following standard template guideline (e.g., customer name, offer details).
- Follow the Chakra Message Template Creation Guide for detailed instructions.
- Submit the template for WhatsApp approval.
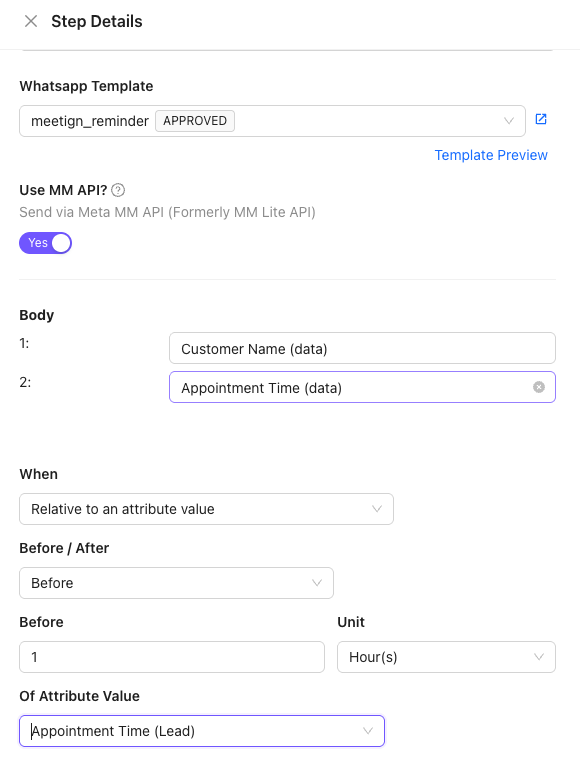
Step 4: Create an appointment reminder campaign
- Navigate to Campaigns in the Chakra dashboard. Click Create New Campaign

- Follow the instructions in the help document to
Create a Campaign(https://help.chakrahq.com/chat/getting-started/create-workflow-campaign) - Configure the campaign settings, including:
- The approved appointment reminder message template.
- Under the When section
- Set the type to "Relative to an attribute value"
- Choose "Before" under Before/After
- Set 1 Hour as the before duration
- Choose the Appointment Time attribute under "Of Attribtue Value"
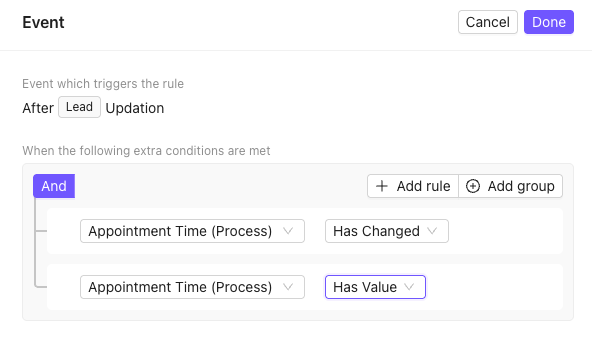
Step 5: Add an Automation Rule for the Campaign
To automatically send appontment reminder messages when a lead is updated with an appointment time, set up a lifecycle rule in Chakra.
- Go to Admin > Leads and select Lifecycle Rules from the left side panel.
- Choose Post Updation and click Add to create a new rule.

- In the Lifecycle Rule Builder:
- Add a Trigger Condition (e.g.,
Date of Birth is today). - In Take Action, select Send Campaign and choose the Appointmente reminder campaign created in Step 4.
- Set the Active toggle from the top right to activ
- Then save the lifecycle rule
Step 6: Test the Automation
- Add a test lead with an appointment set to today’s date.
- Verify that the appointment reminder message is sent automatically via WhatsApp.
- Monitor the campaign performance in the Chakra dashboard.