Create Workflow Campaign
Overview
Workflow campaigns in Chakra allow you to create campaign sequences or drip campaigns. These let you schedule a series of WhatsApp messages to be sent to customers at specific points in their engagement journey. With smart decision nodes and automated removal options, you can tailor the experience effectively.
Steps to Create a Workflow Campaign
1. Navigate to Campaigns Tab
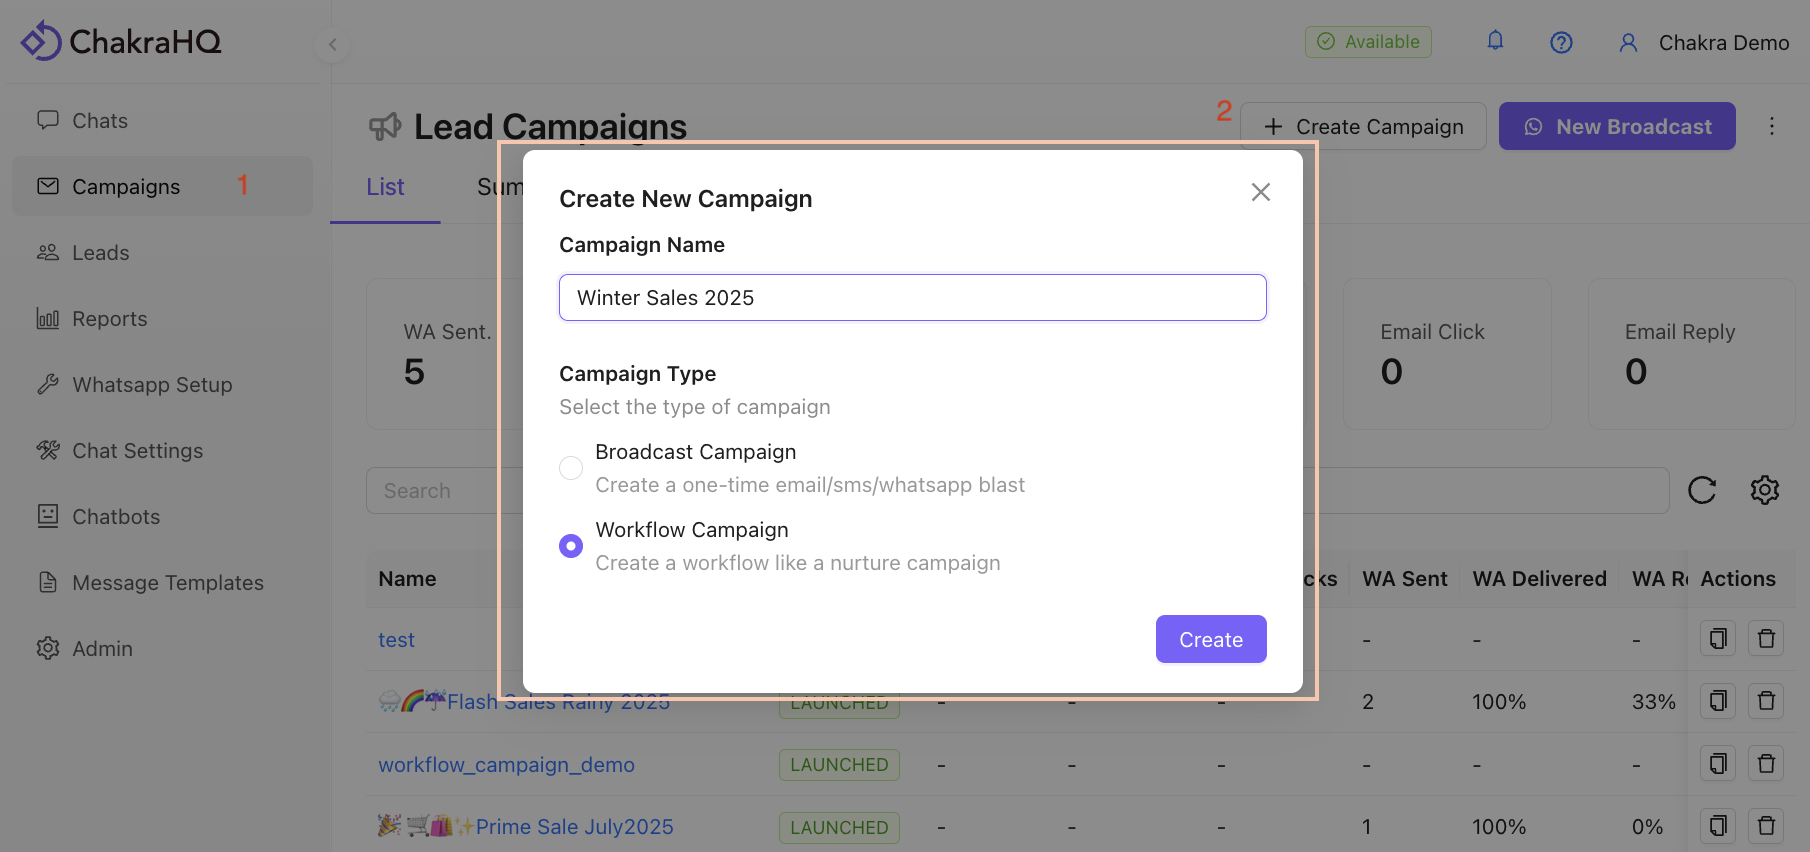
Go to the "Create Campaign" button in the Campaigns tab.
2. Set Campaign Details
Add a campaign name and select the "Workflow Campaign" option under Campaign Type.
3. Add a WhatsApp Message Step
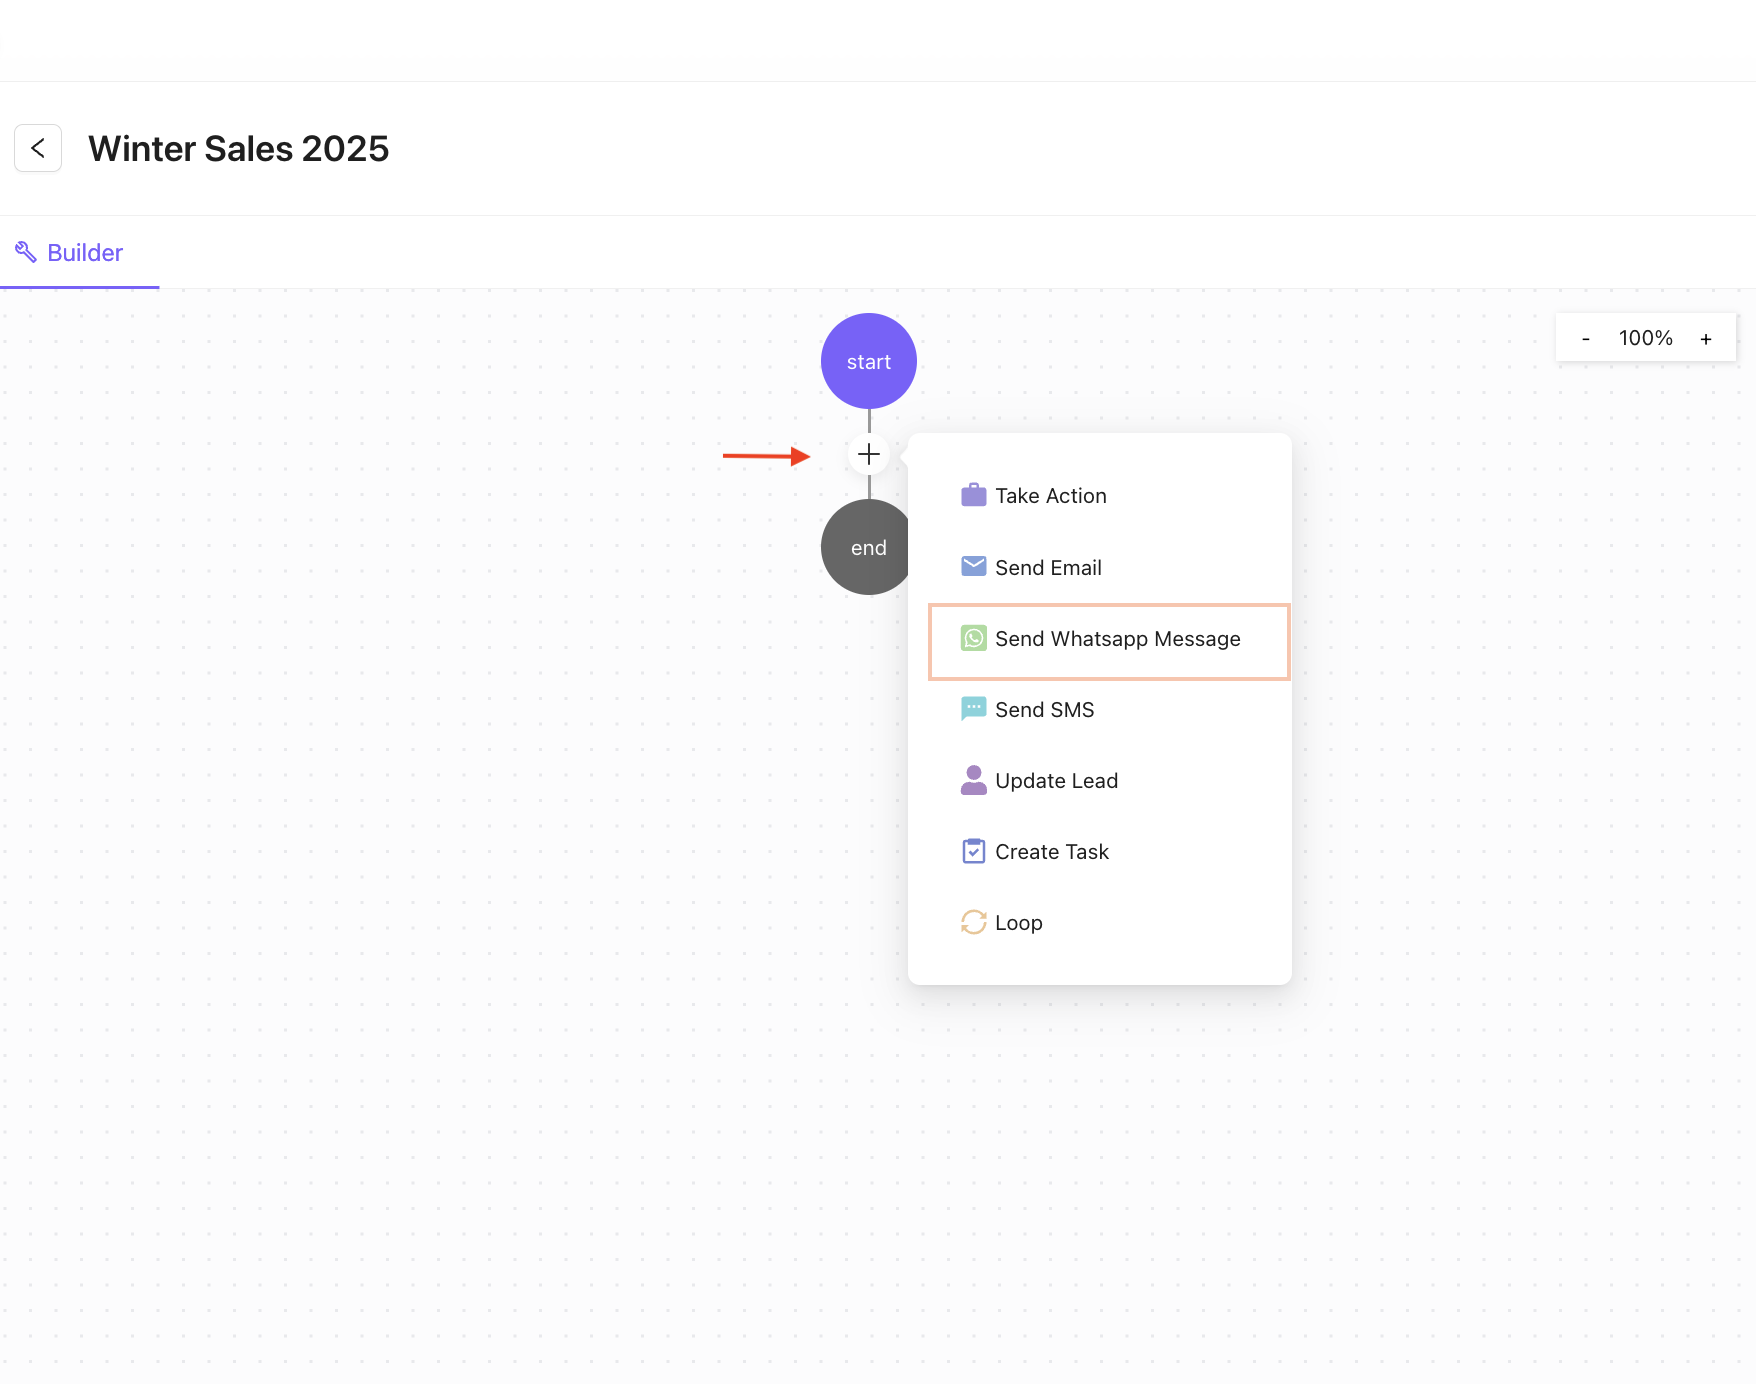
In the campaign builder, click the + icon and choose "Send WhatsApp Message".
4. Configure the Campaign Step
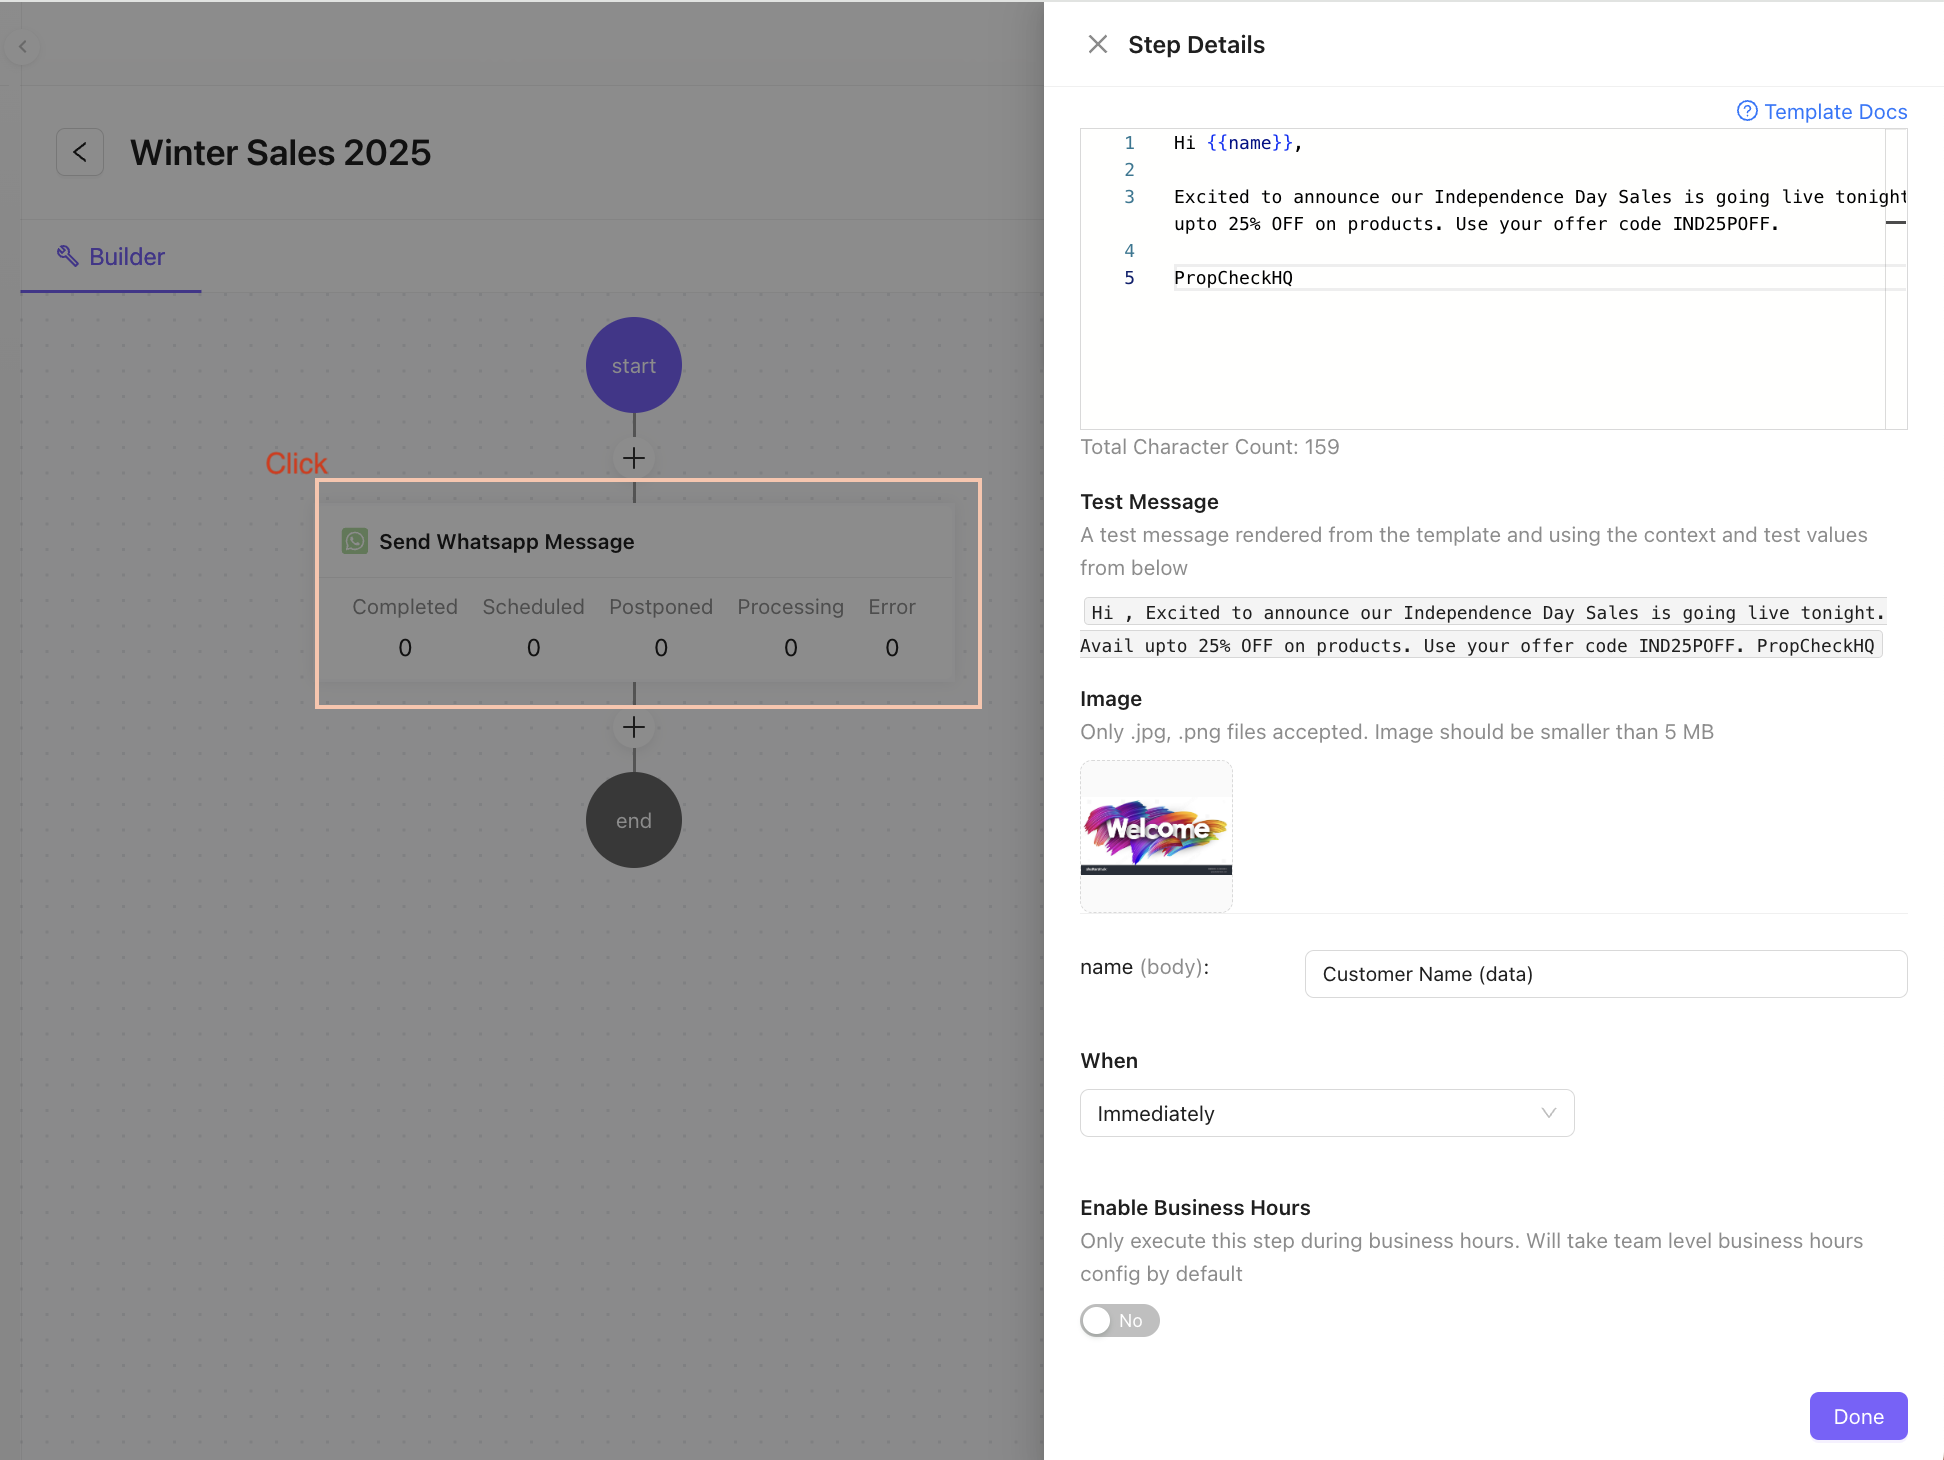
The campaign step drawer opens on the right. Click on the "Campaign Step" section.
5. Enter Step Details
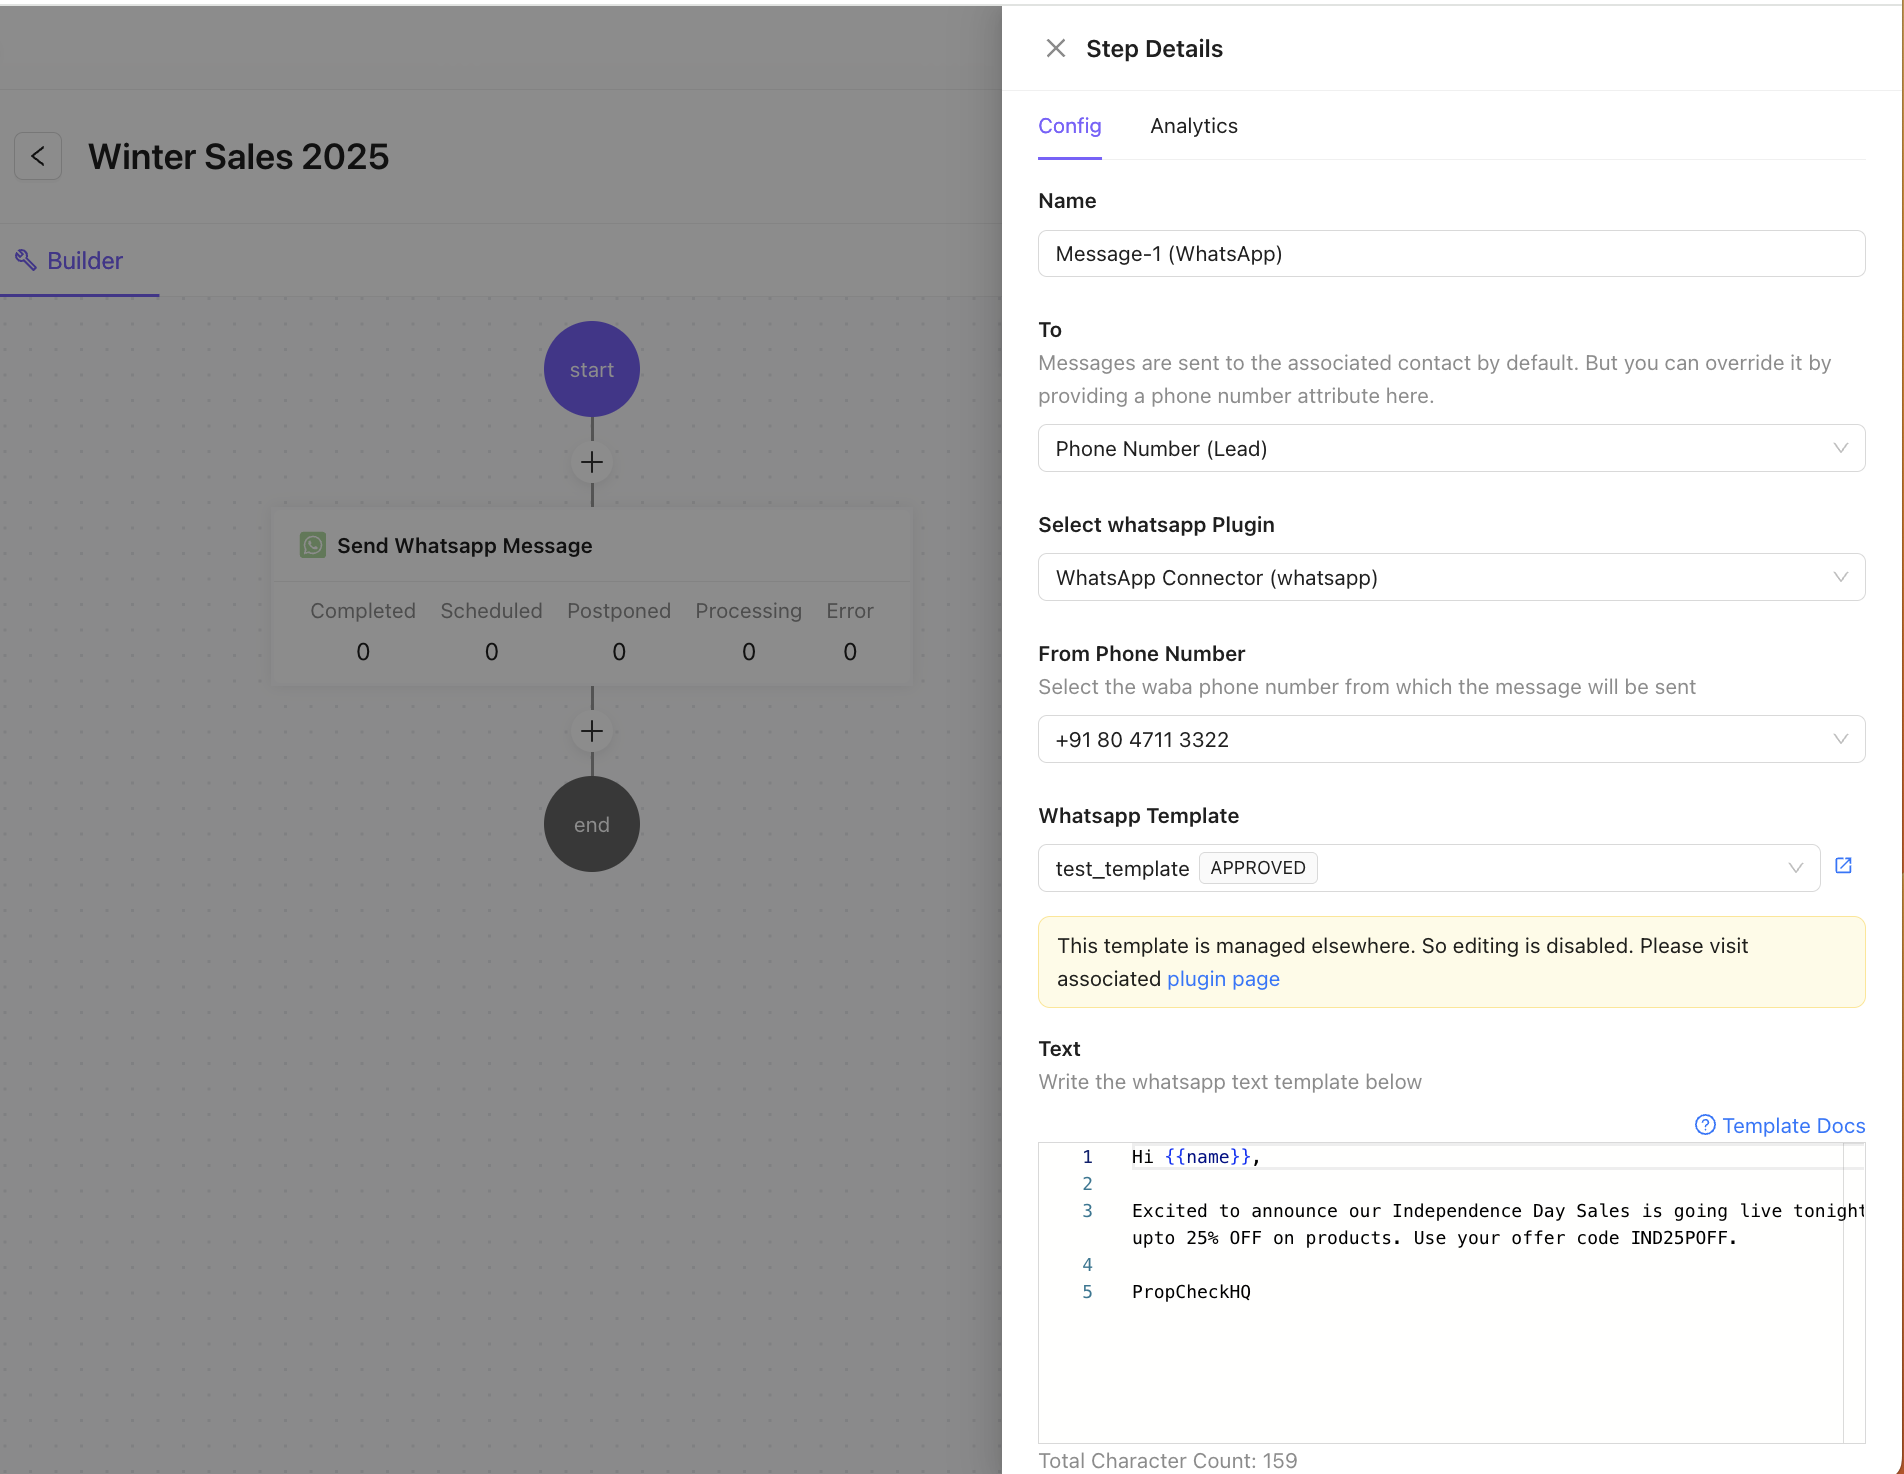
- Add a Step name.
- Set "To" (Phone Number/Lead).
- Select WhatsApp Plugin and Phone Number if needed.
- Choose the desired template.
- Preview the template in the template view (Note: Approved templates cannot be modified here).
6. Add Template Variables
Include template message body variables (e.g., image upload, personalized name, etc.).

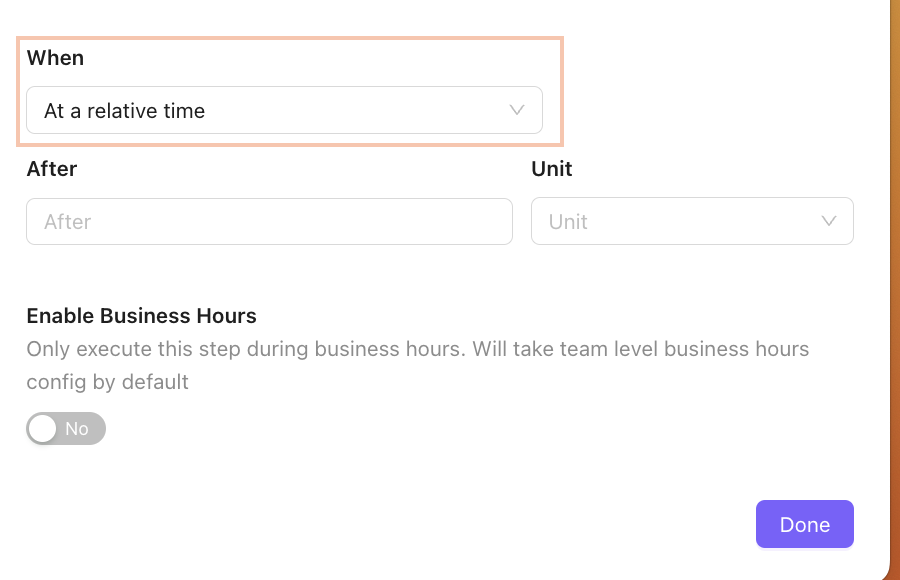
7. Set Step Execution Time
Choose the step execution time under "When" (Immediately, At Relative Time, or At a Scheduled Time).
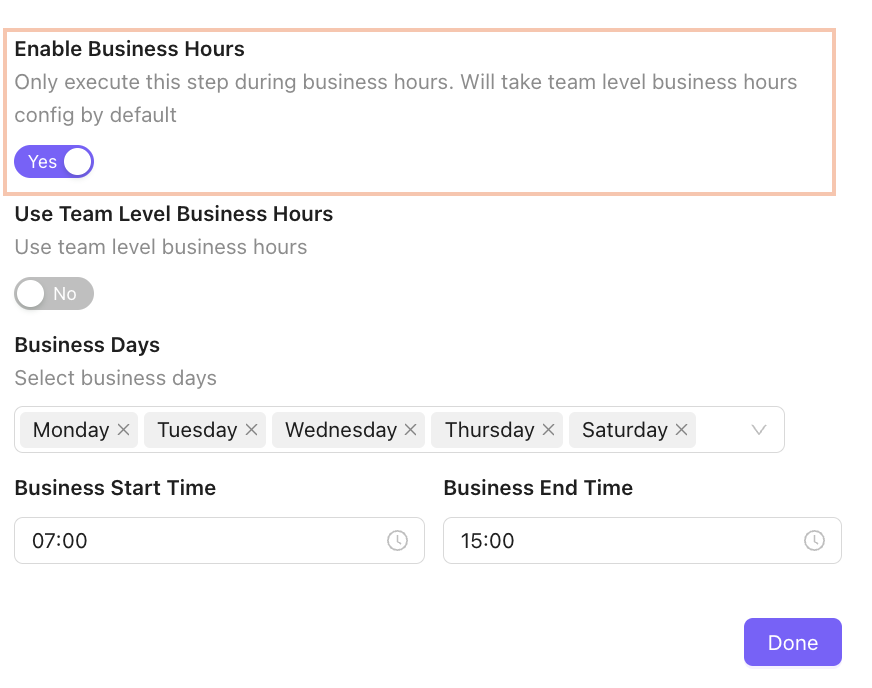
8. Configure Business Hours
Add Business Hours settings to send messages only during set times.
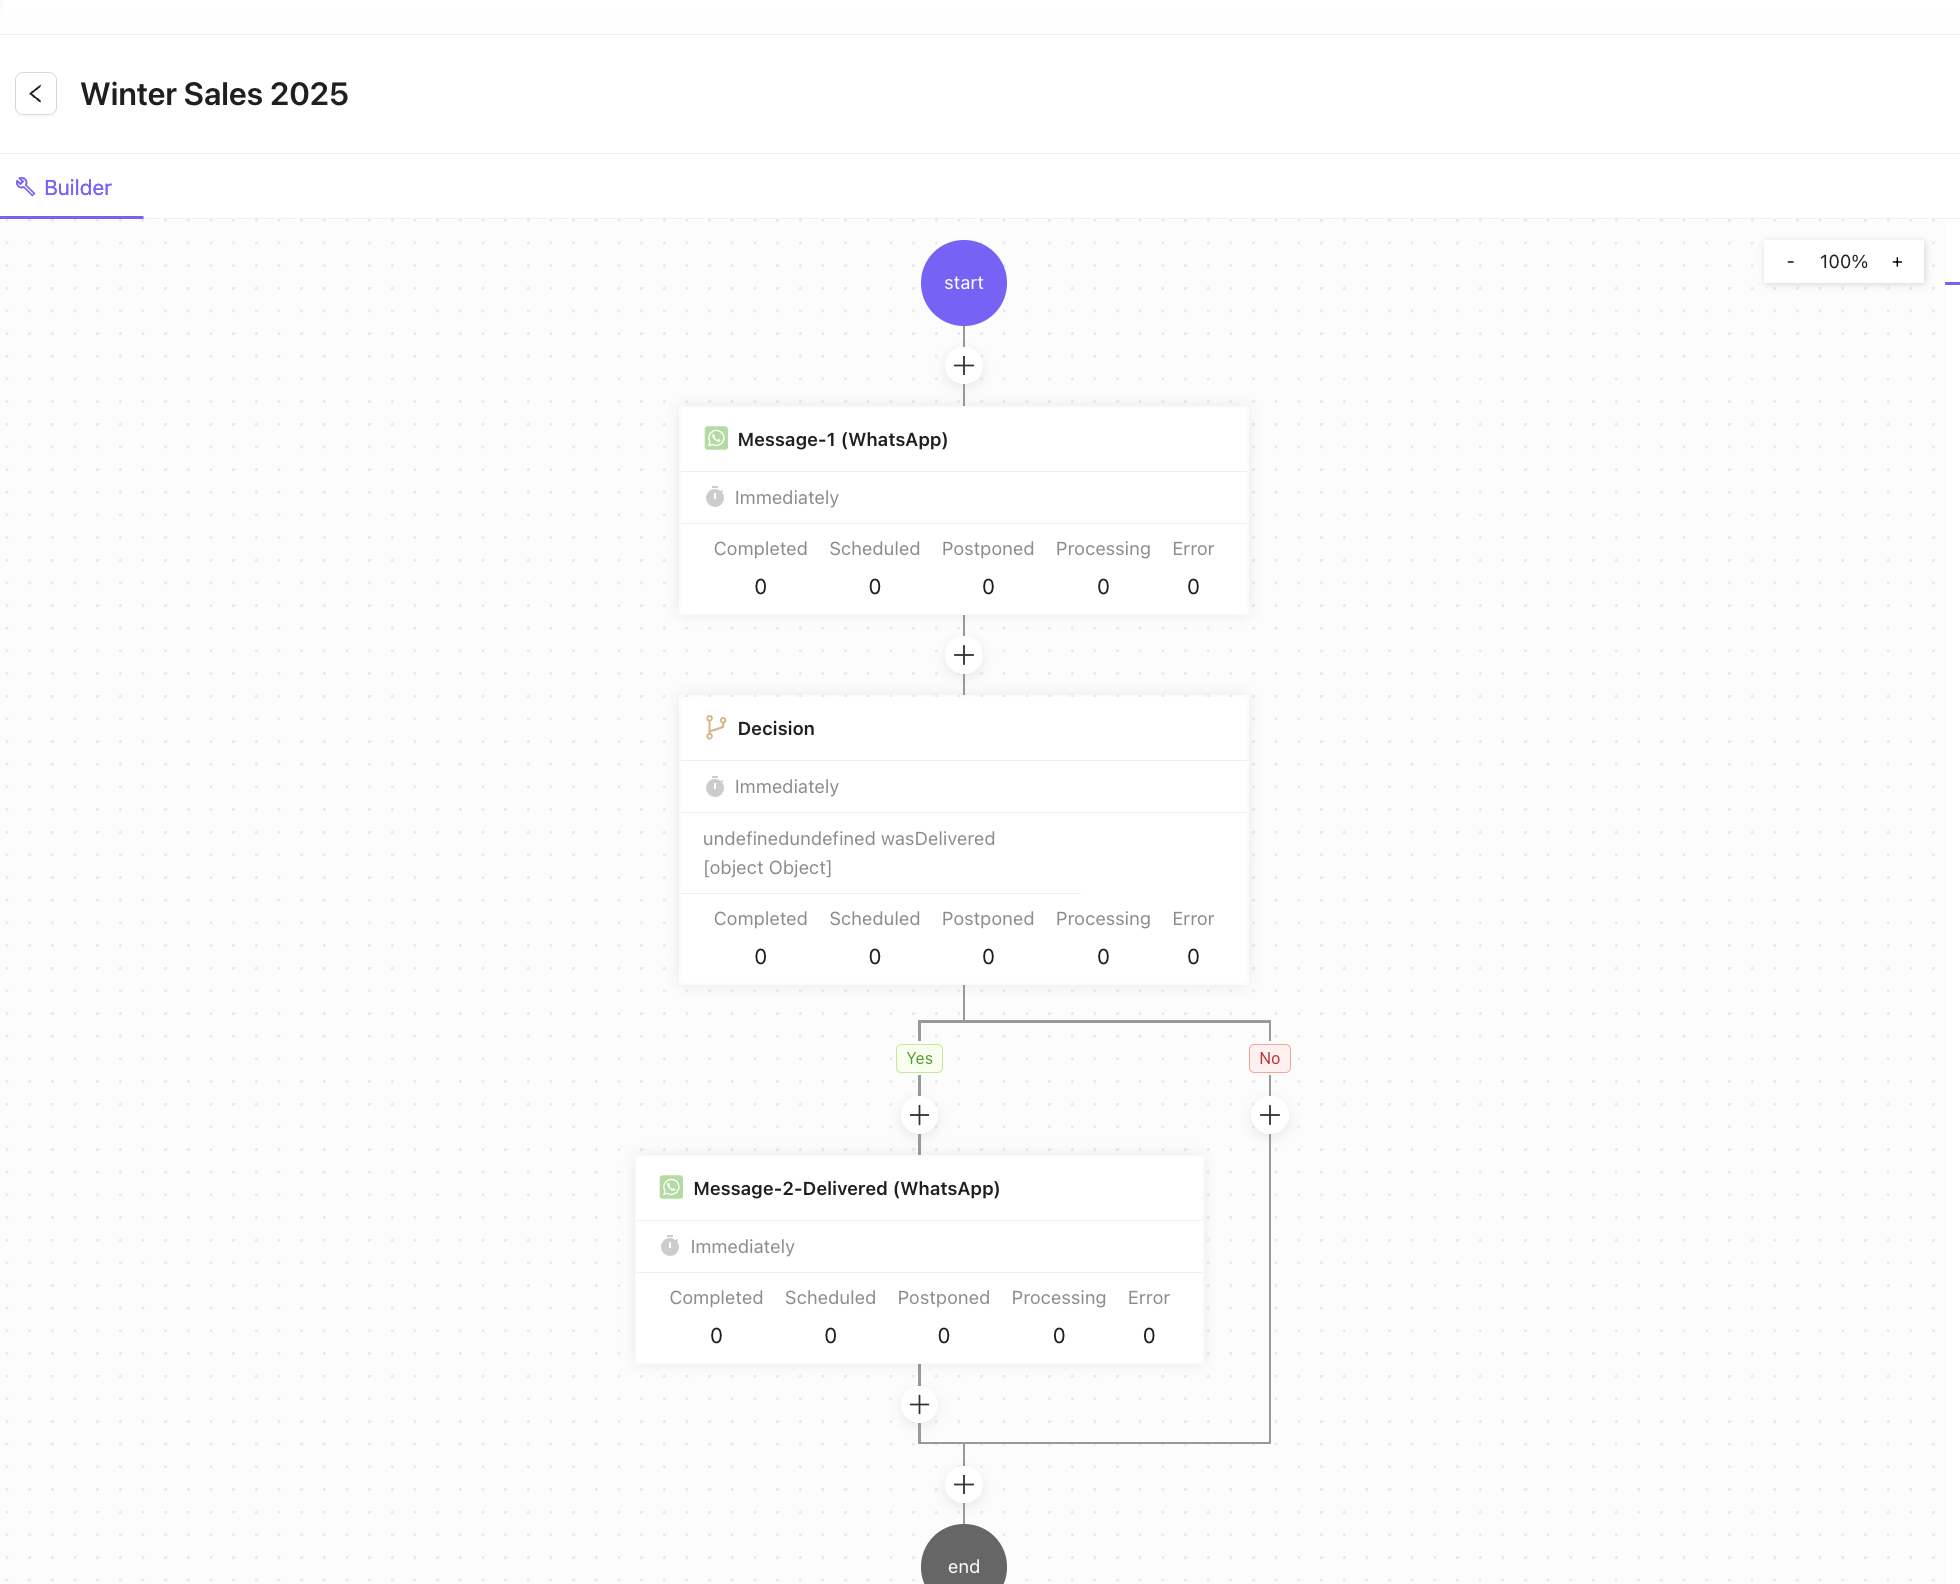
9. Add Decision Nodes
Use the + icon in the builder and select "Take Action" to configure branching points. Set rules or conditions (e.g., Message Read, Replied, Delivered, or NOT) to direct the campaign flow, allowing actions like Remove from Campaign or Send a different message based on previous step behavior.
10. Add More Campaign Steps
Build the rest of the campaign sequence flow as needed.

11. Add Campaign Retry [Optional]
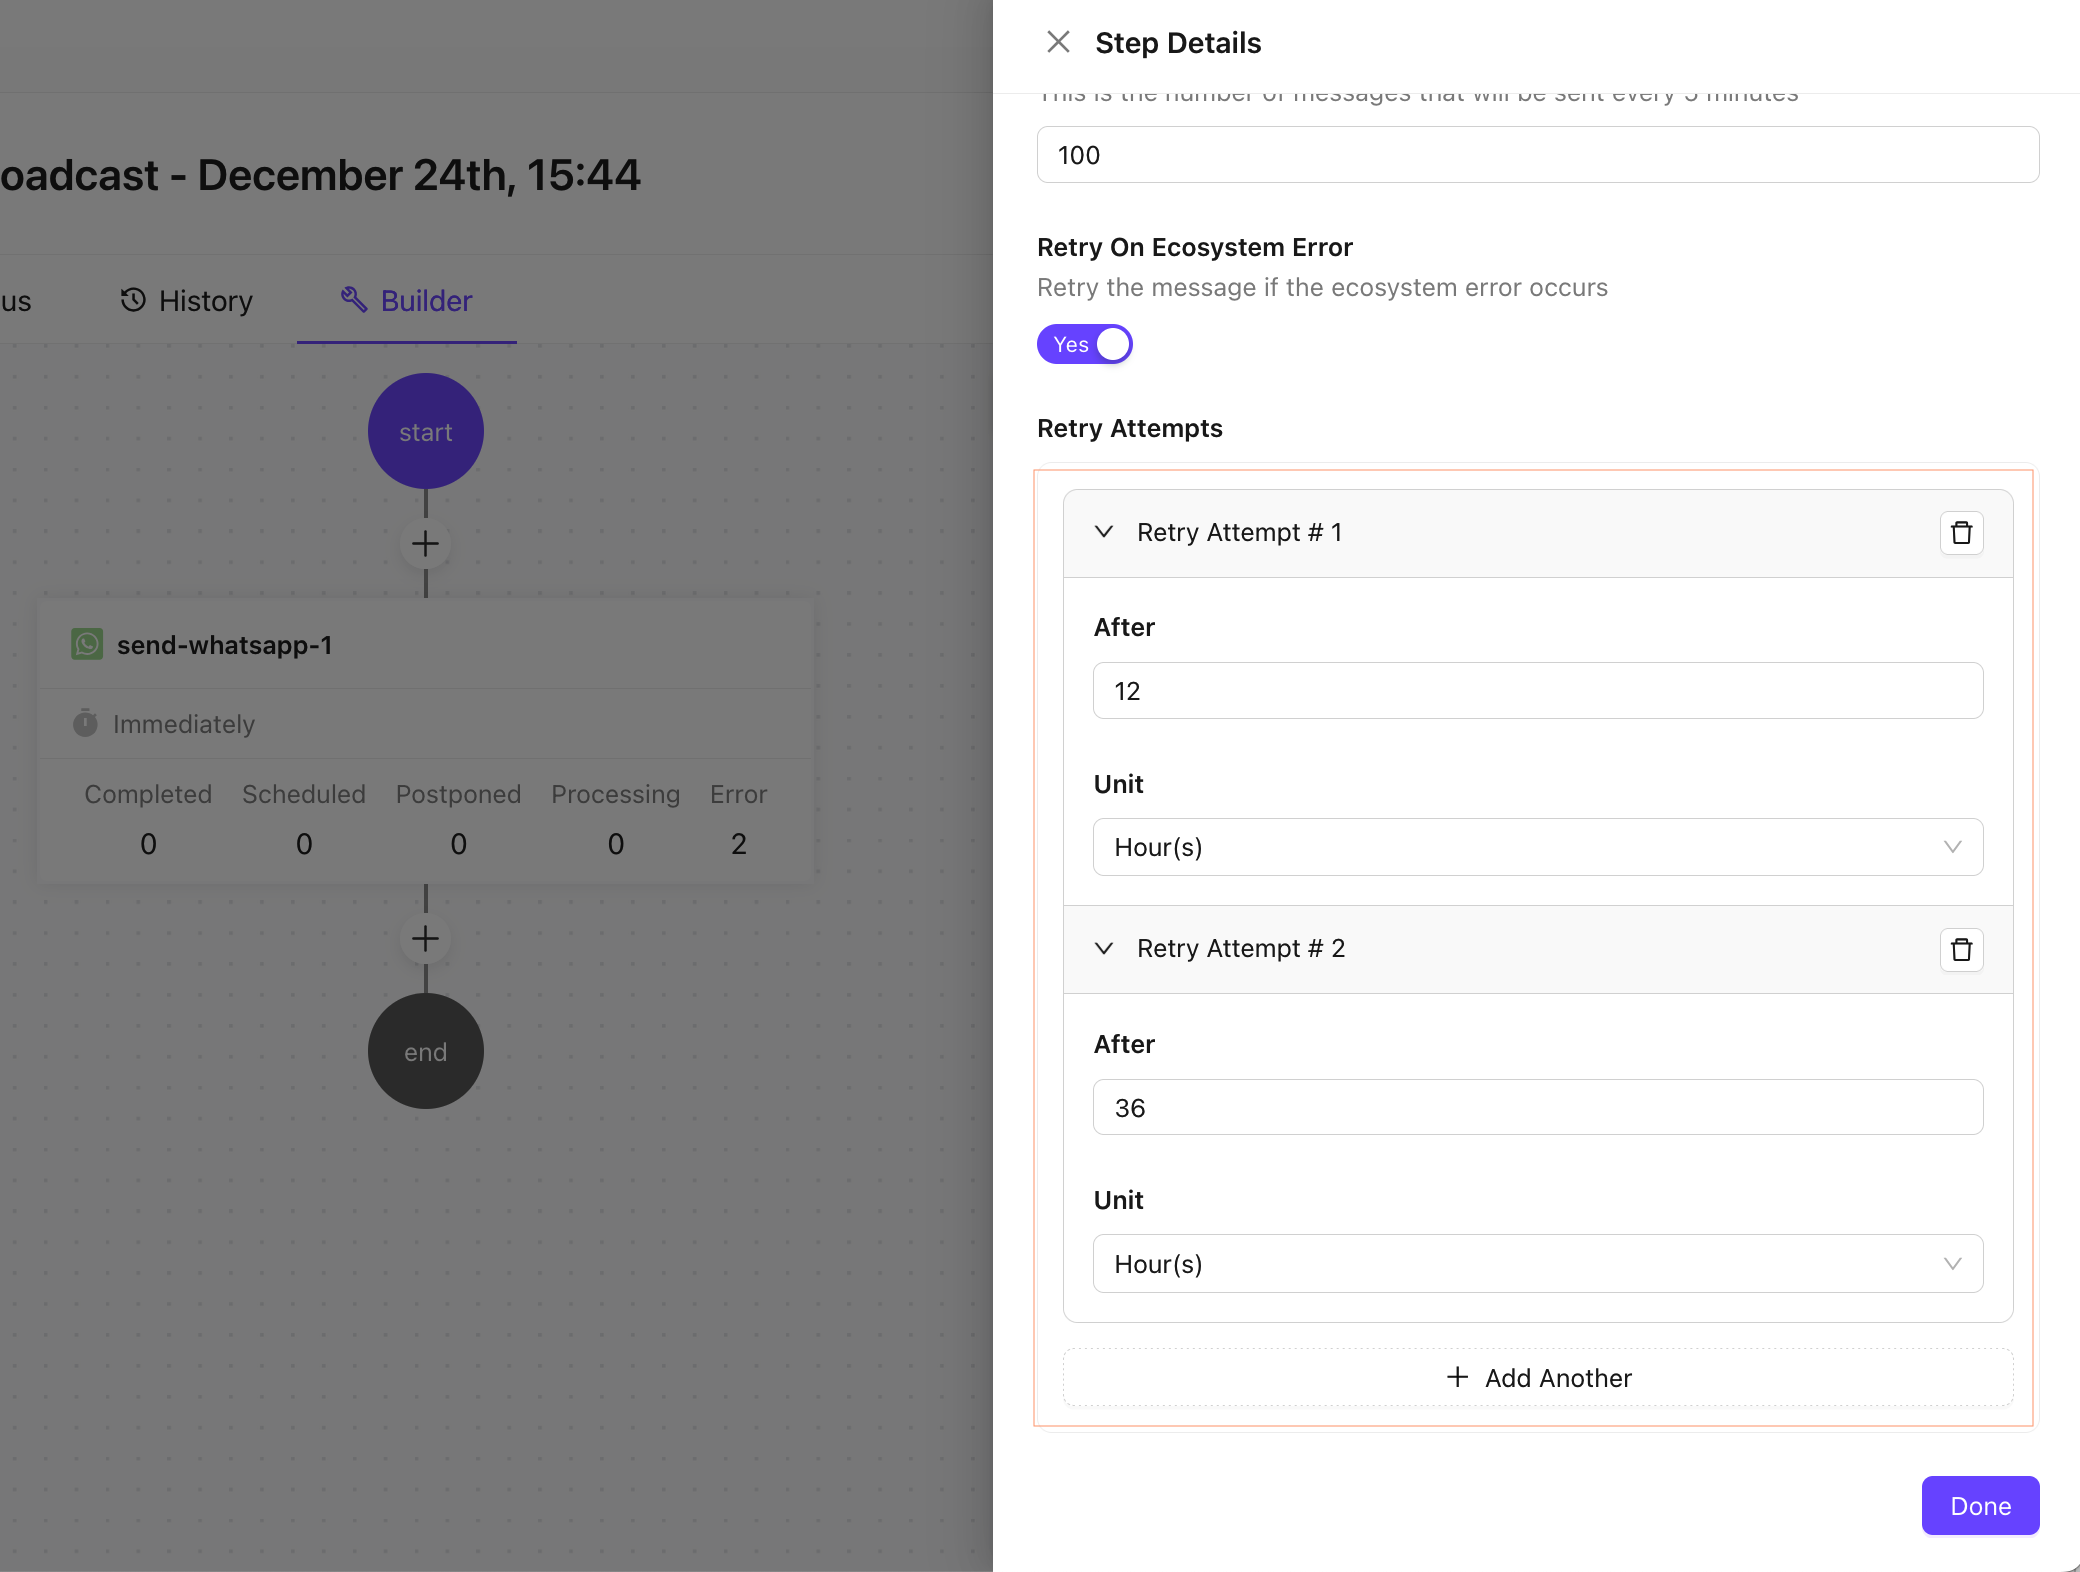
Currently campaign retry workflow is enabled for Maintining a Healthy Ecosystem Error Code #131049
a. Choose a Campaign Step
Click on the Campaign Step to open the configuration settings
b. Enable the Retry Ecosystem Error option
Enable the Retry Campaign Toggle
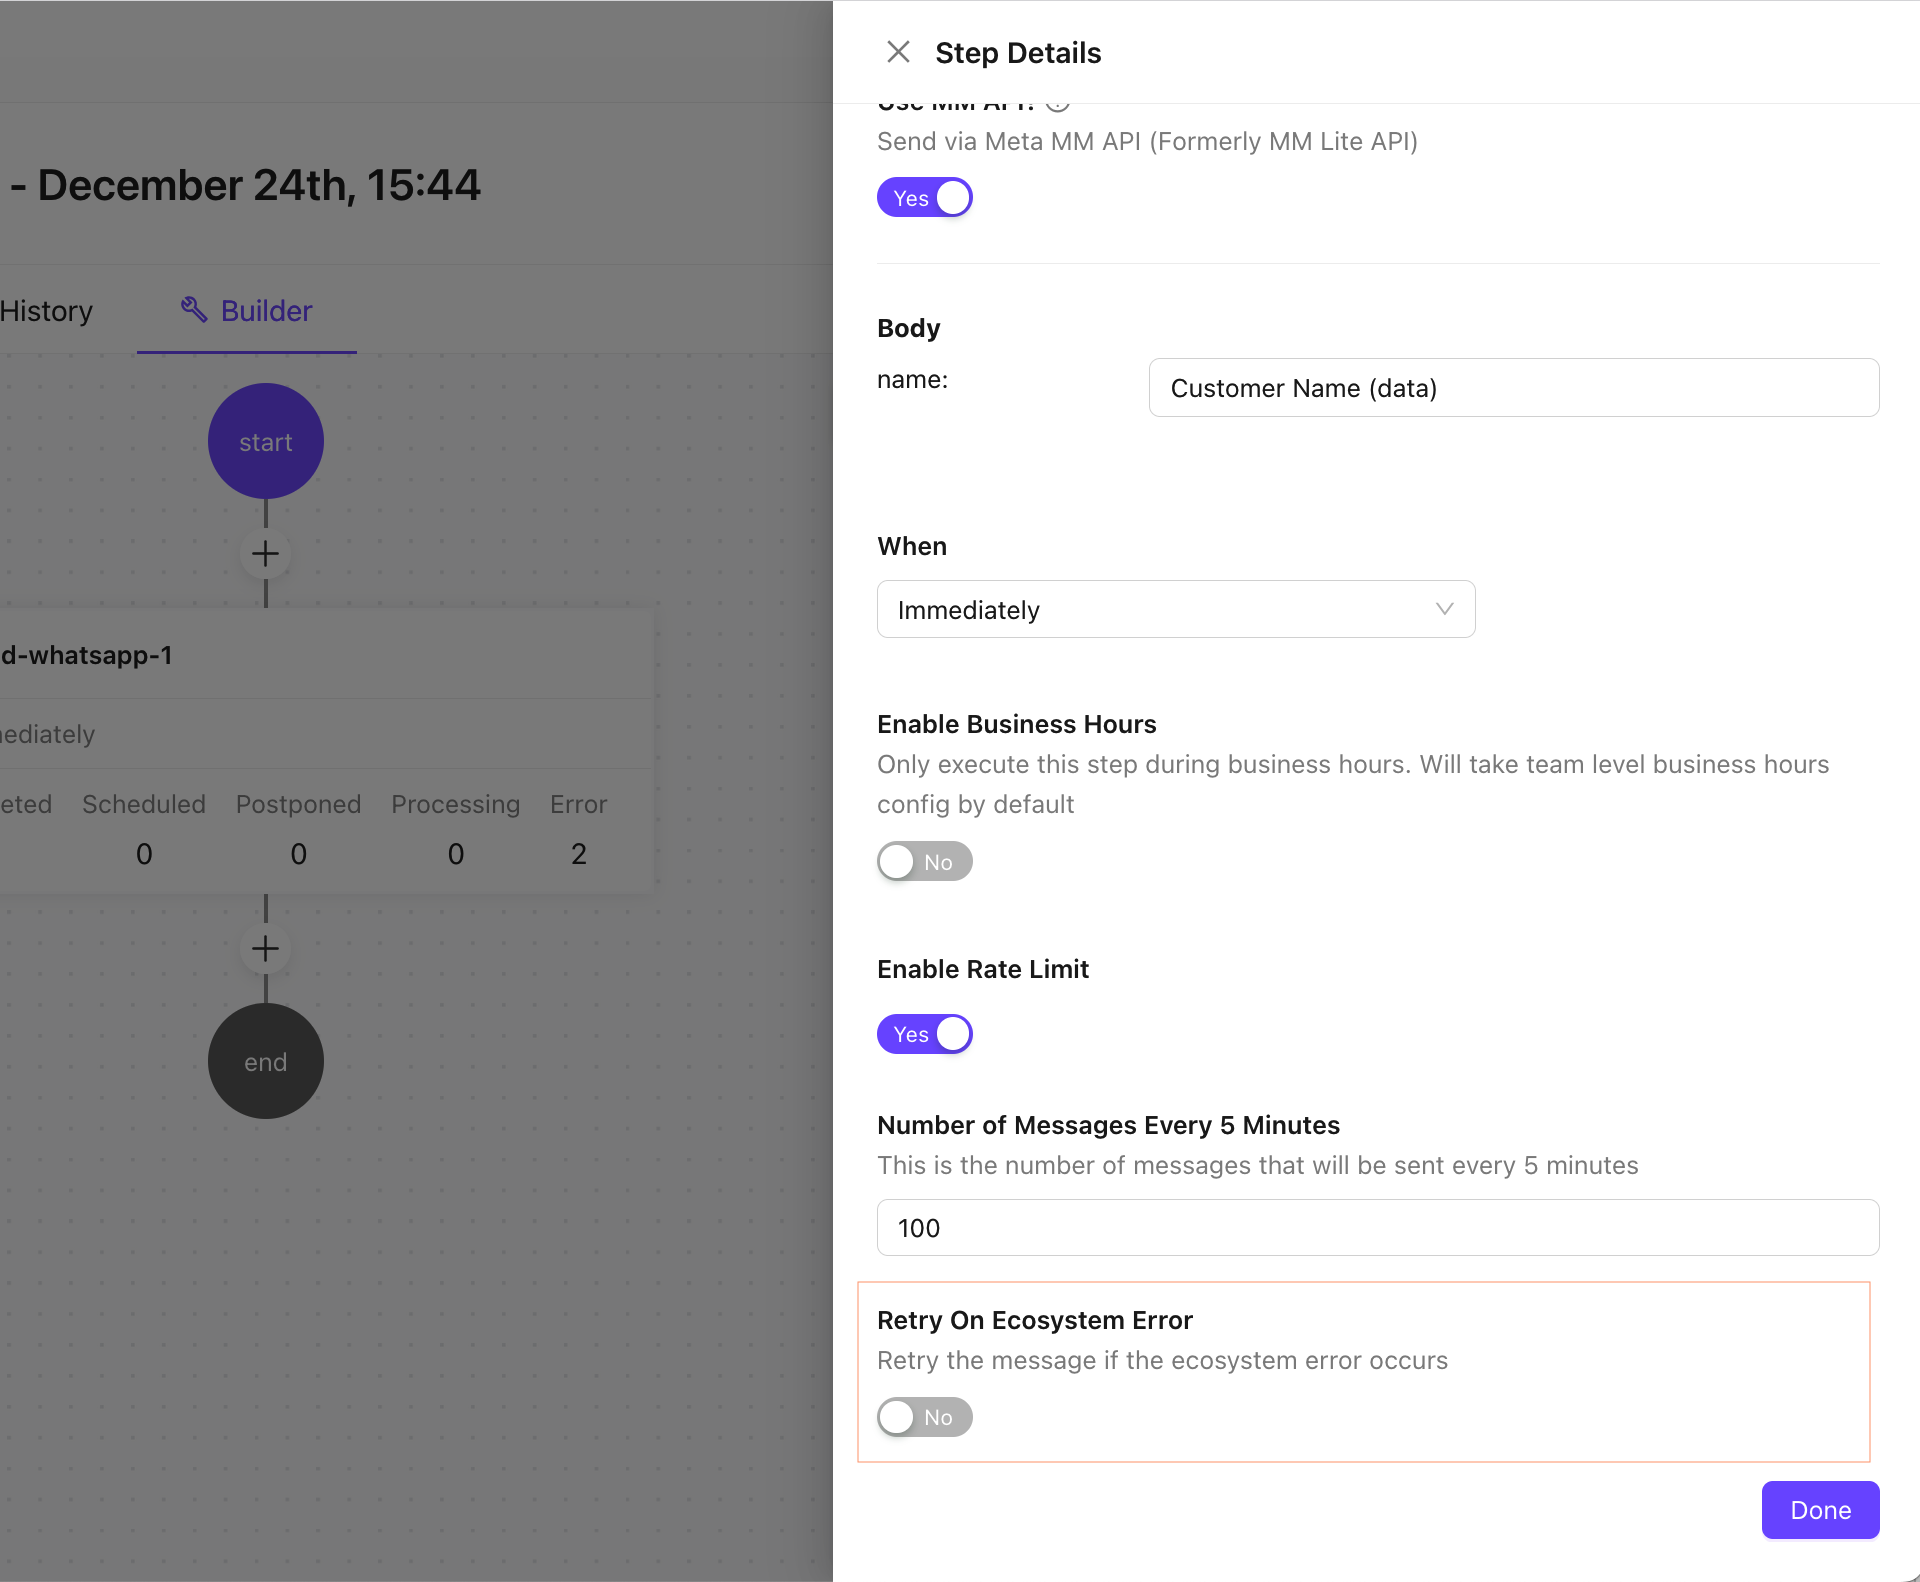
c. Configure the Retry Campaign Setting
Add the Retry Attempts Rules with Retry Attempt Time Frame and Time Unit.
d. Save The Campaign
Save the Campaign after configuration.
12. Save & Activate Campaign
Once the builder flow is complete, click Save and toggle the campaign to Active.
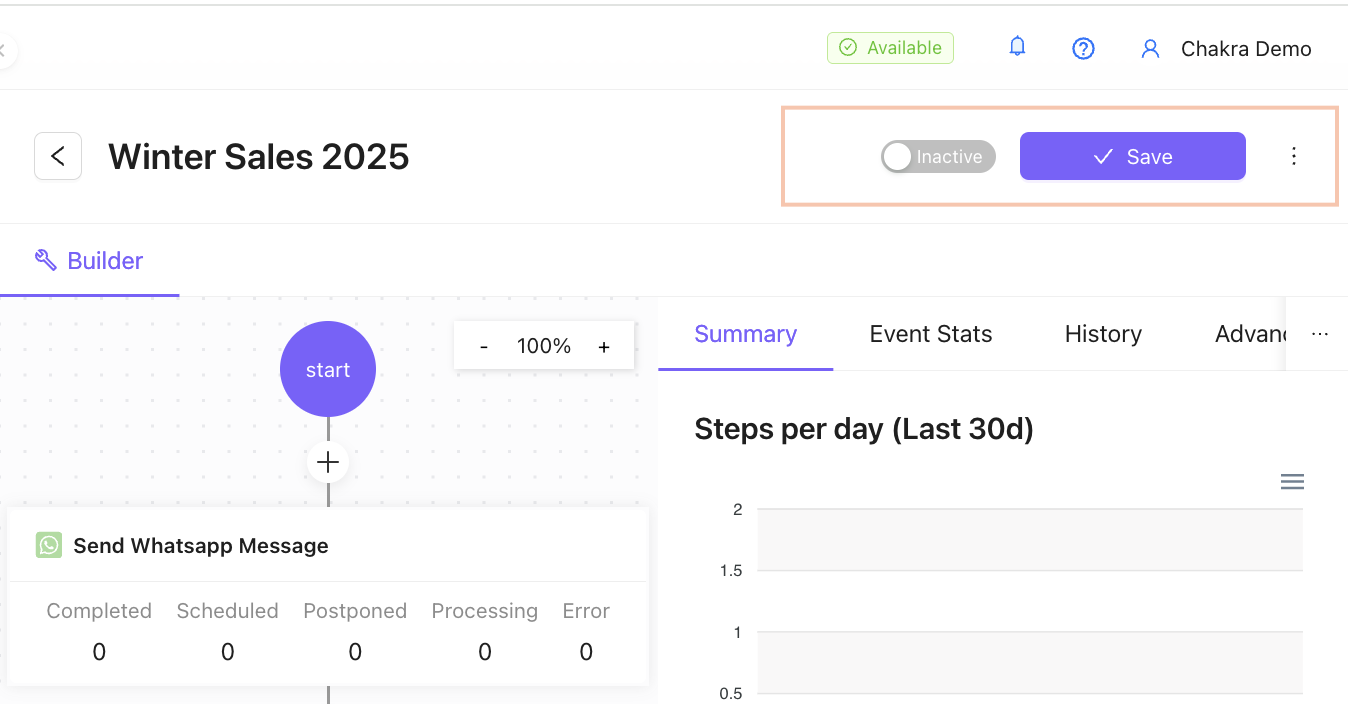
- The campaign is now ACTIVE.
13. Add Leads to the Campaign
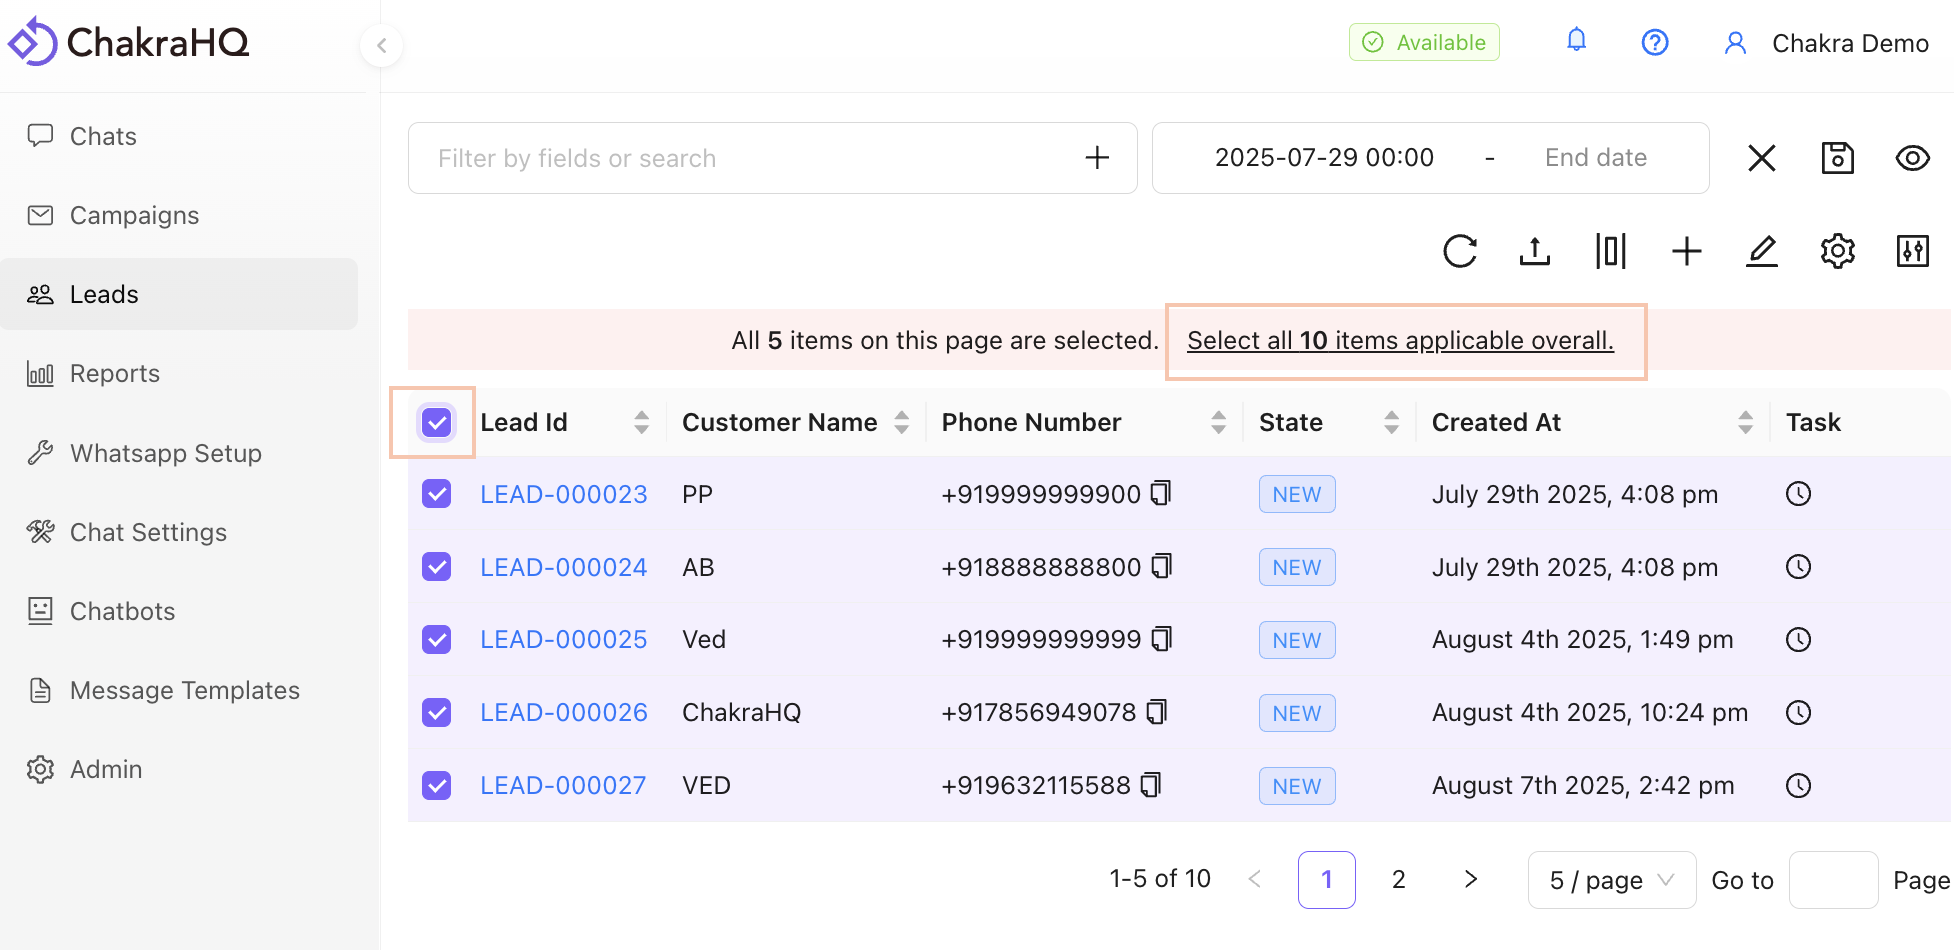
- In the Leads tab, select specific leads or use "Select All" to choose leads.
Steps to Add Leads to a Campaign
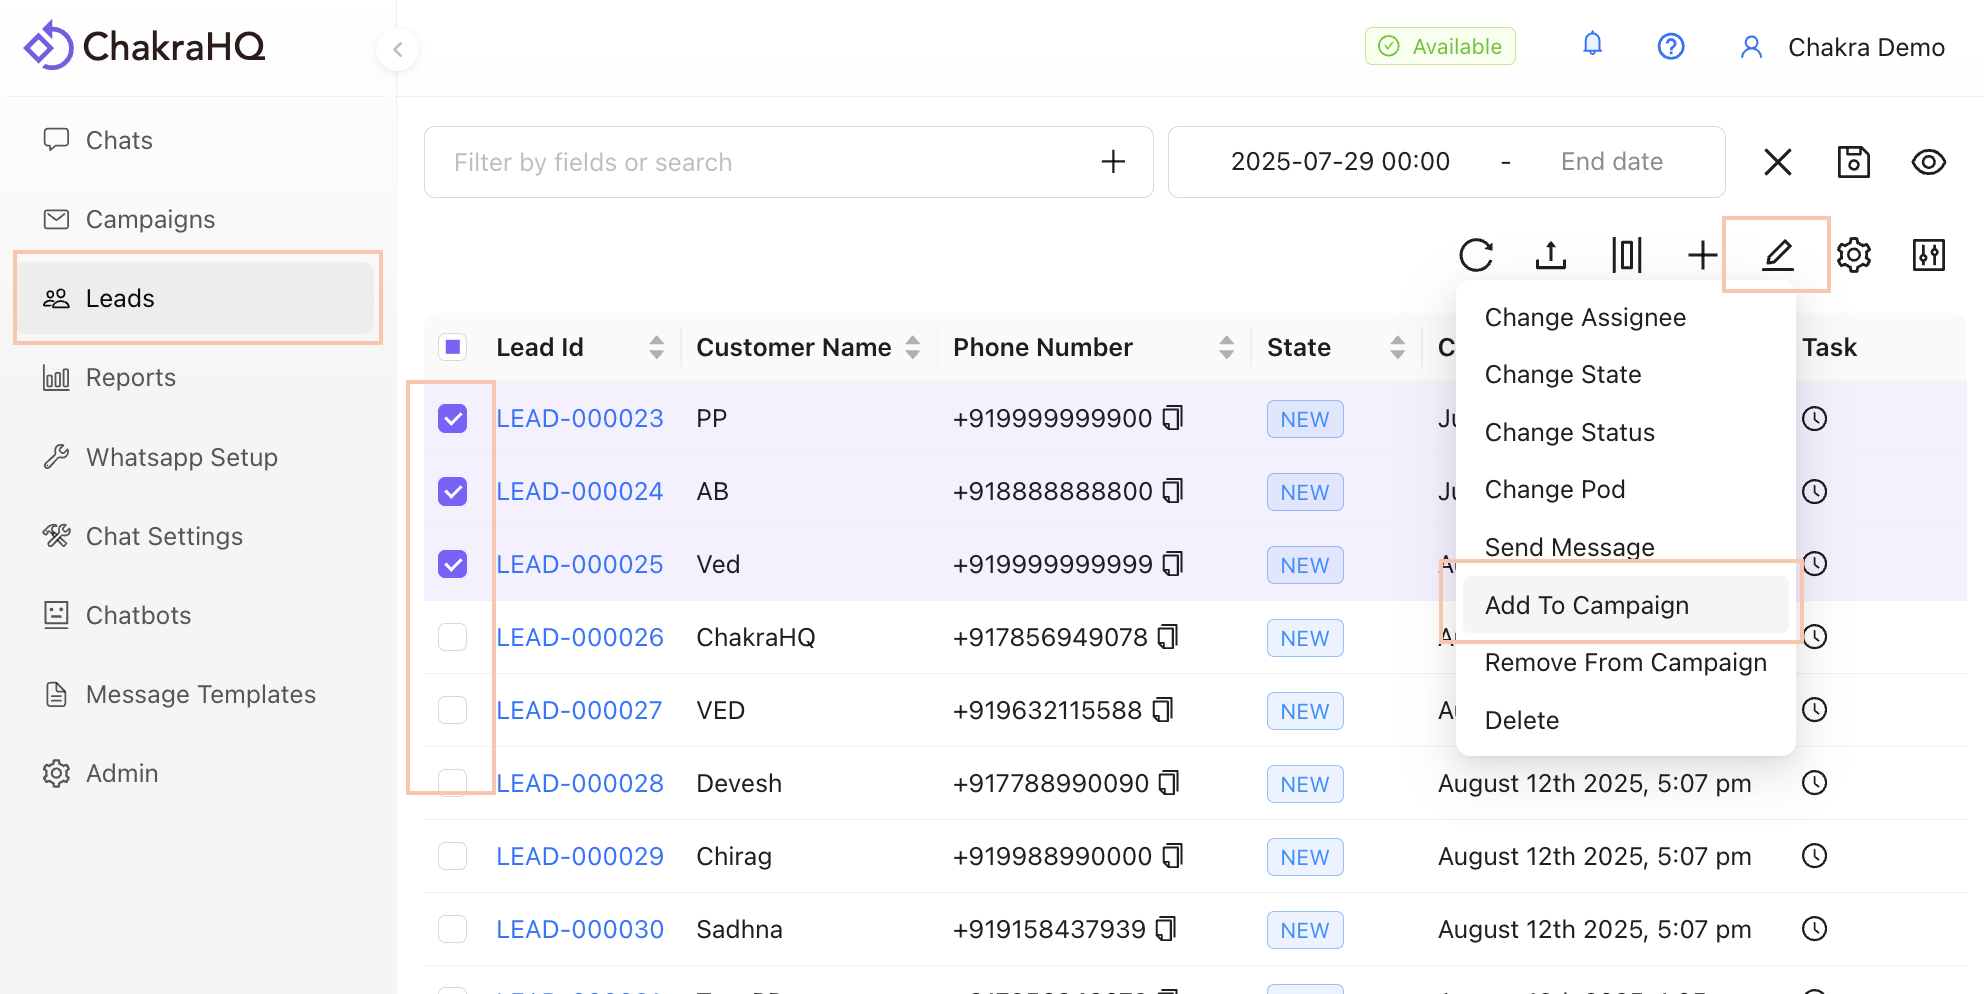
Select the Campaign and click Add
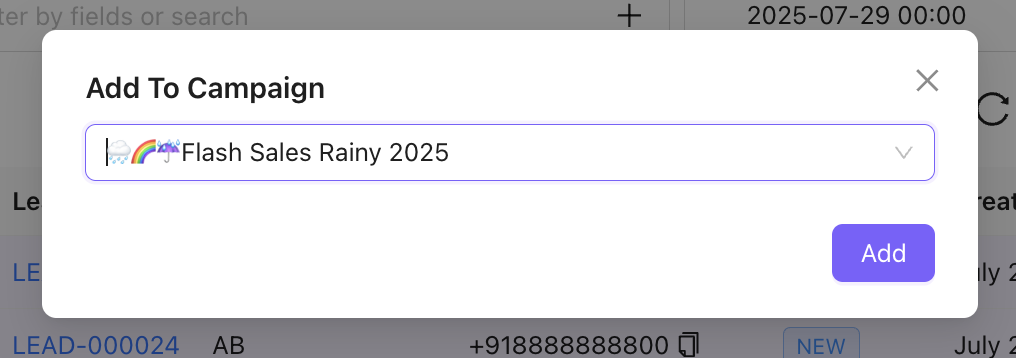
Select ALL Leads
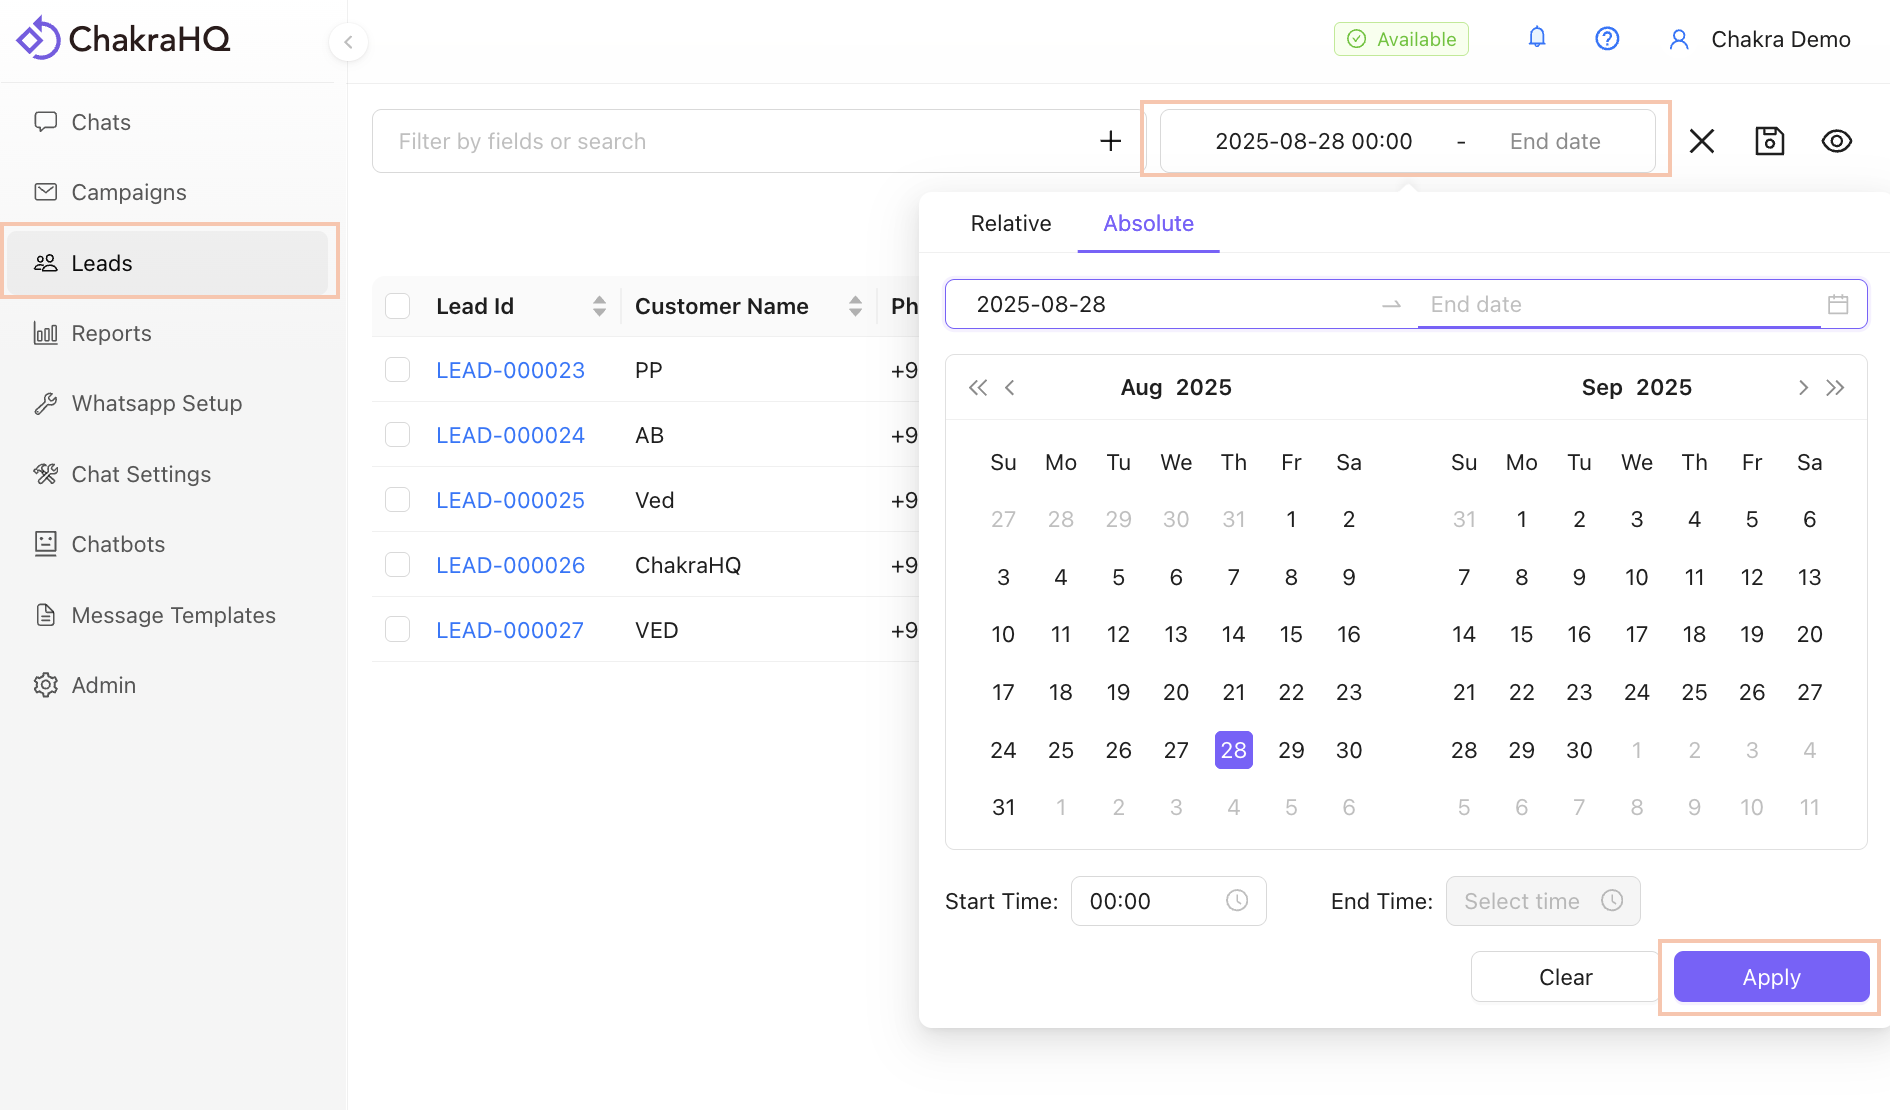
Use Lead Filters
Use Date filter or Lead filter by attributes to shortlist relevant leads for the campaign
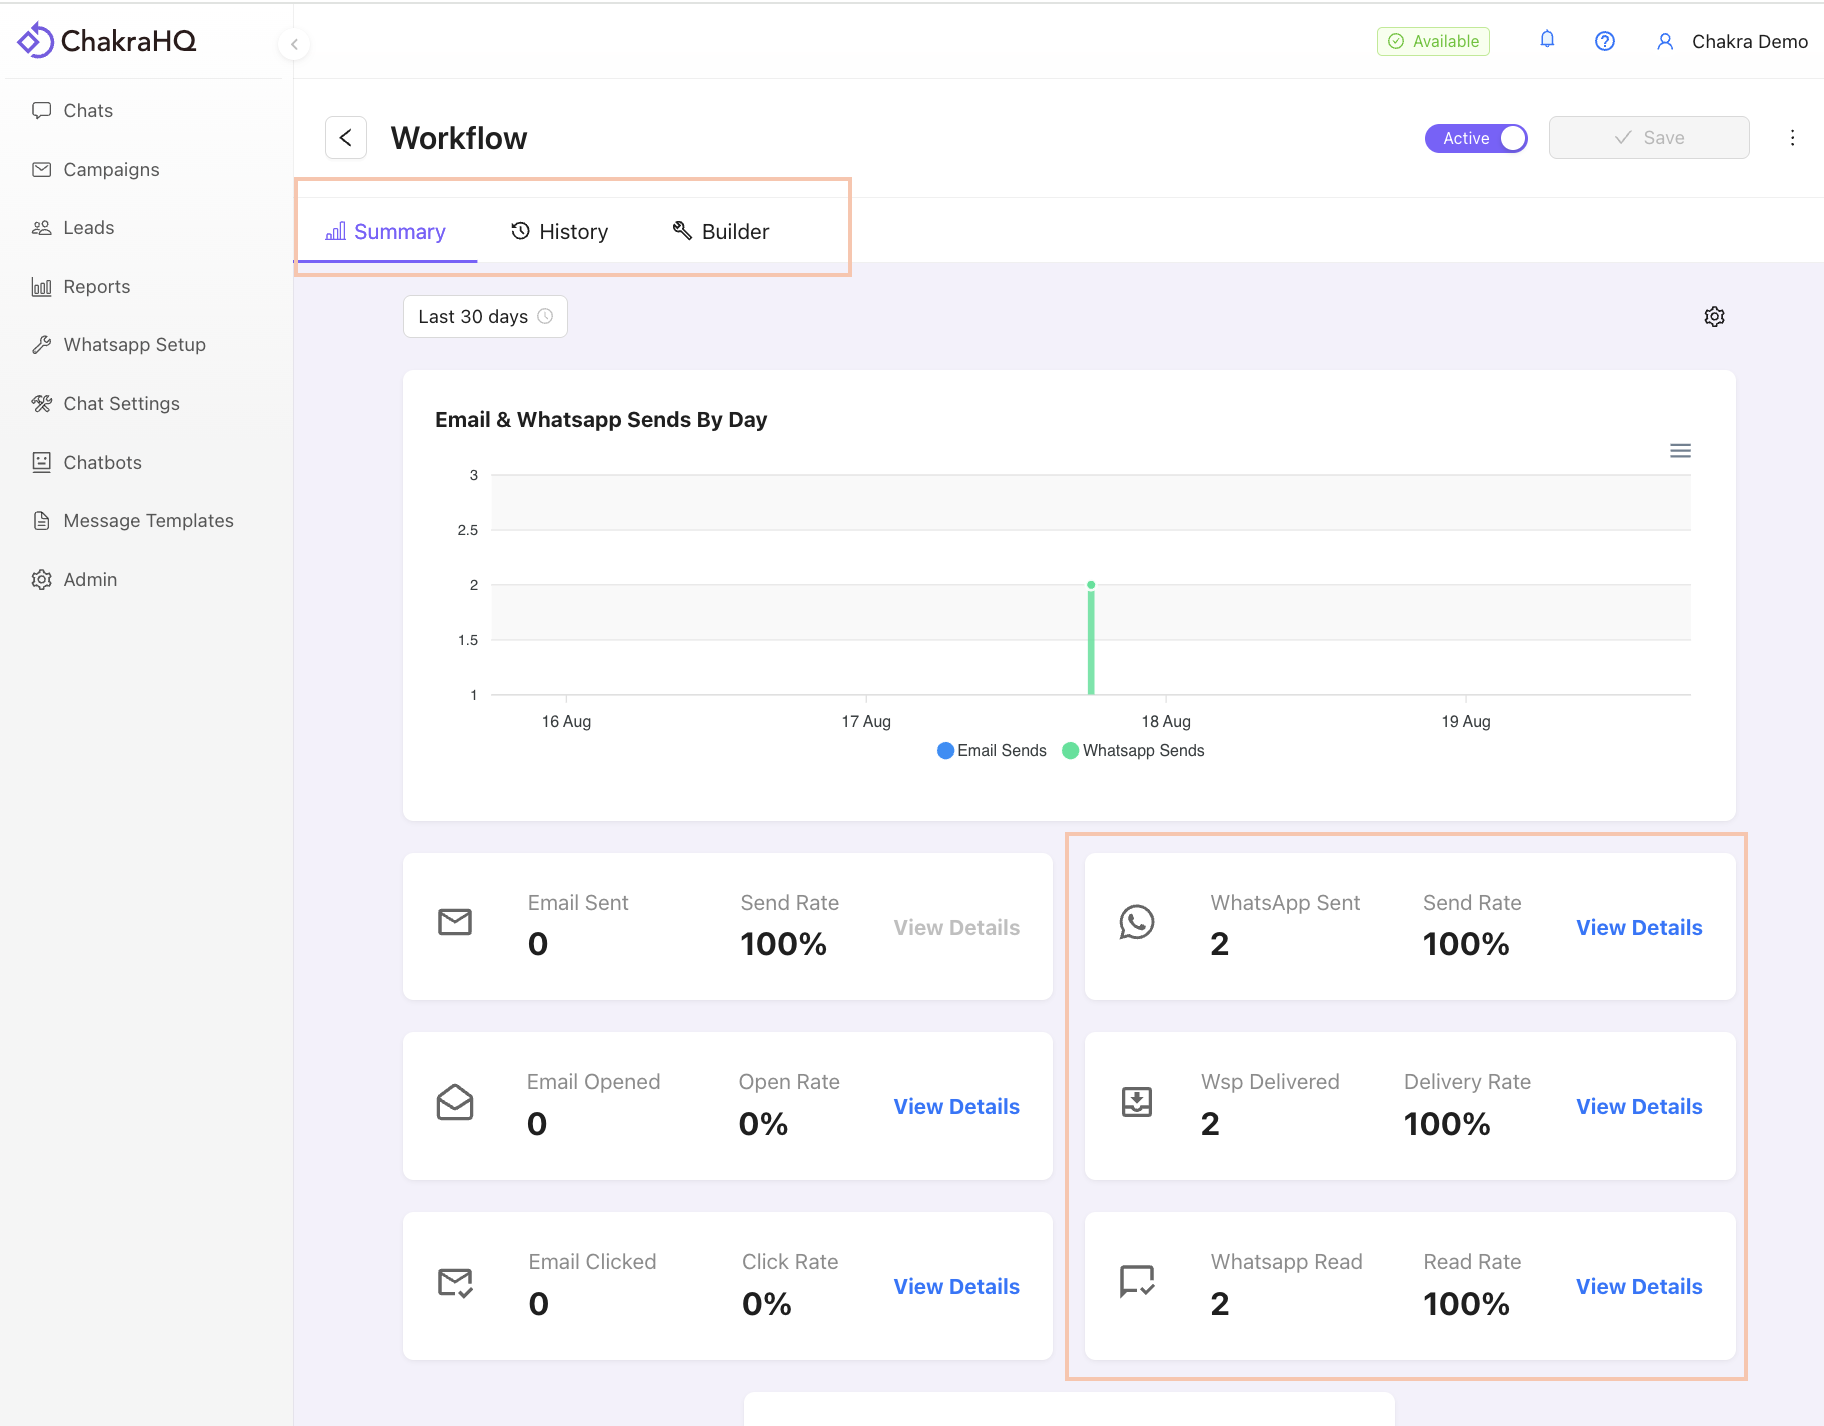
14. Track Campaign Performance
Monitor campaign metrics in the Summary tab and check granular steps in the History tab.
Additional Notes
- Ensure templates comply with WhatsApp policies.
- Track Message Delivery performance for every executed campaign step
- Regularly review campaign performance to optimize results.
For further assistance, contact support or refer to additional resources.