Chatbot Call API Node
Steps to Use the call api node in chatbot
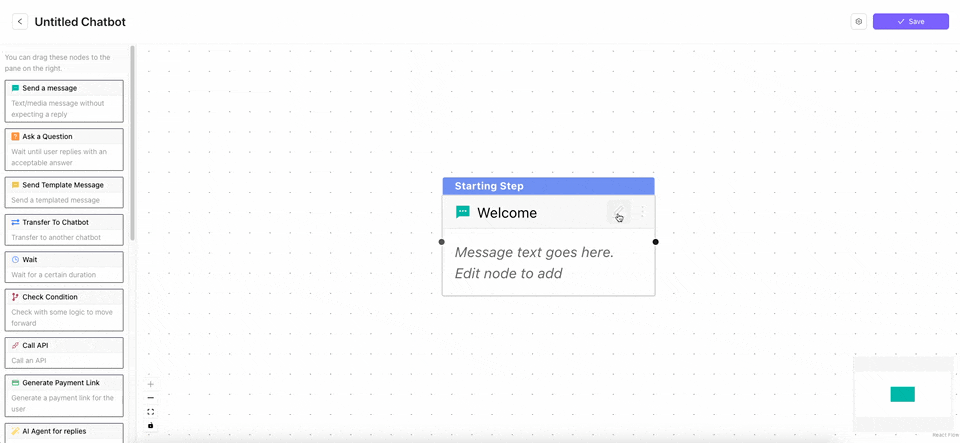
Using API node in Chatbot Builder
You can use the Call API to call an api from the chatbot itself. You can even use the response of the API in the chatbot flow.
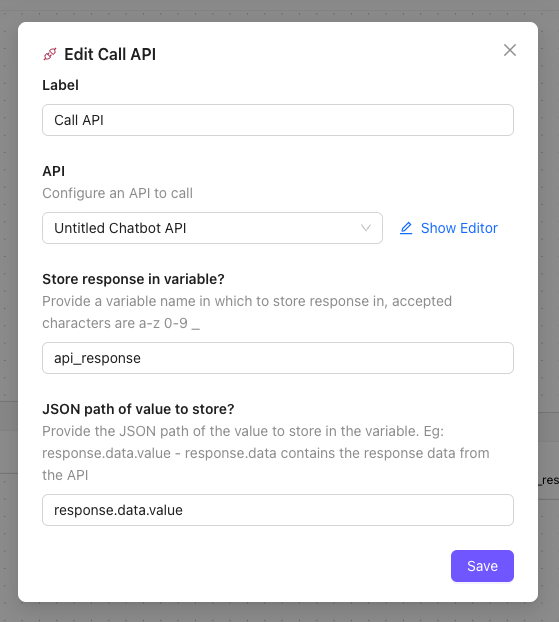
Configuration of API Node
- API - You can select or configure the api details from the API section
- Click on "Show Editor" update the API configuration
- If you are using a json payload, you can type
{{to show a list of available variable substitutions - You will have access to the last chat message text and the data collected via the chatbot
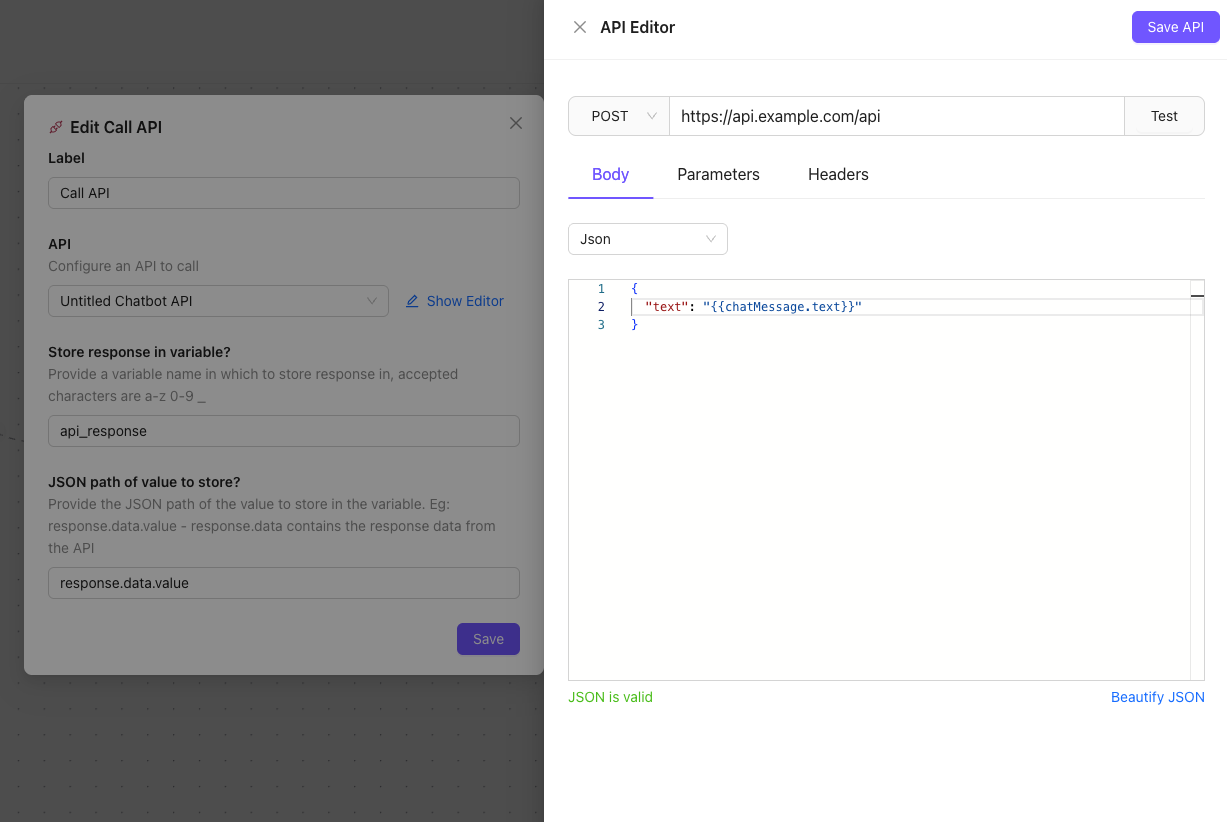
- Store response in variable? - Provide a variable name to store the api response in a variable
- JSON path of value to store? - Provide a json path to extract a certain specifc value from the JSON response and store in the variable
- The api response is accessed with the key response.data
- so if your api response is
{ "value": "this is the response" } - then the jsonpath should be response.data.value
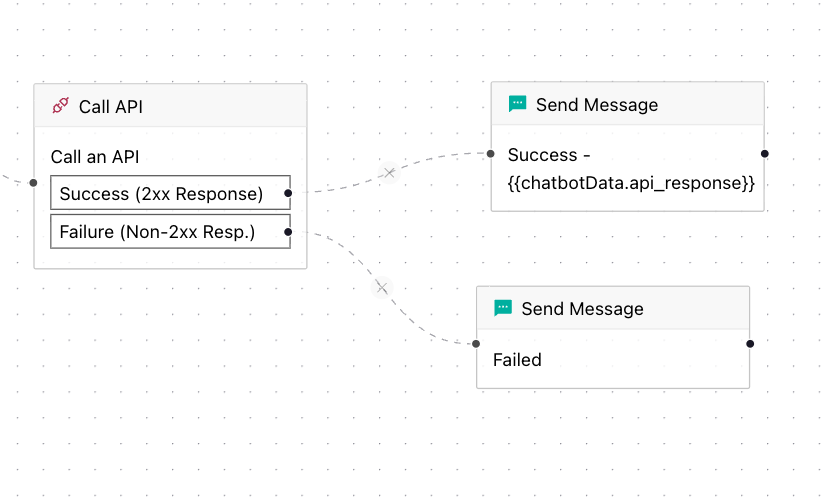
Configure API Output
The API will either result in a success (2xx response) or a failure (non 2xx response). You can link the options to further nodes accordingly.
API Node Configuration Guide
Below is a step by step guide to building a new chatbot with Call API Node
Create API node in Chatbot
- Create a Chatbot using
Message Node,Question Node, saving chatbot response usingUpsert Nodeand connecting them in a flow - Drag and drop the
Call APInode to the right of the question node - Edit the
Call ApiNode - Click
Show Editornext to the selected API - Make necessary changes like providing the api url and selecting the http method
- Chose
form url encodedorform multipartfrom the body type - Click
Add Anotherunder thekey valuesection - A new entry will be created - under key provide the key name like
text, Under value select the query variable - Click
Save APIto close the editor - Under
Store response in variableadd a variable name like api_response - Under
JSON path of value to storeadd a json path to select a specific value from the api response to store - The api response is accessed with the key response.data
- so if your api response is
{ "value": "this is the response" } - then the jsonpath should be response.data.value
- Click
Saveto close the api node editor
Add Message Node for API Response
- Drag and drop a message node to the right of the api node
- Connect the Success option of the api node to the new message node
- Edi the message node
- Type in a message for the message node. If you want to access the data returned in the api node, type @ and start typing to get a menu of variables available. Choose
api\_responsevariable - Click
Savein the message node. Next, clickSavefrom the top right corner to save the chatbot.
This chatbot will ask user a question and then hit your configured api with the user response. If an api response is received then the response is sent back to the user.