Create a Chatbot
Create an easy chatbot for WhatsApp and website chat
Overview
Creating a powerful, automated conversation flow is easier than ever with Chakra Chat Chatbot Builder. Here's a step-by-step guide to help you build, configure, and launch your chatbot.
Note: Before proceeding, it is suggested to explore the chatbot builder basics to learn about the fundamentals of the Chakra chatbot builder basics
Create a Chatbot
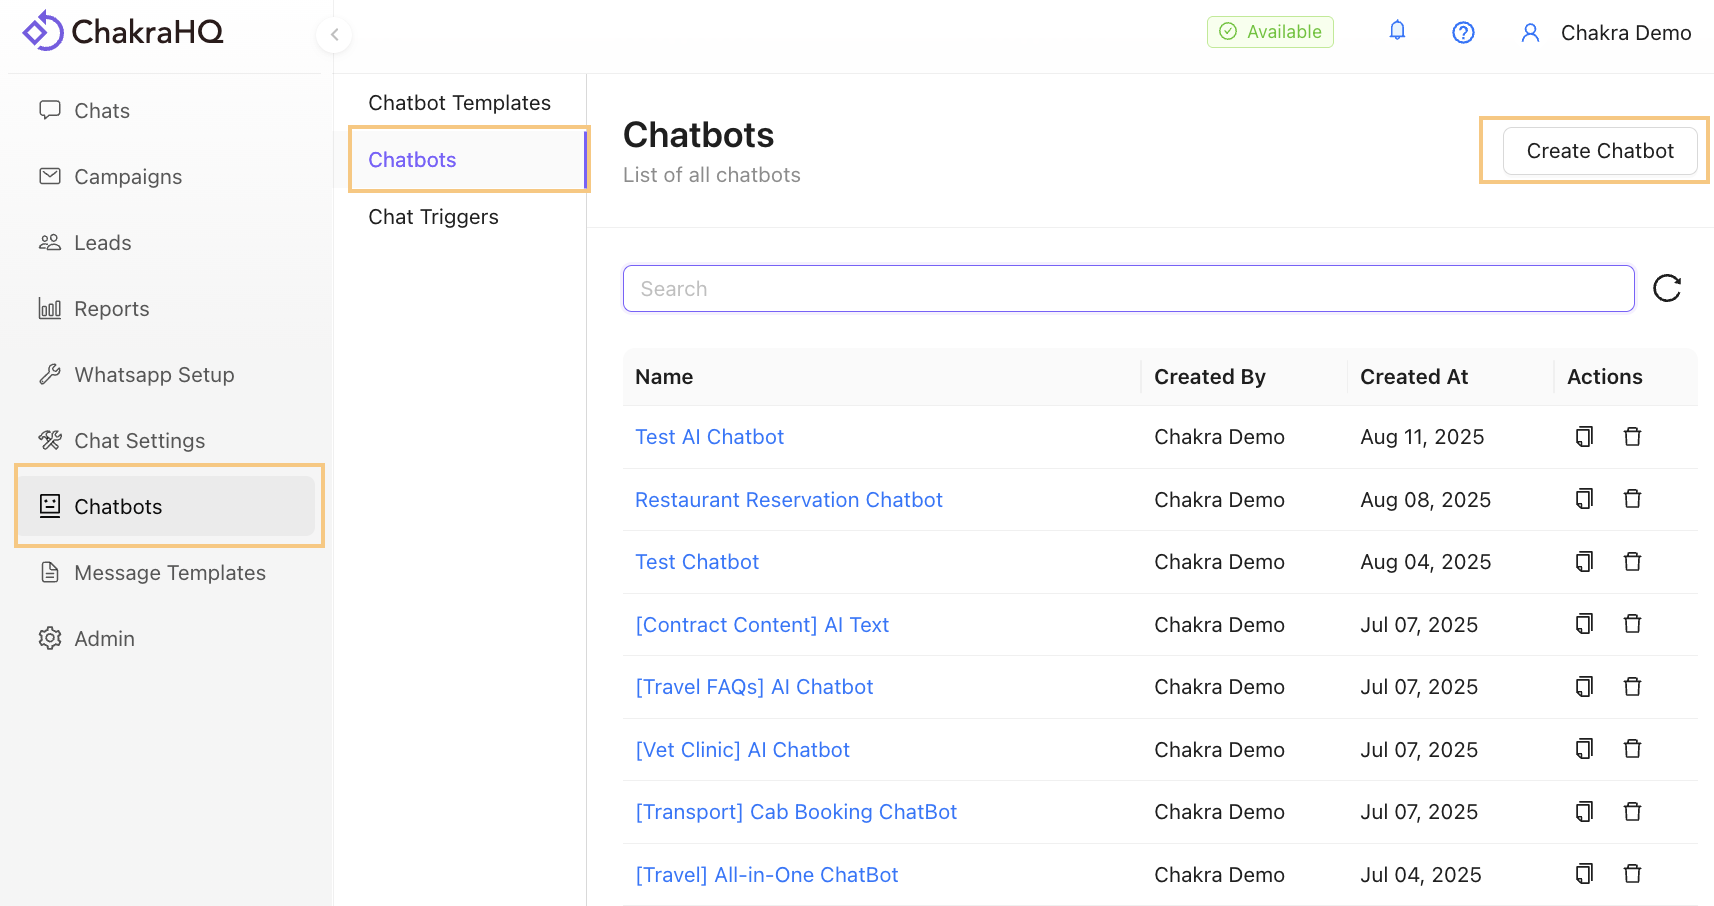
1. Create New Chatbot
Go to Chatbots and click on Create Chatbot
2. Name the Chatbot

3. Default Starting Node
In the chatbot builder, a Send Message (Welcome) is set as the default start node. You can choose to retain this or add a new node and make it the default
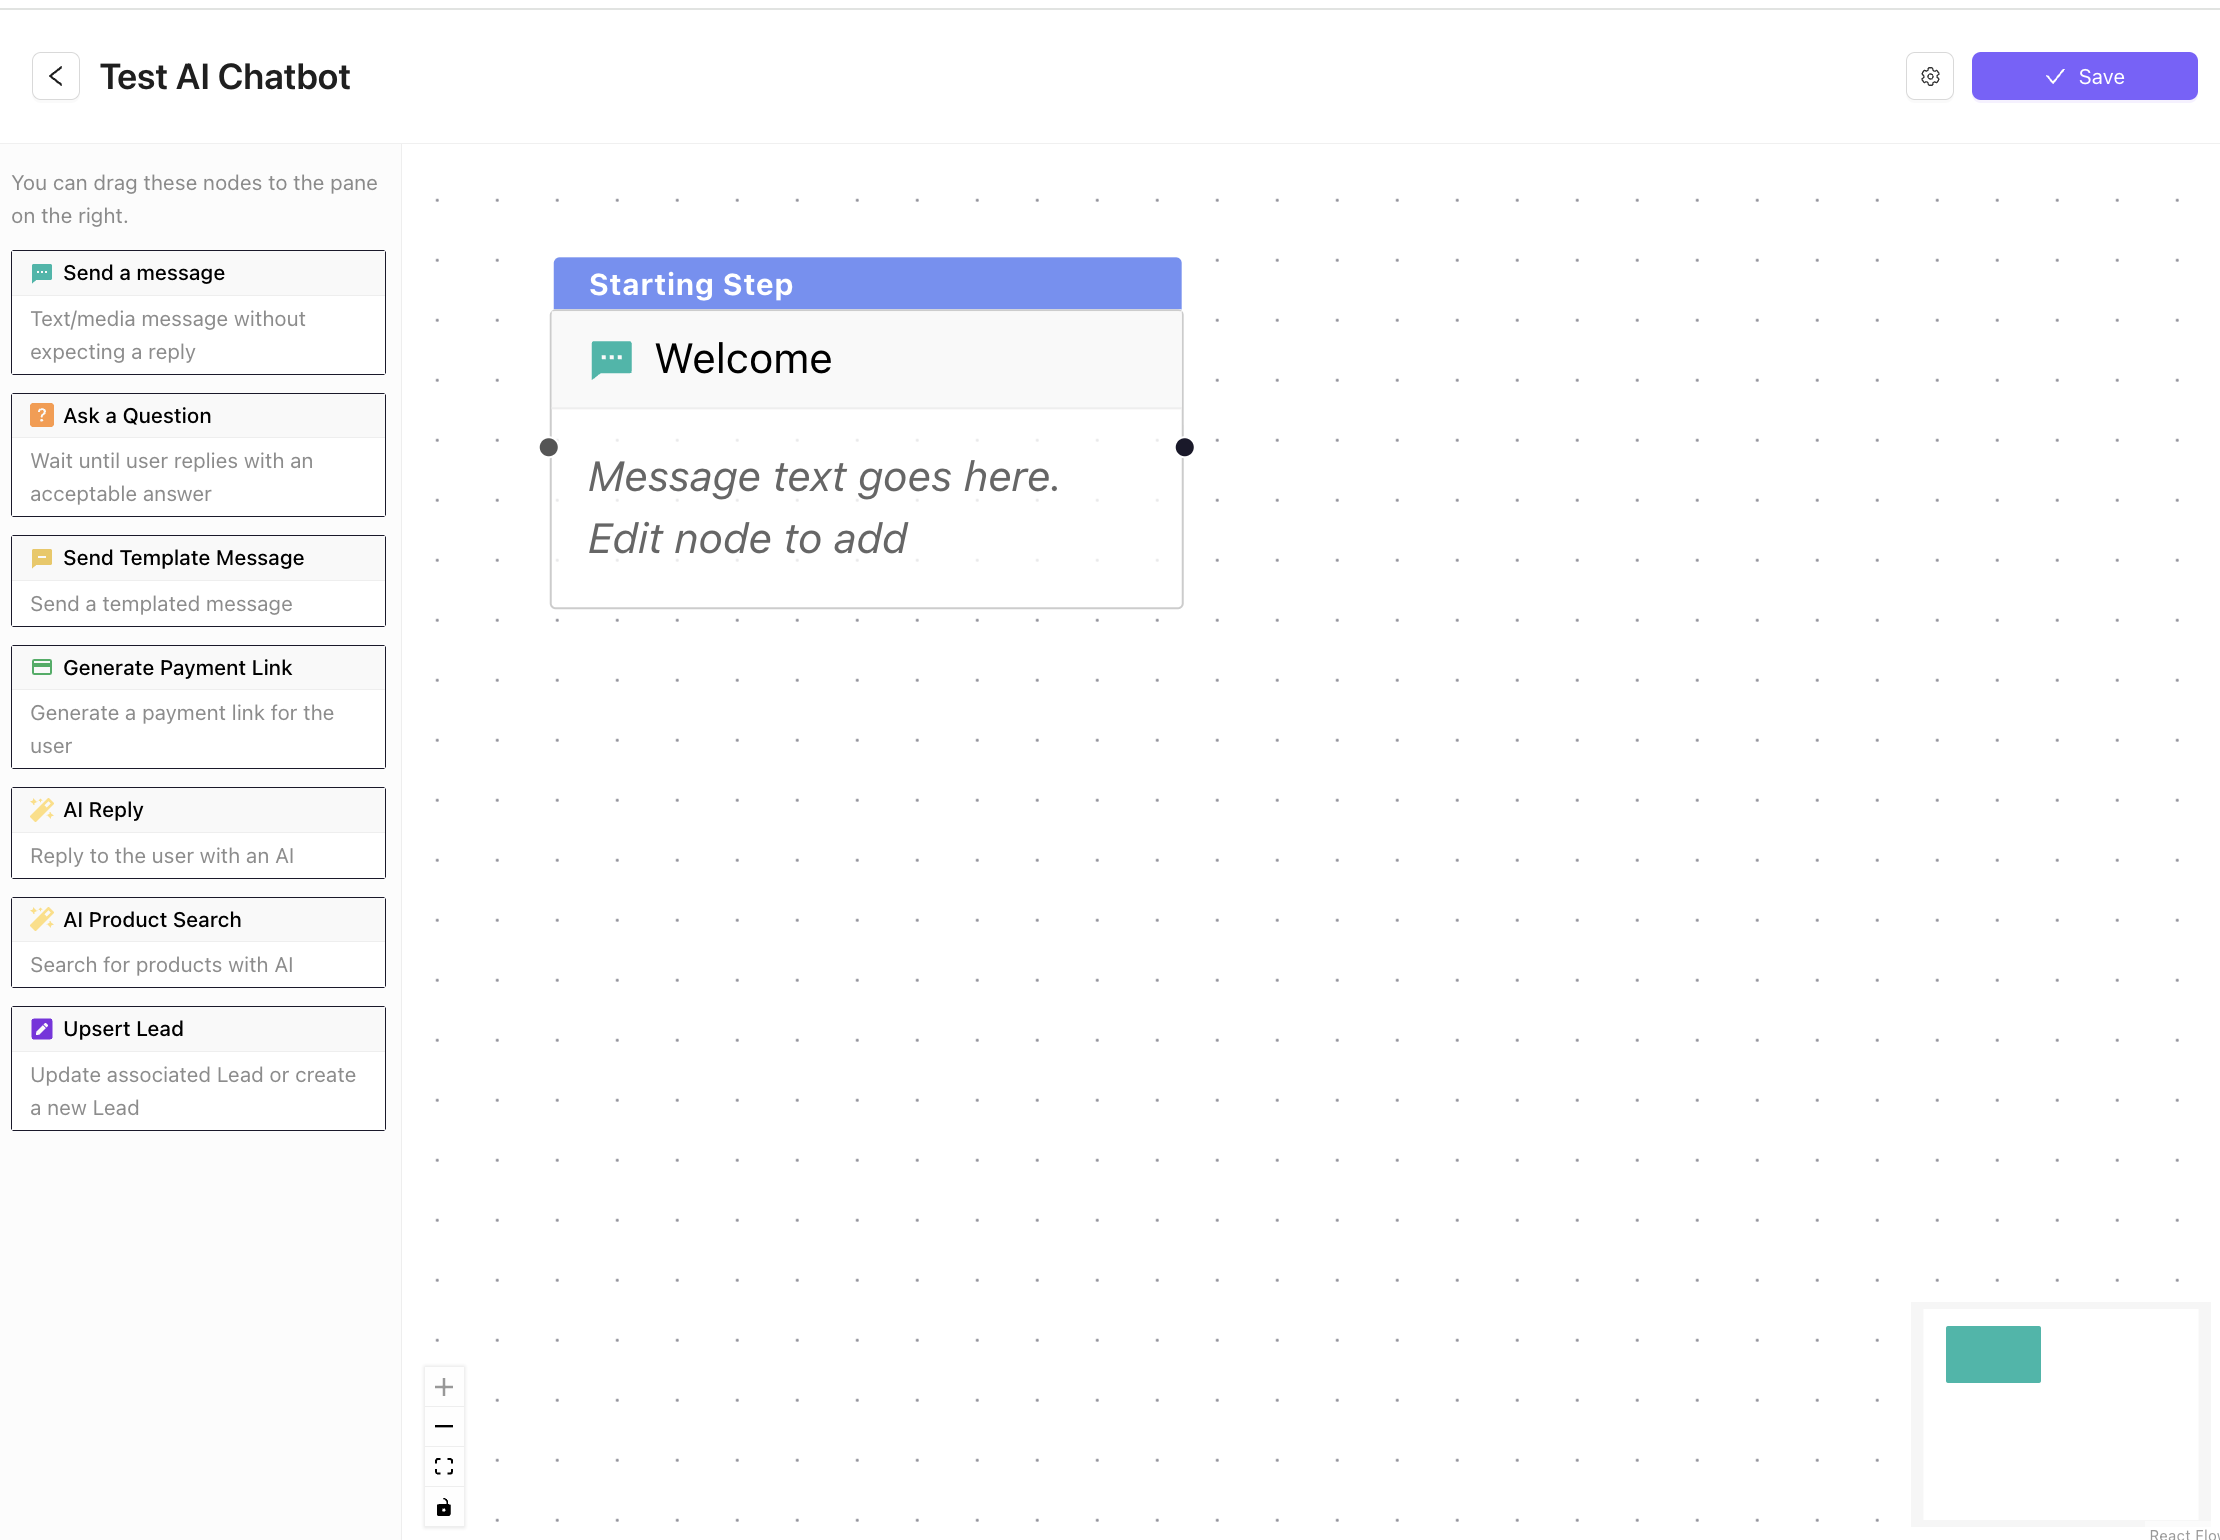
4. Edit Nodes
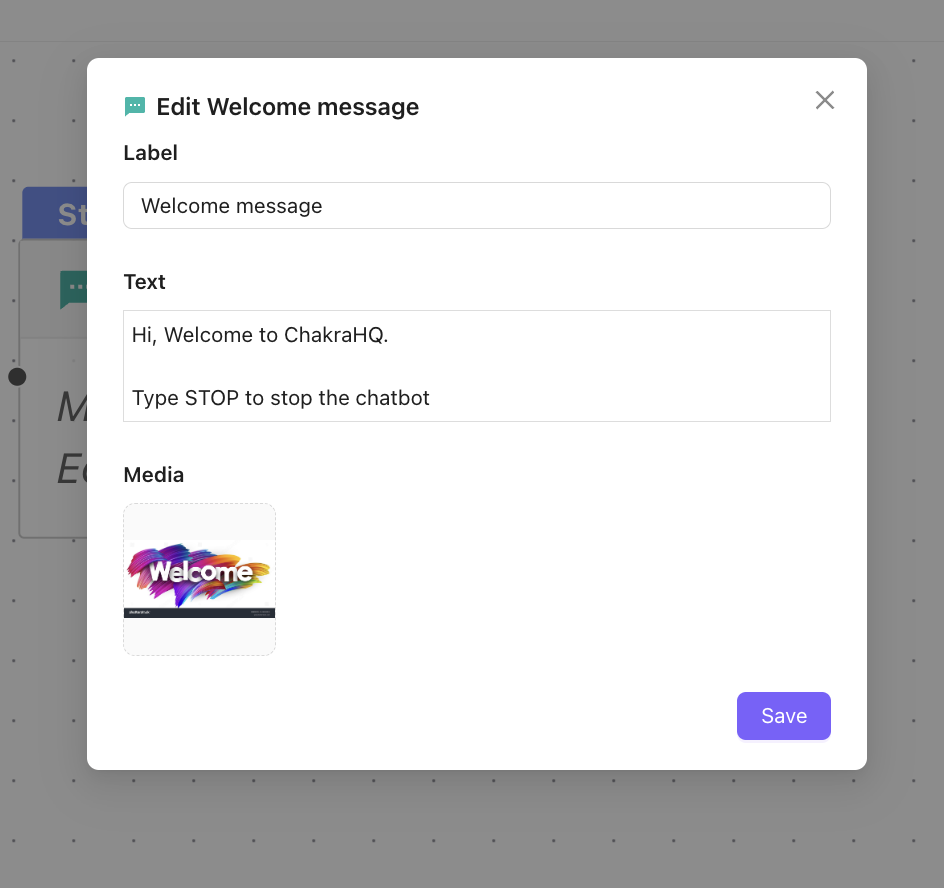
Edit the Welcome message node. Add a label(name), add body text message, and an image (optional) as required
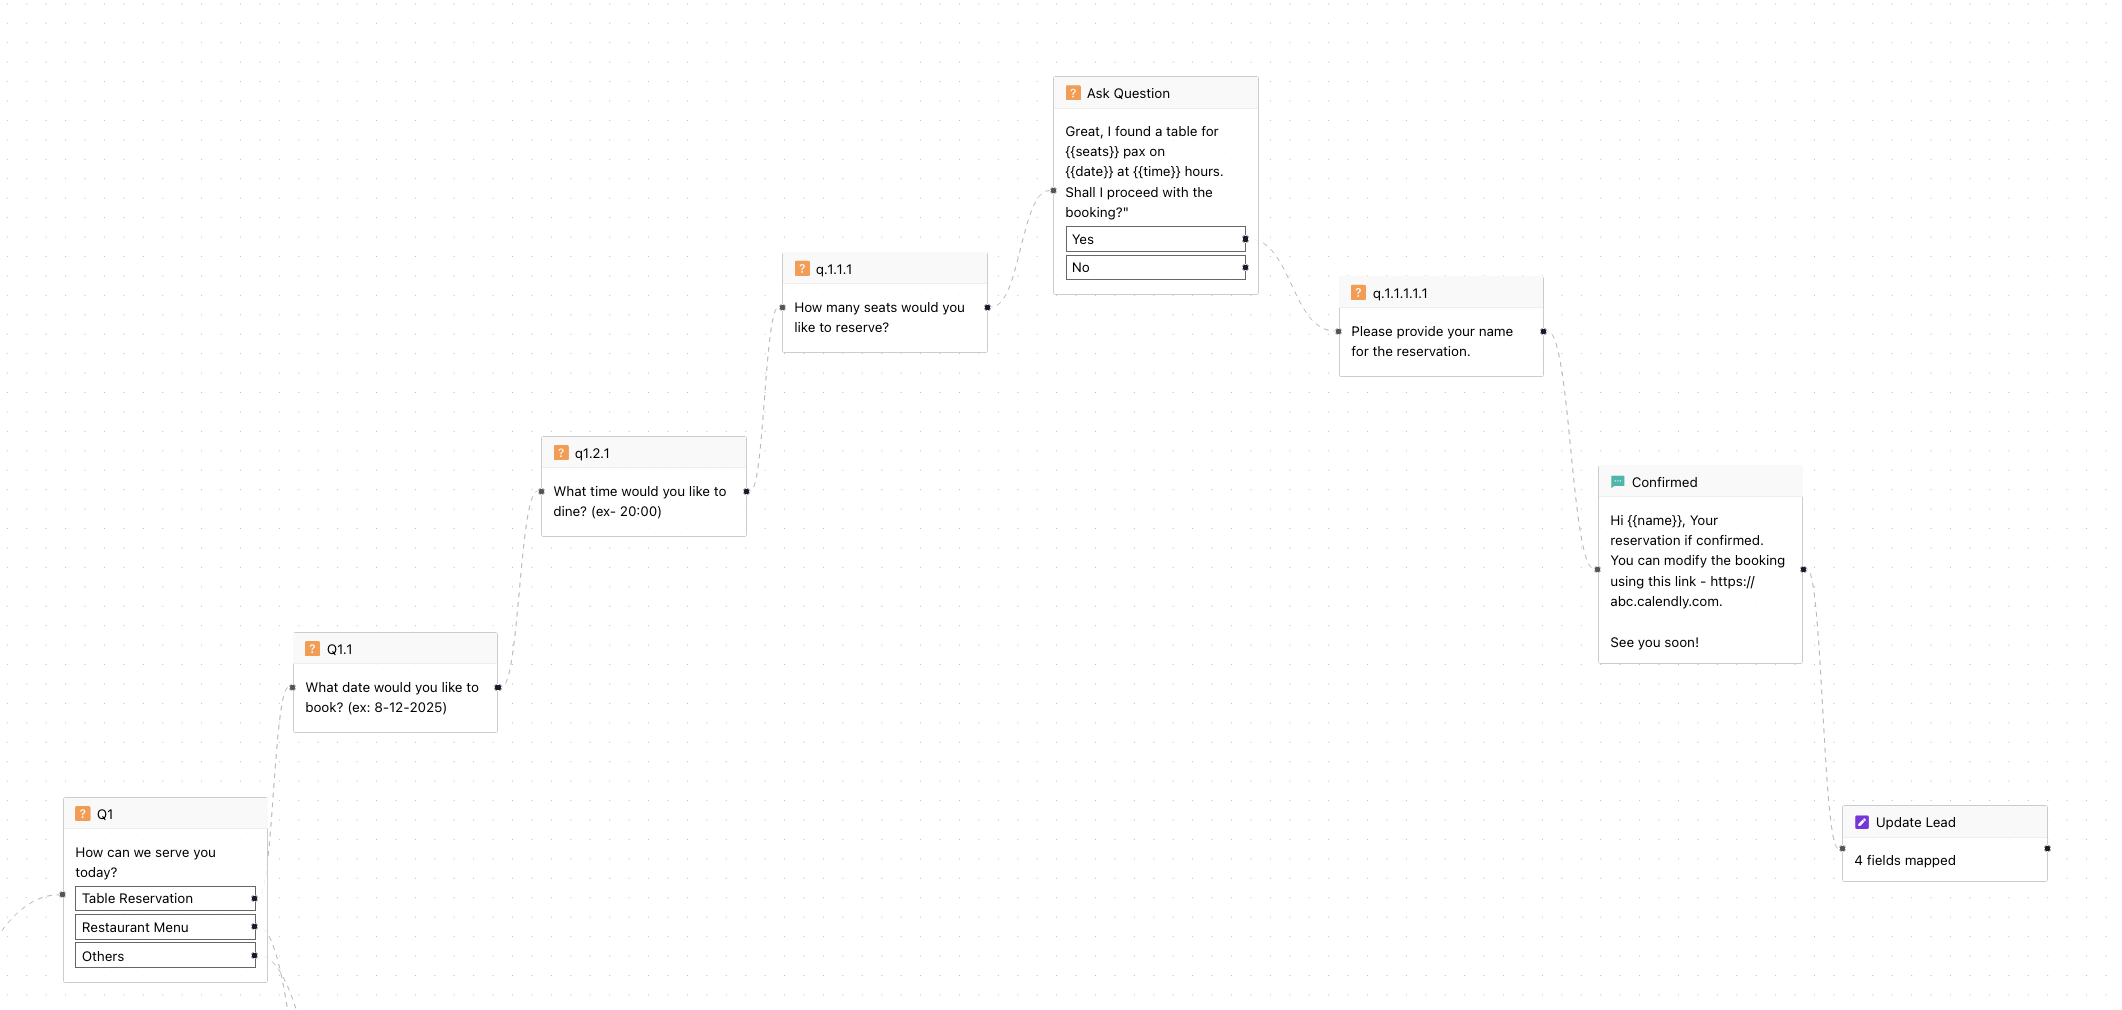
5. Add Nodes
Next, add another node, say the Question node, and connect it with the previous message node with a connector.
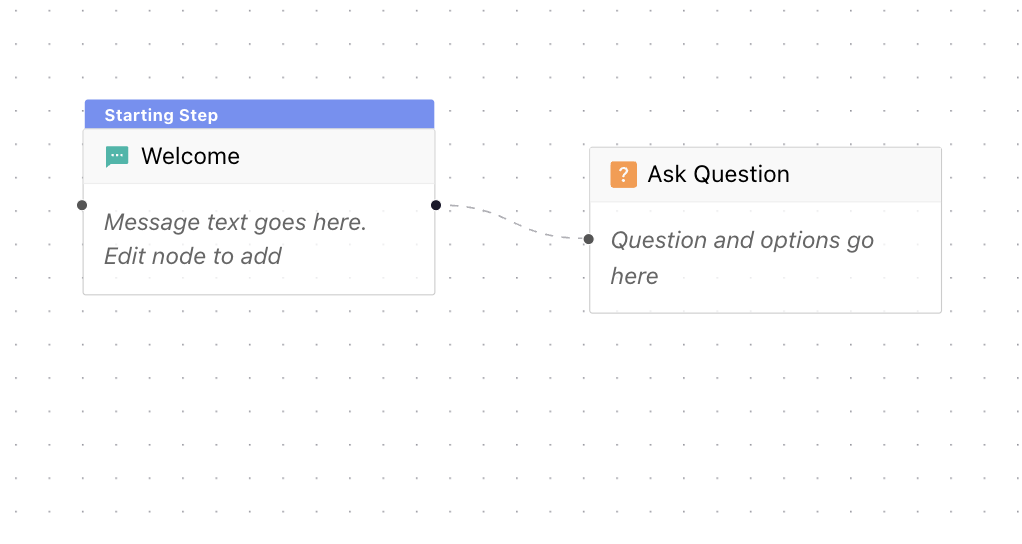
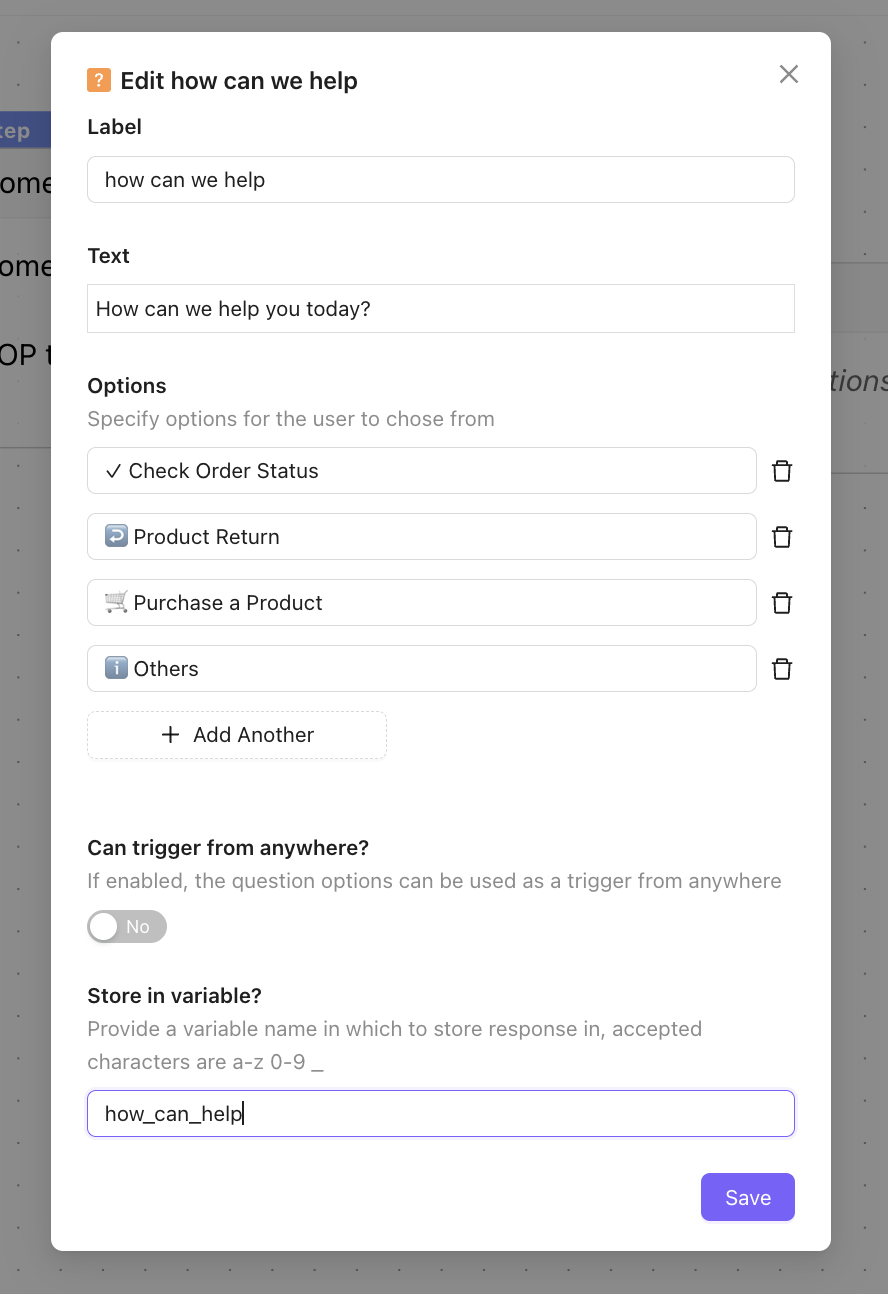
6. Edit the Question Node
Edit the Question Node, add question text and then question node options
- Label: Name of the Chatbot node
- Text: Message Text
- Options: Button option in the interactive chat message
- Can Trigger from Anywhere: To trigger the chatbot multiple time using different buttons
- Store in Variable: Save the chatbot response as a variable
7. Add More Chat Nodes
Similarly, add additional nodes as your chat workflow requires to create a complete chat workflow in the chatbot builder.
8. Add Final Step Node
You can create a Final step (End Step) in the Chatbot to signify the end of the chatbot session to your customer
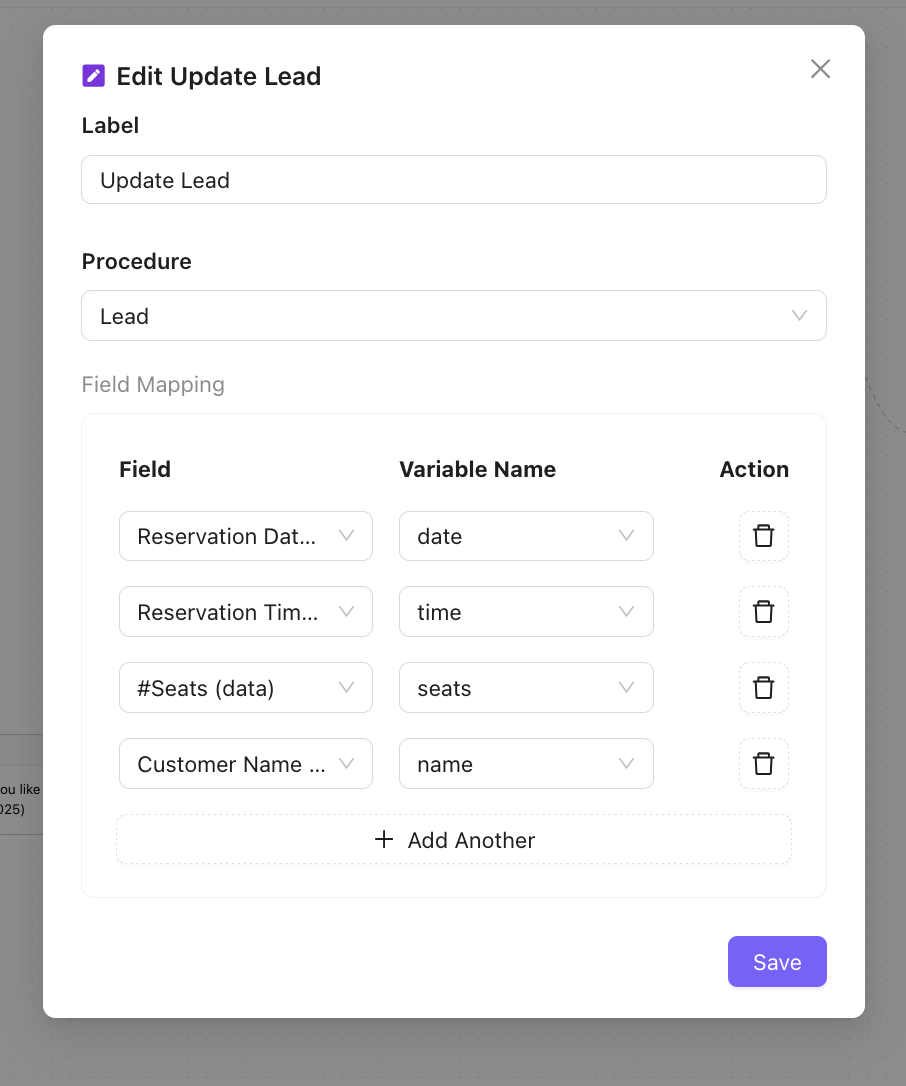
9. Link Chat Responses to Lead
Additionally, if you wish to save the customer responses to the chatbot, use the Upsert Lead node to link the variable in each question node. This will capture the chatbot response in the lead attributes. You may need to create lead attributes for this. For example, if your chatbot flow is asking for a document from the customer, save this in a document format attribute in the lead.
10.1 Add STOP or RESTART Keyword
- Go to ⚙️ in Chatbot Builder
Configure STOP keywords to allow chat customers to skip the chatbot at any time for their convenience. You can also add RESTART keyword to allow restarting a chatbot flow.
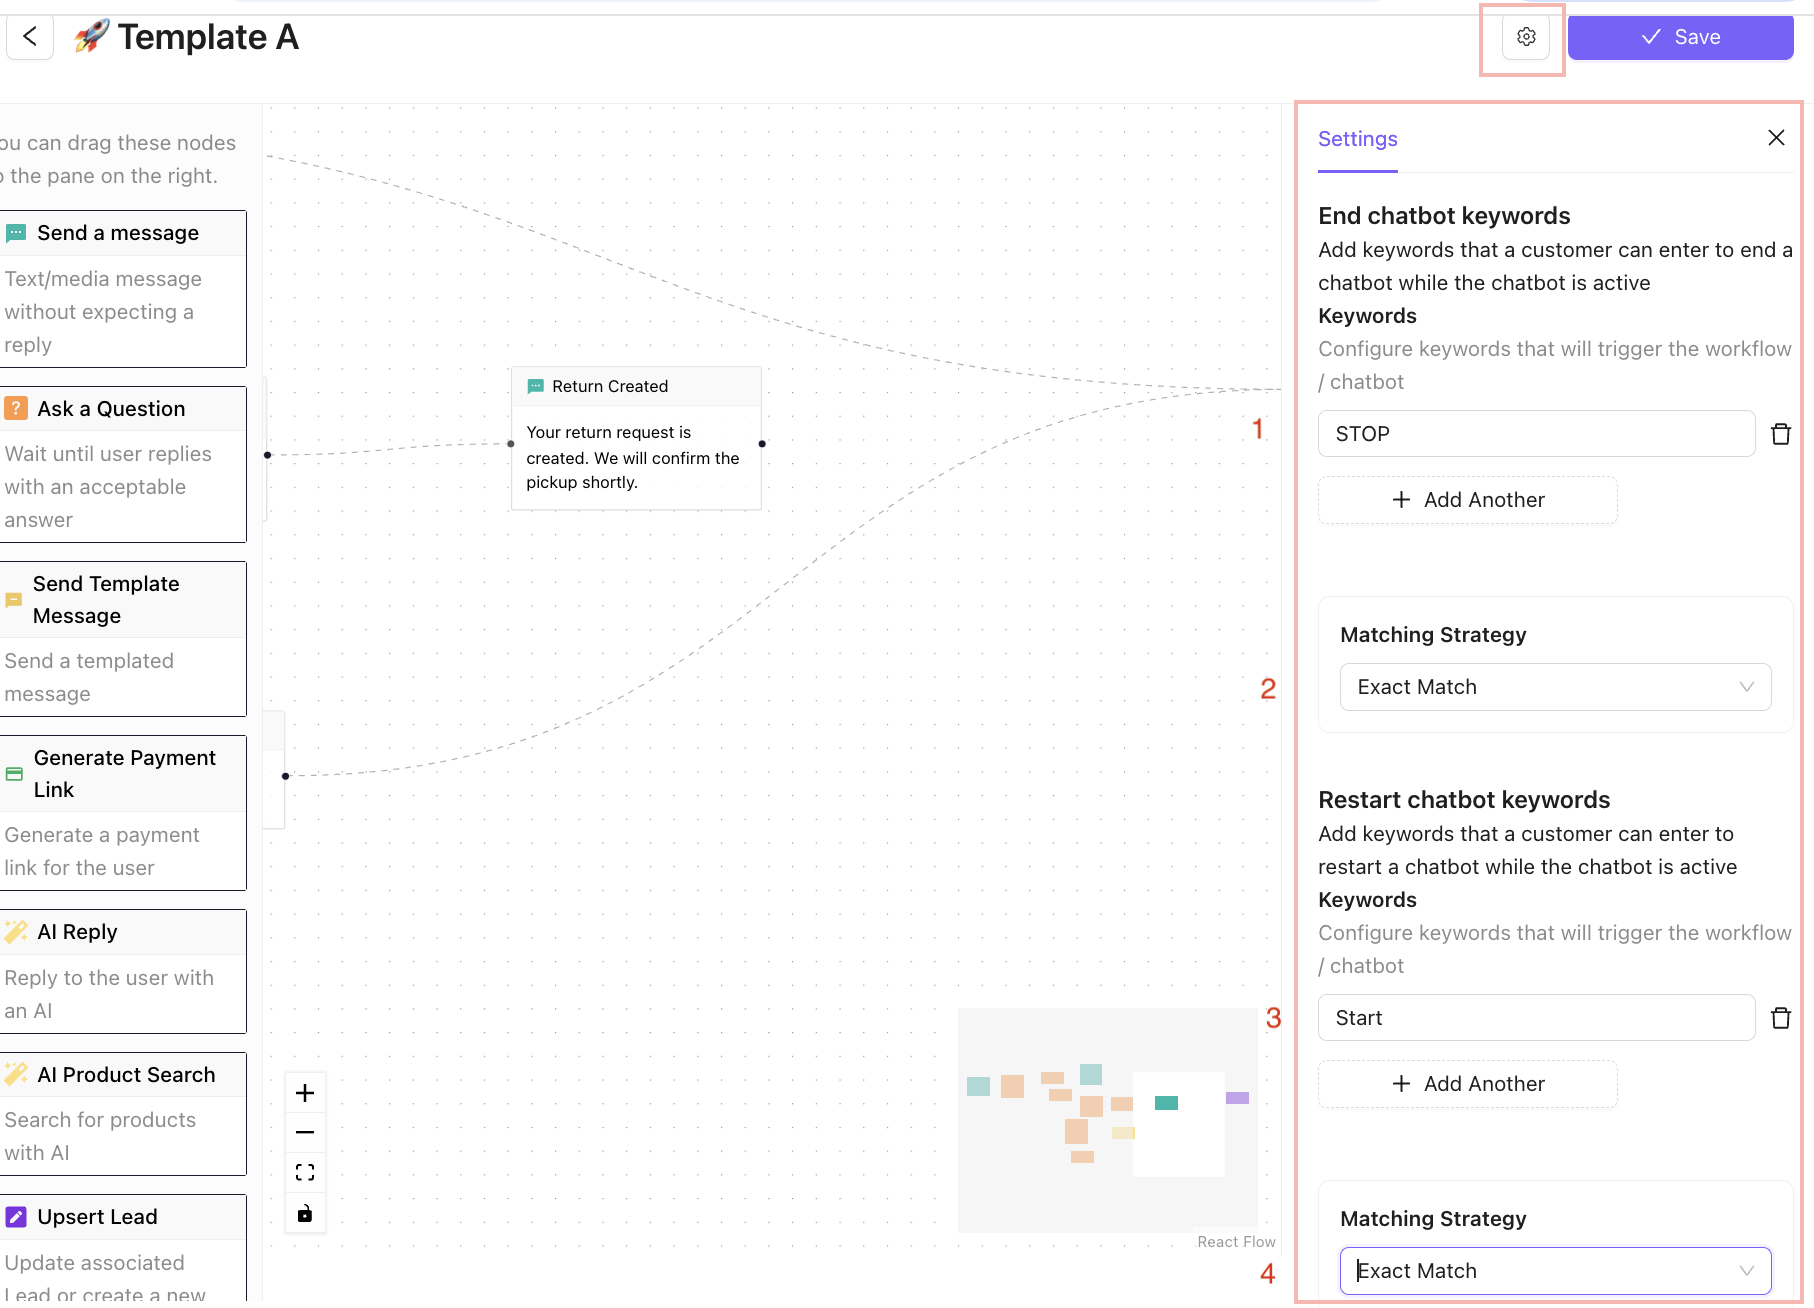
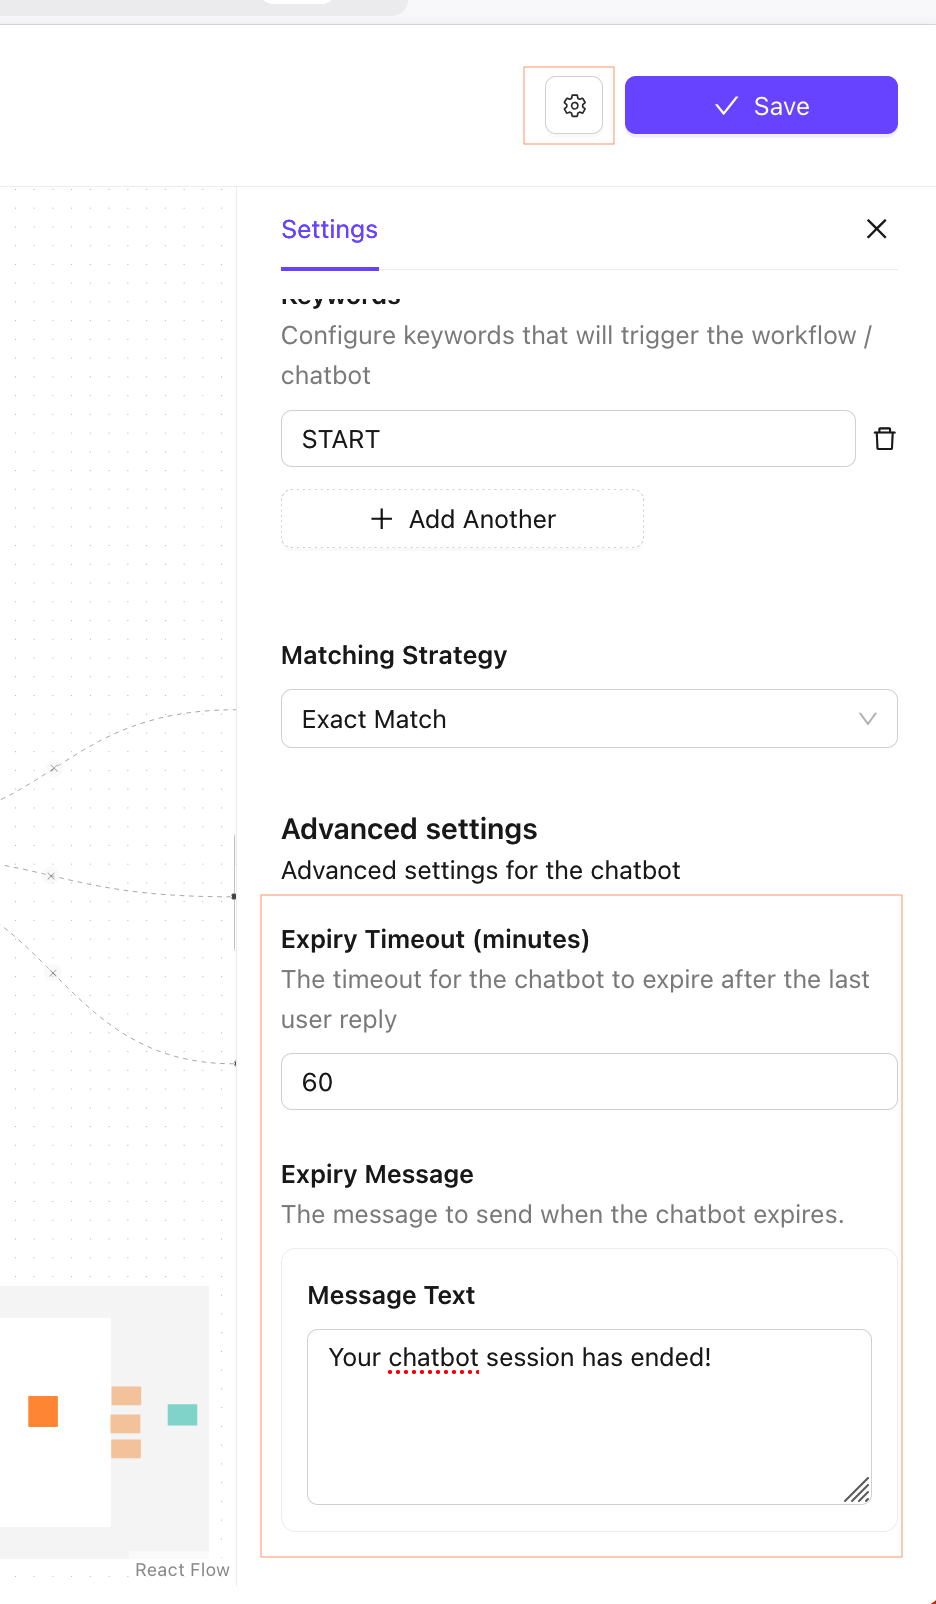
10.2 Add Chatbot Expiry
- Go to ⚙️ in Chatbot Builder
- In the Advanced Setting Section
- Add
Expiry Timeouttime in minuted - Add Chatbot Expiry Message
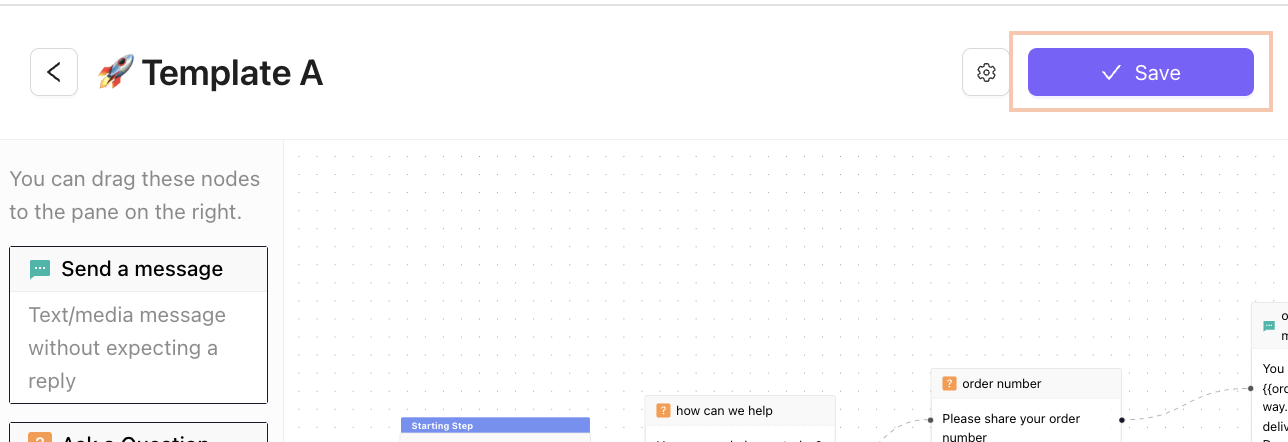
11. Save the Chatbot
Save the Chatbot in the Builder.
12. Add Chatbot Triggers
Go to Chat Automation
Choose an apprpriate Chat Automation Rule. Configure automation for default chat scenarios.
- When a new chat session is opened during off-business hours: This automation will be triggered when a customer messages your team and a new chat session is opened.
- When a new chat session is opened: This automation will be triggered when a customer messages your team and a new chat session is opened. If the off-business hours automation (1) is also configured, then this automation will be triggered only during business hours.
- When customer sends a message during off-business hours and no keyword based chat trigger is invoked: This automation will be triggered every time a customer messages your team during off business hours. This automation is useful to setup an autoamted chatbot like a ticket booking bot.
- When customer sends a message and no keyword based chat trigger is invoked: This automation will be triggered every time a customer messages your team and no keyword based chat trigger is invoked This automation is useful to setup an autoamted chatbot like a ticket booking bot. If the off-business hours automation (3) is also configured, then this automation will be triggered only during business hours.

- Click on
Take Actionand choose Assign to Chatbot - Choose the desired chatbot to assign
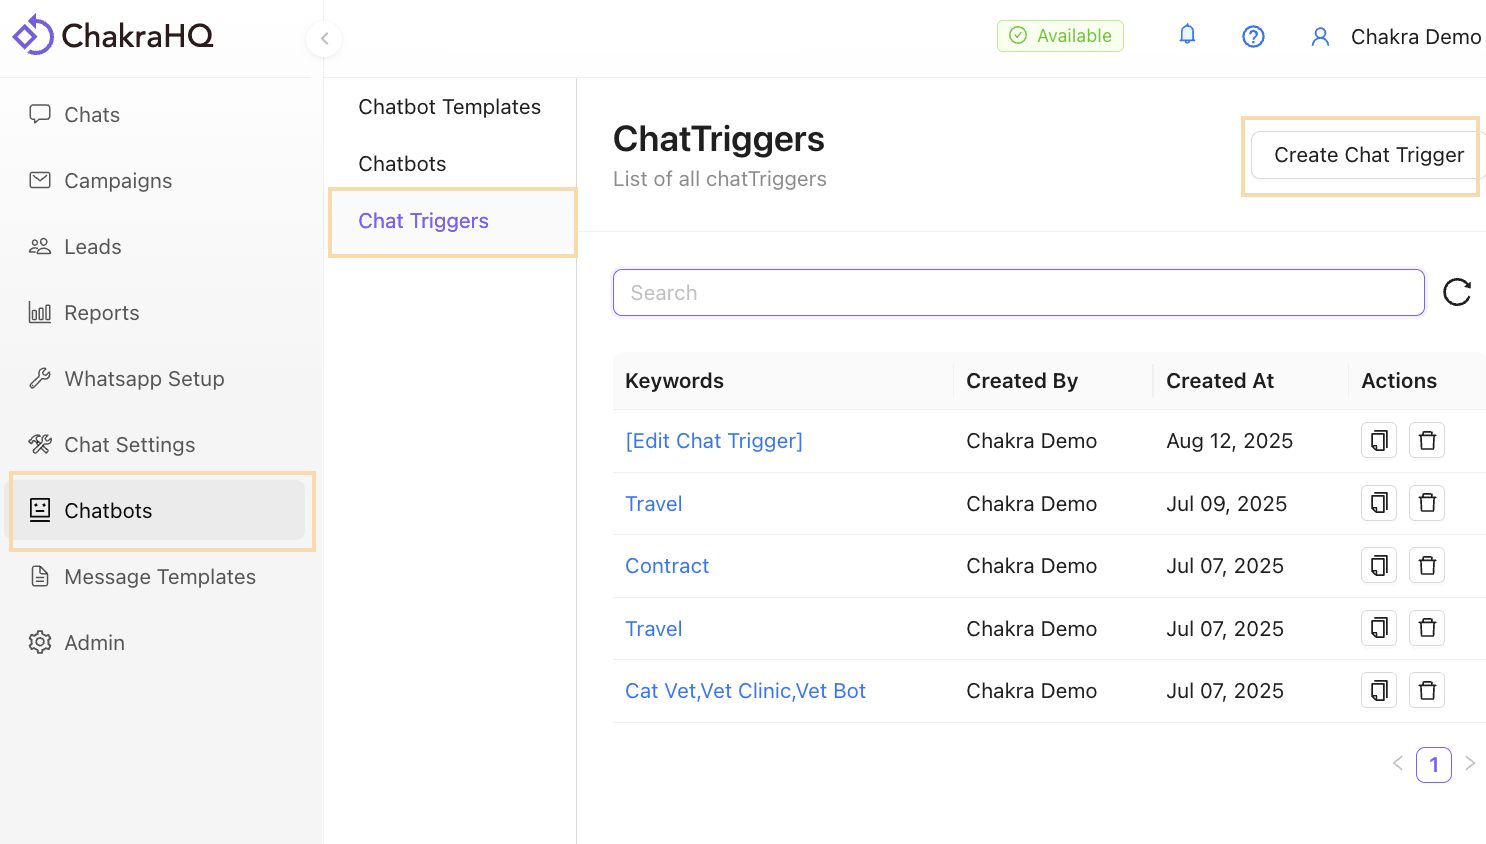
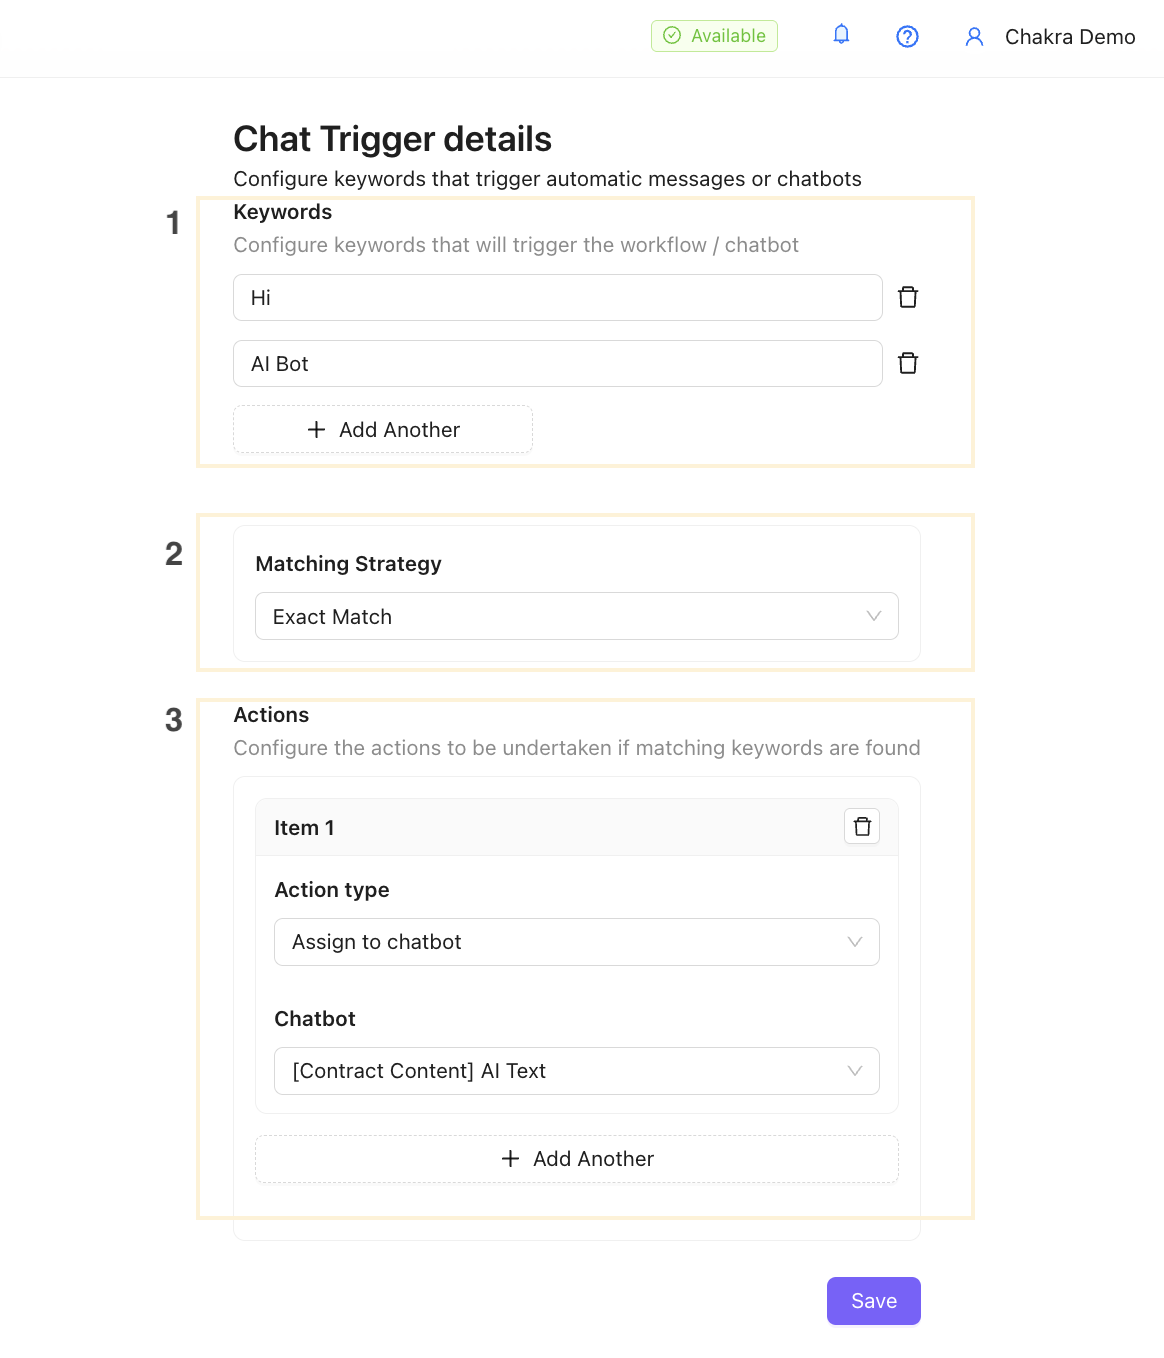
13. Add Keyword Chatbot Triggers
Configure keywords that trigger automatic messages or chatbots
Go to Chat Trigger
13.1 Add a Keyword Chat Trigger
13.2 Configure Keyword Chat Trigger
Your Chatbot is ready and live in action. Test the chatbot and get going.