Shared Chat Inbox Overview
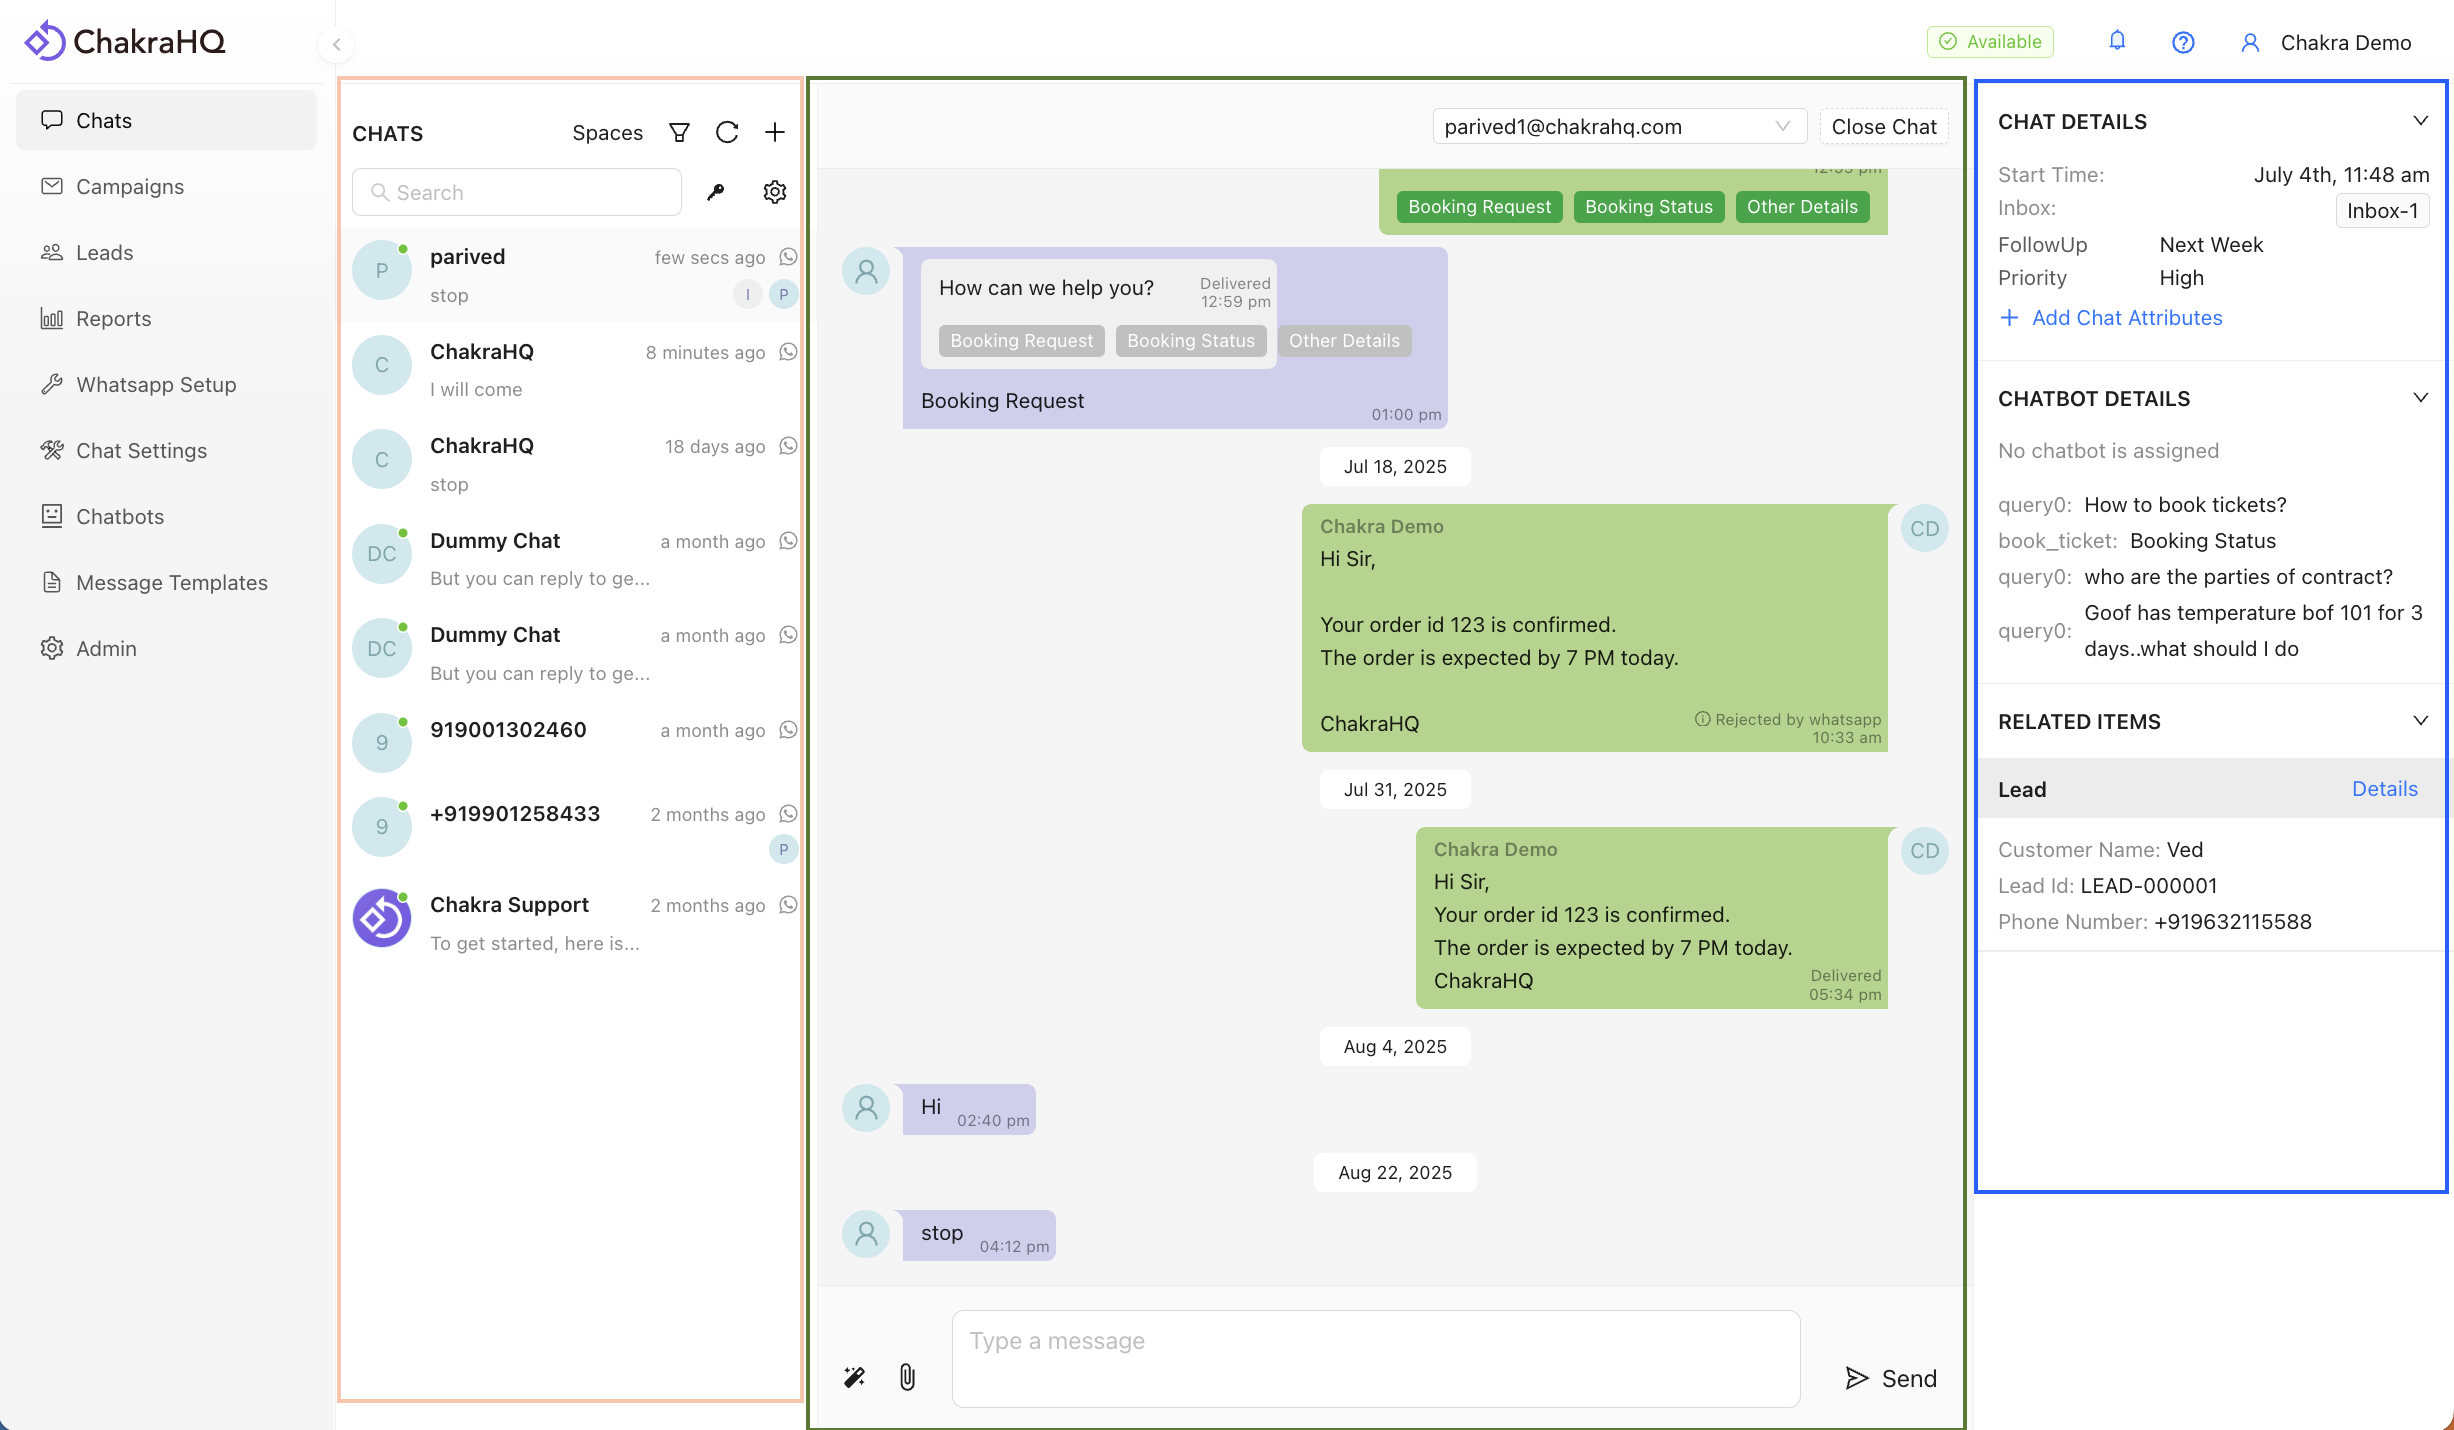
The Shared Chat Inbox in Chakra provides a unified workspace to manage all customer conversations efficiently. It centralizes chat interactions, enabling actions like applying filters, accessing leads, tagging chats, and leveraging AI assistance. The Shared Chat Inbox is divided into three key sections:
- Chat List: Displays all customer conversations.
- Chat Window: Facilitates message composition and conversation history.
- Chat Details: Provides additional context and tools for managing chats.
1. Chat List
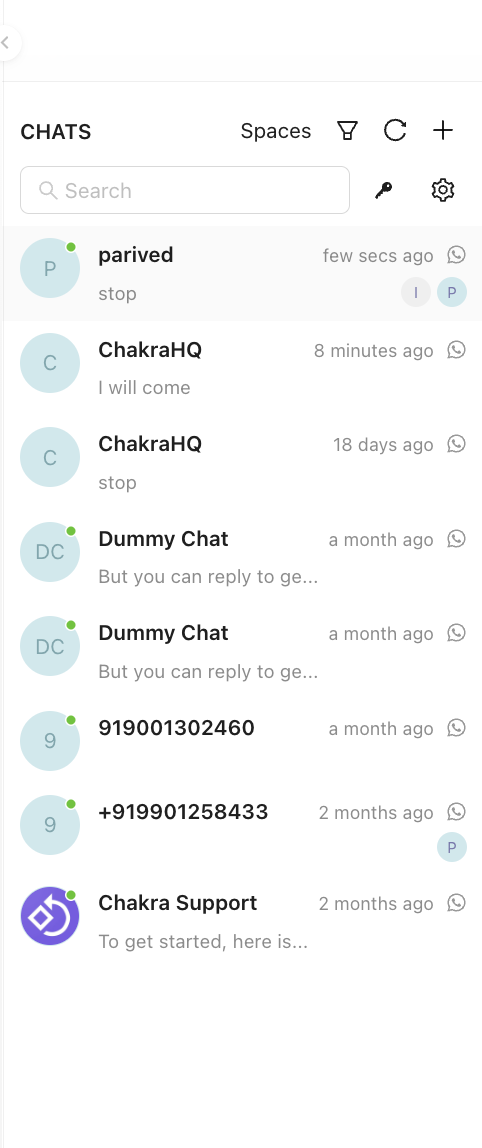
The Chat List organizes all customer conversations in a single, accessible view.
1.1 Chat List Action Buttons
Interactive buttons in the Chat List to manage and organize chats and enable other settings.

1.2 Chat Filters
Filter chats based on specific criteria to display only relevant conversations. For example, setting chatStatus==OPEN shows only open chats. Available filter attributes include: Status, Assigned User, Chat Tags, Read/Unread Chats.
1.2.1 How to Add a Chat Filter
-
Click the
▽icon. This opens a Filter configuration drawer on the right side.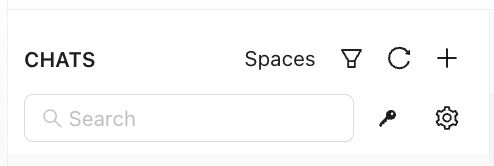
-
Click
Add Rule. Select afieldfrom the options, add the operator (==, !=, Any in, etc.), and then select or input the value.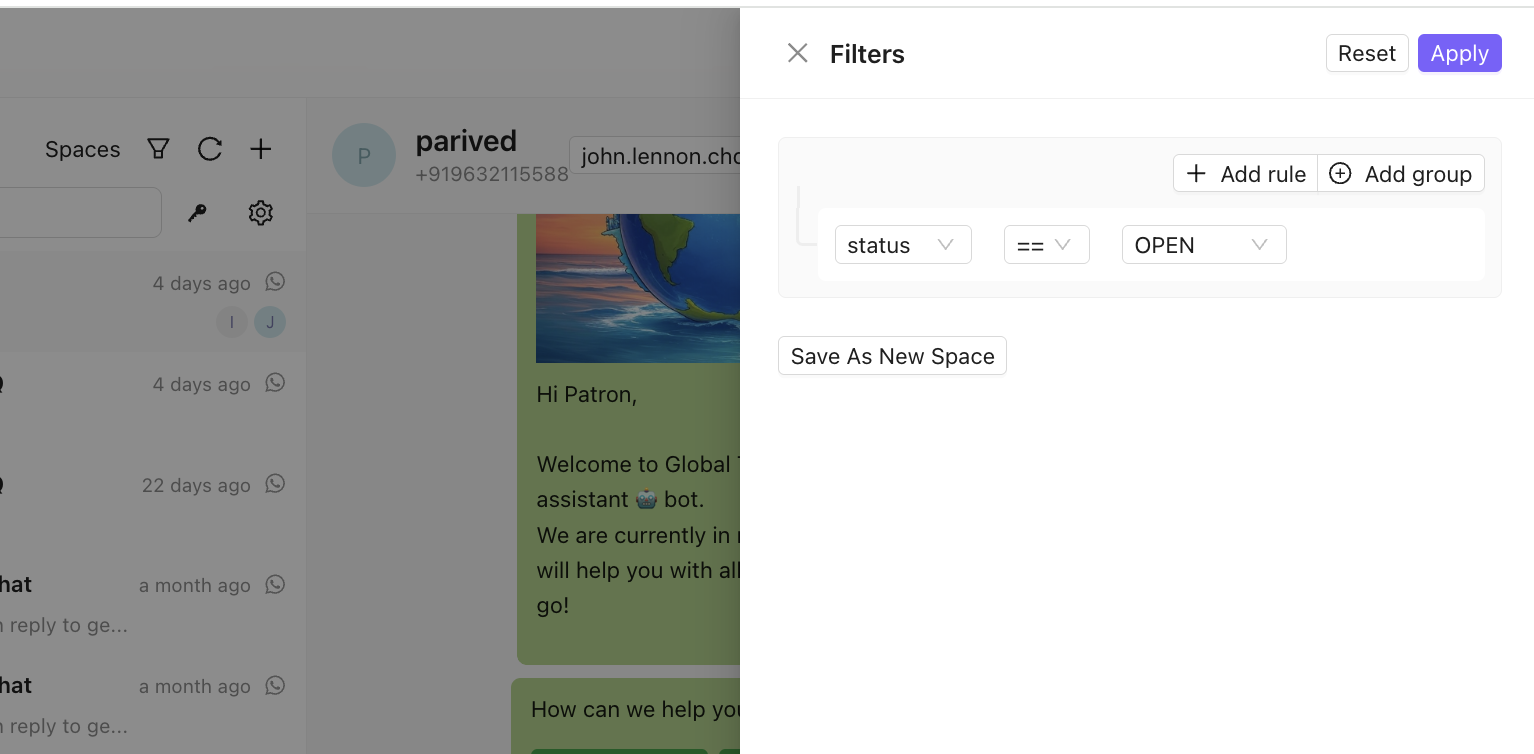
-
Click
Apply.
The applied filter will be reflected in the Chat List.
1.3 Chat Spaces
Save frequently used filter sets as "Chat Spaces" for quick access. For instance, create an Unreplied space to prioritize chats needing immediate responses.
1.3.1 How to Create a Chat Space
-
Click the
▽icon. This opens a Filter configuration drawer on the right side.
-
Click
Add Rule. Select afieldfrom the options, add the operator (==, !=, Any in, etc.), and then select or input the value. -
Click
Save as New Space. This opens a pop-up window to configure the new space.
-
Add a
label(name) to the space and configure it for yourself or a wider team. ClickSave.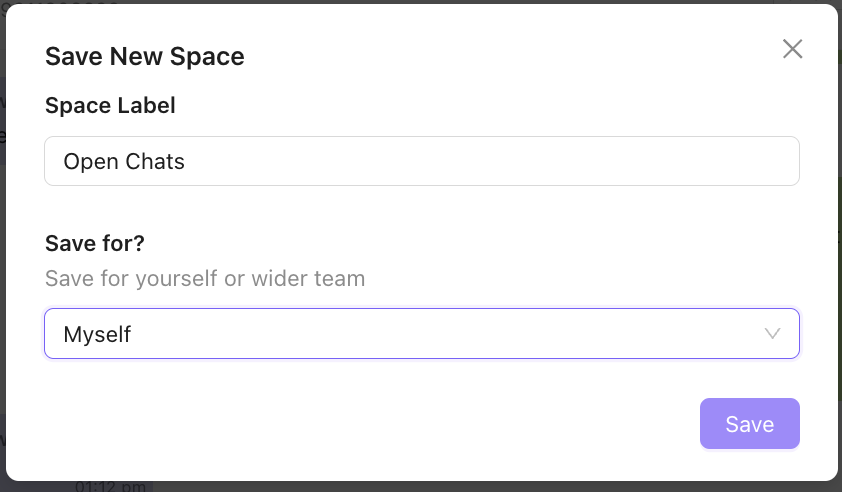
-
Click
Applyin the Filter configuration drawer.
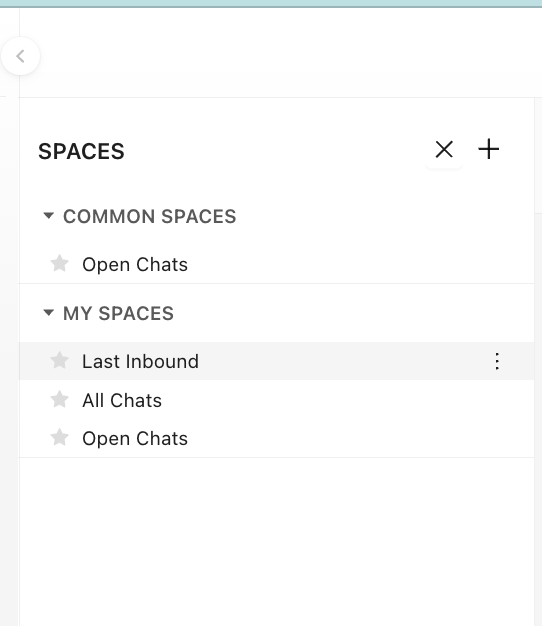
1.3.2 How to Apply a Space
-
Click
Spaces. -
In the Spaces list, click the relevant space. The selected space is applied to the Chat List.
1.4 Chat Refresh
Update the Chat List to reflect the latest messages and changes without reloading the entire page.
- How to Refresh: Click the
⟳icon in the Chat List action header.
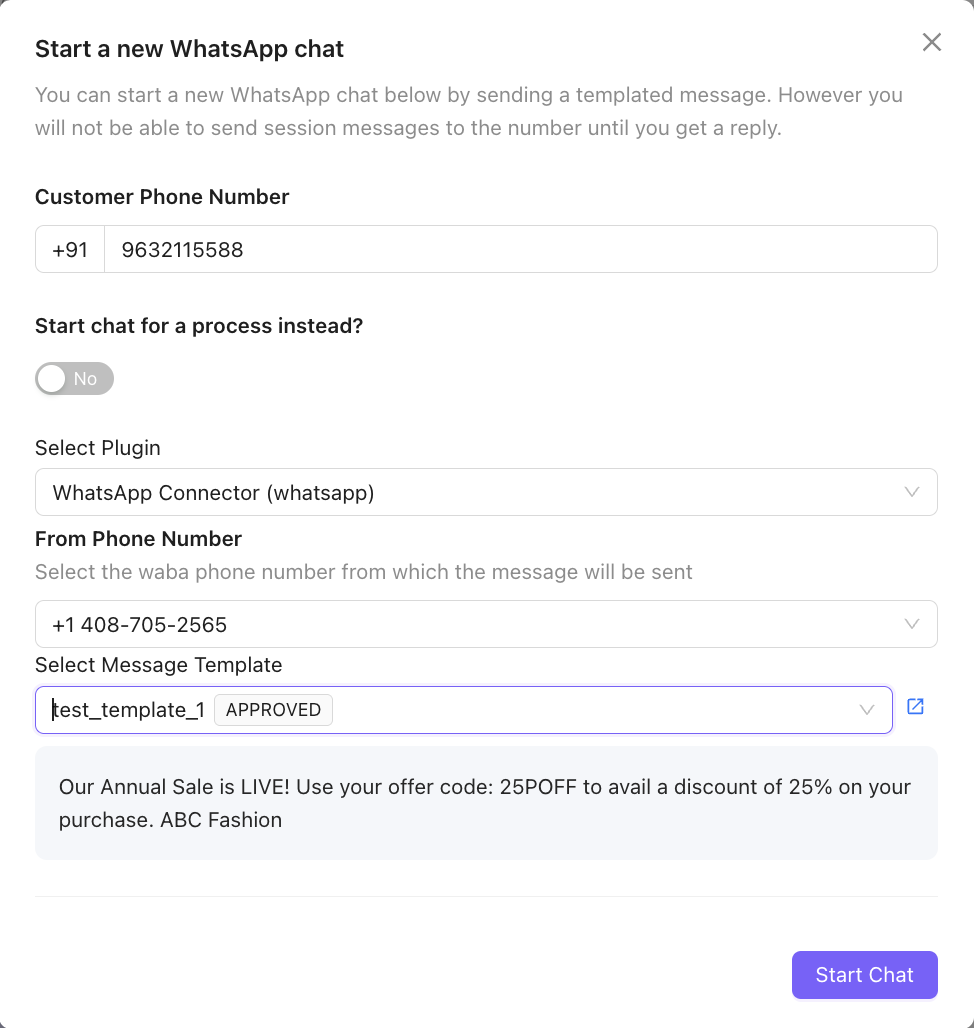
1.5 Start a New Chat
Initiate a new chat using a template message directly from the Chat Inbox, bypassing the need for a campaign broadcast.
- How to Start a New Chat:
-
Click the
+icon and selectStart New WhatsApp Chat.
-
Enter the customer’s phone number or search for an existing contact.
-
To use an existing lead, select
Start chat for a process insteadand choose a lead. If no lead exists, use theAdd Newoption to create one.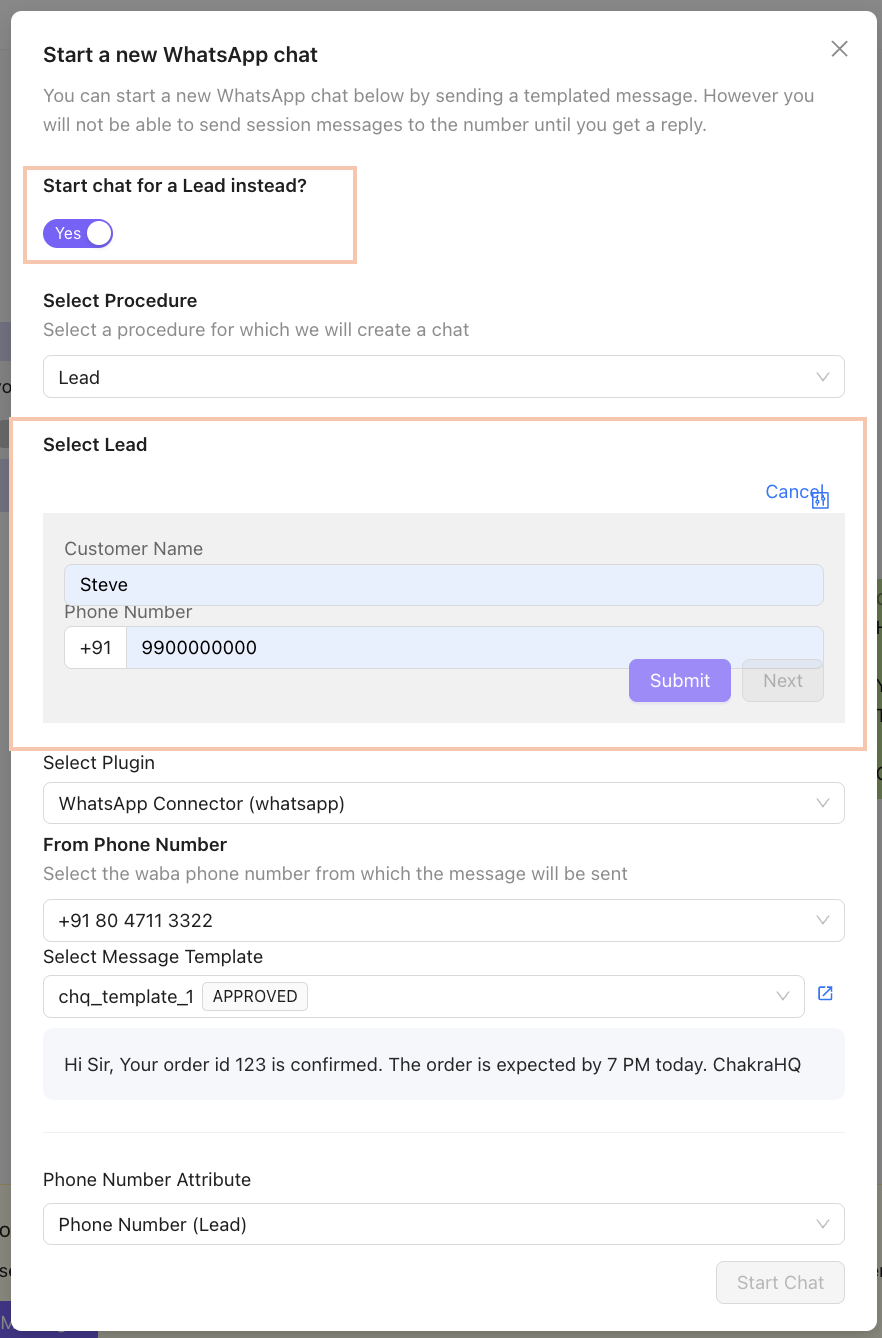
-
Select the appropriate WhatsApp Plugin and Phone Number (defaults are preloaded).
-
Choose a message template.
-
Click
Start Chat.
-
1.6 Chat Notification Settings
Enable notifications for all chats, not just those assigned to you.
-
How to Enable All Notifications: Click the
⚙️icon and toggle notifications for all chats.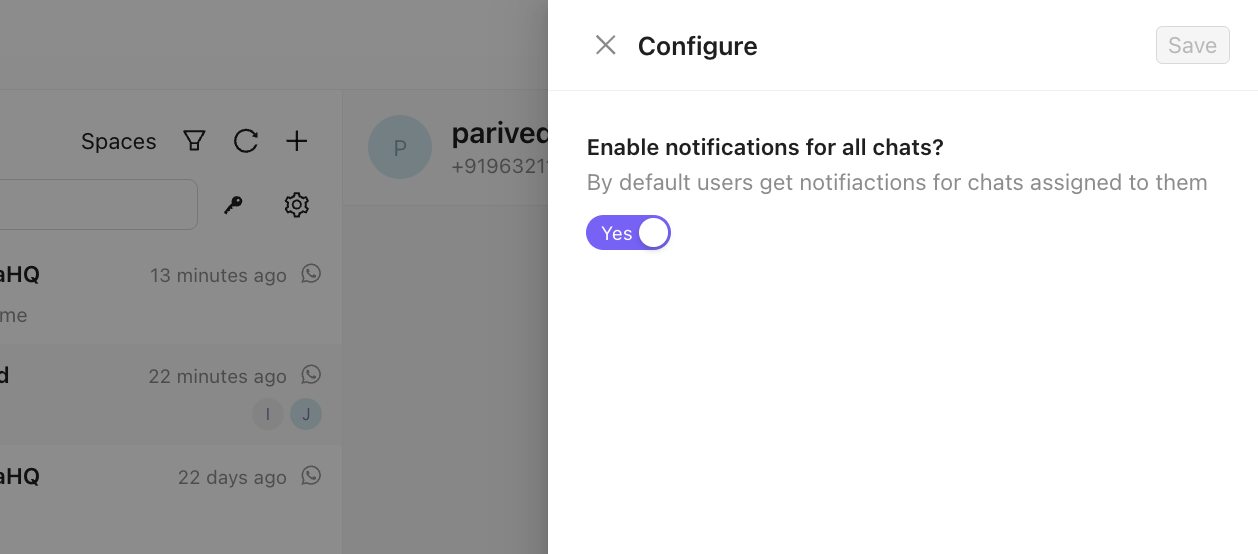
1.7 Manage Chat Access Control
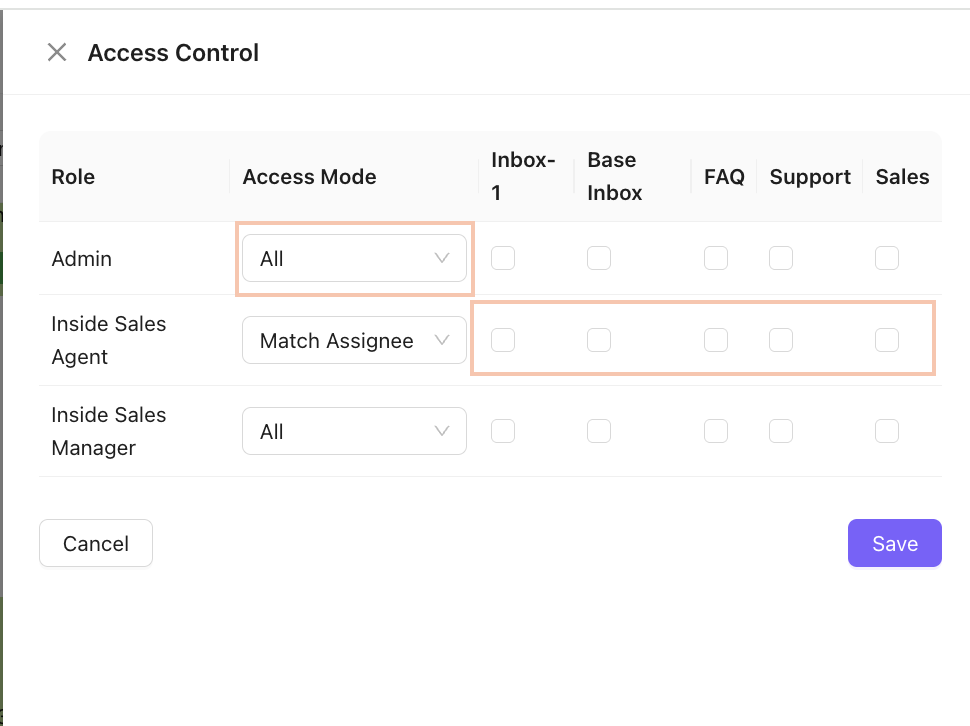
Control which users can view or interact with specific chats based on criteria like assignment or chat inbox.
How does the chat access control work?
- To give access to all chats for a specific chat inbox
Select access mode-Alland check the specific inbox/s - To give access to only the assigned chats for a specific chat inbox
Select access mode- Match assignee and check the specific inbox - To give access to All chats of all inboxes
Select access mode- “All” and check all the inboxes - For any access mode, if NO inbox checkboxes are selected
ALL chats from all inboxesare shown - If no access control is specified, then the following rules are followed
Adminsand 'managers' see all the chatsStandardusers only see chats assigned to them - How to Manage Access:
-
Click the
⋮icon and thenAccess Control.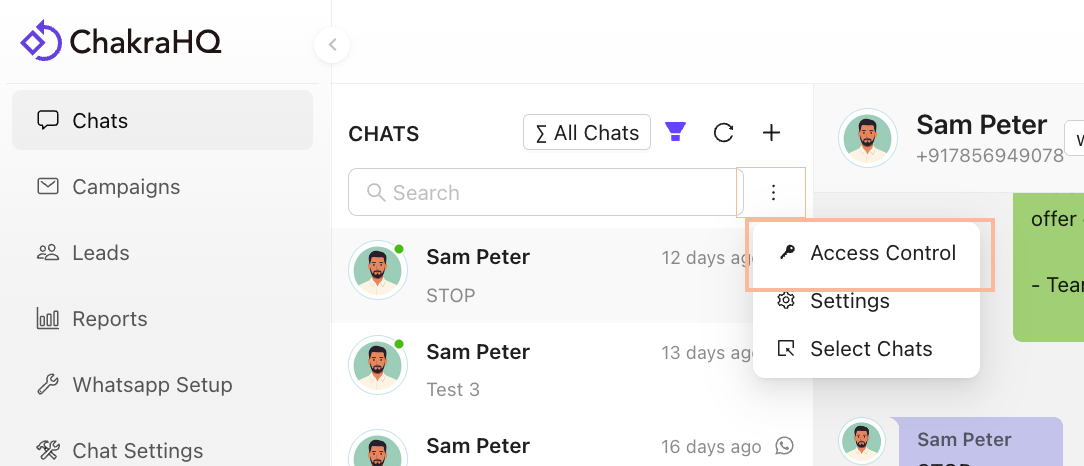
-
Set Access Mode:
- All: Grants access to all chats for users in the role.
- Match Assignee: Limits access to chats assigned to the user.
-
Under Chat Inbox Access, select specific inboxes to restrict access. By default, all roles have access to all inboxes.
-
1.8 Chat List Search
Quickly locate a chat by typing the customer’s WhatsApp Display Name or phone number in the search bar.
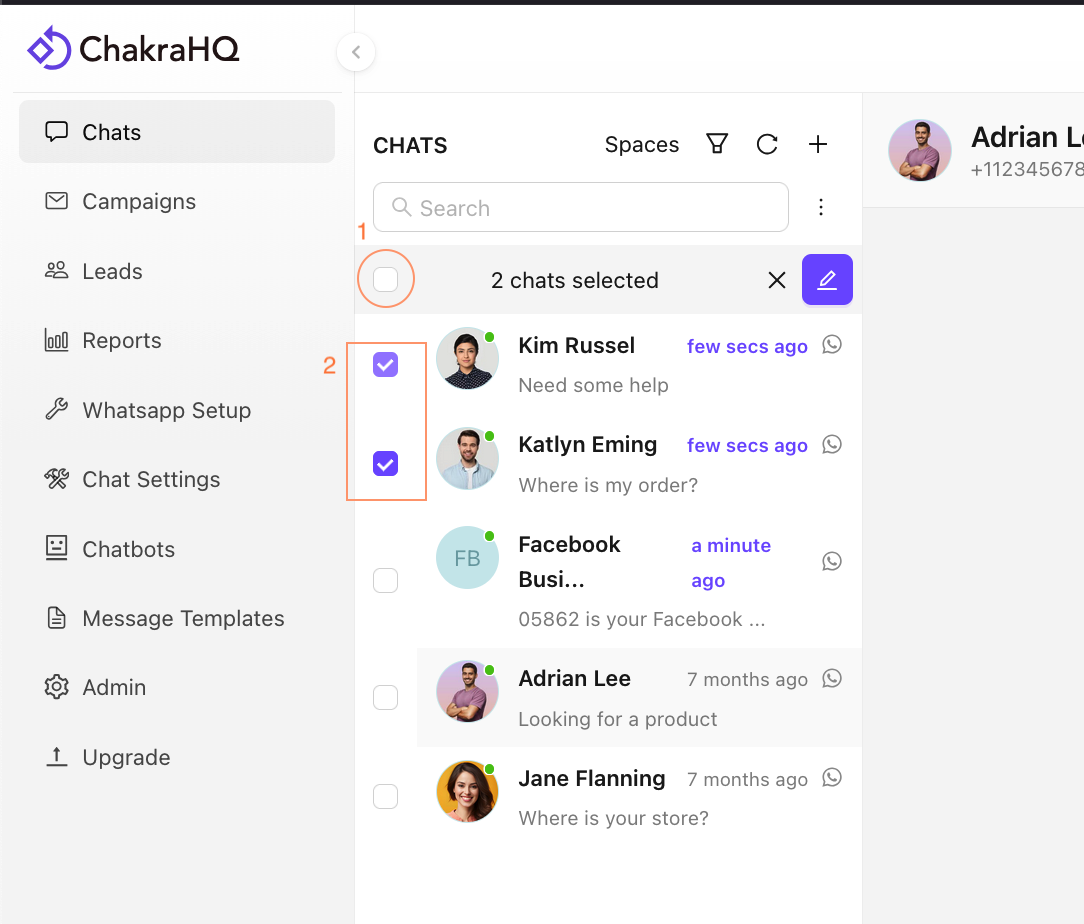
1.9 Chat List Bulk actions
1. Access Select Chats
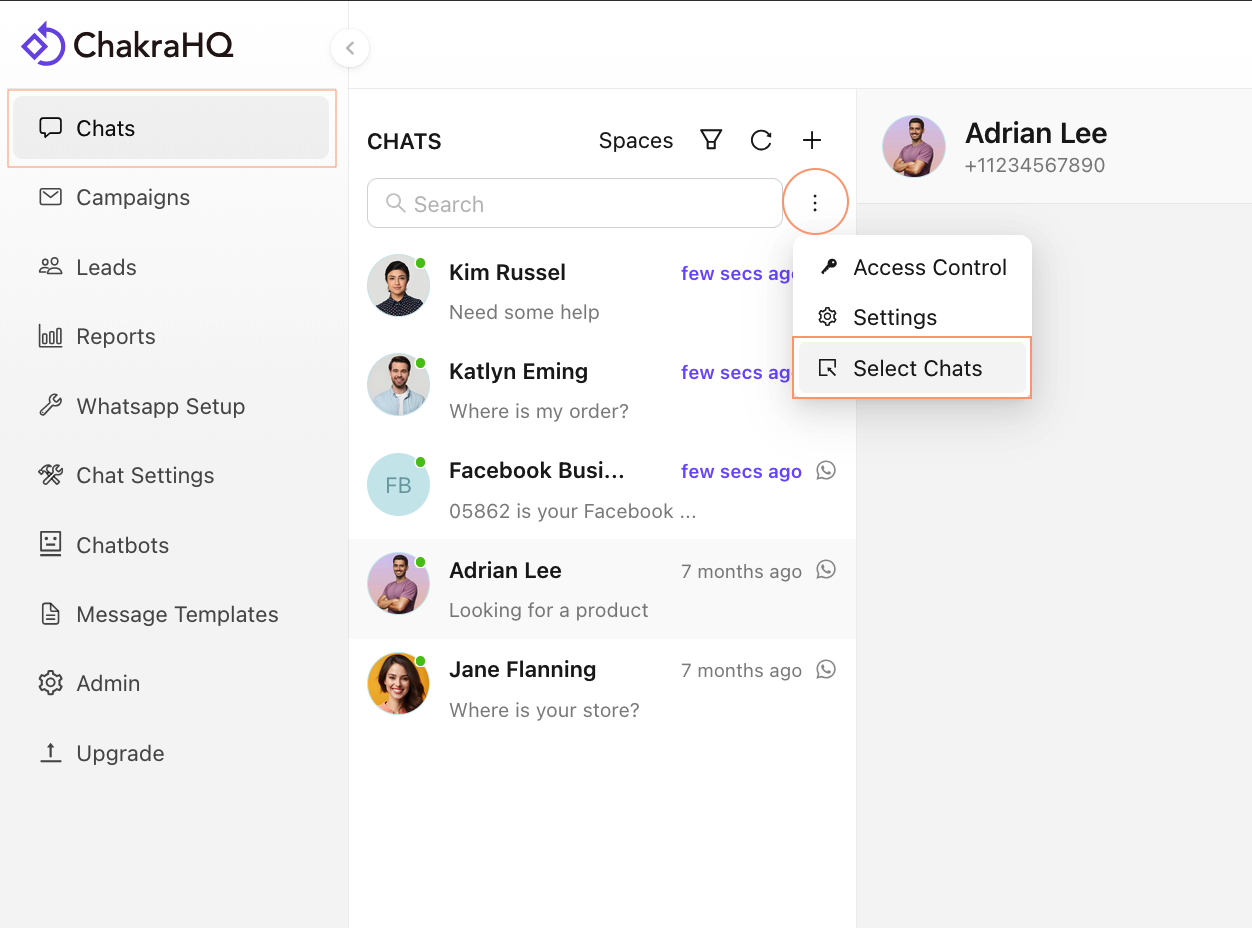
2. Select Chats
-
- Choose
Select AllChat option at the top of the Chat List using ☑ OR
- Choose
-
- Select Chat individually ☐ by clicking the each checkbox
3. Choose Bulk Action
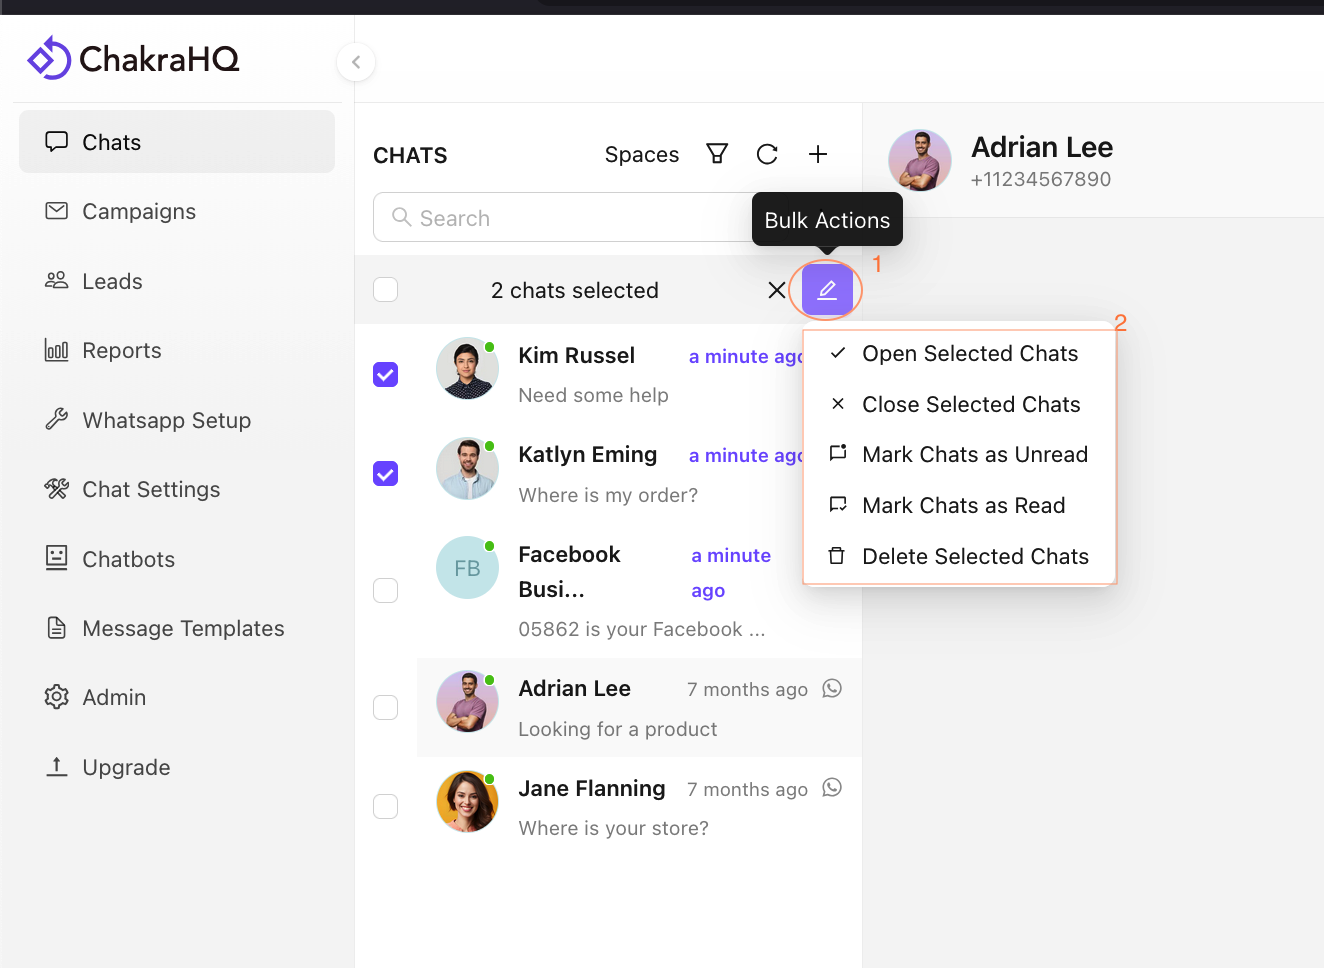
- Type of Bulk Chat Actions:
- ✓ Open Selected Chats
- × Close Selected Chats
- ✘ Mark Chats as Unread
- ✓ Mark Chats as Read
- 🗑️ Delete Selected Chats
2. Chat Window
The Chat Window is the central interface for typing messages, viewing conversation history, and managing chat-related actions.
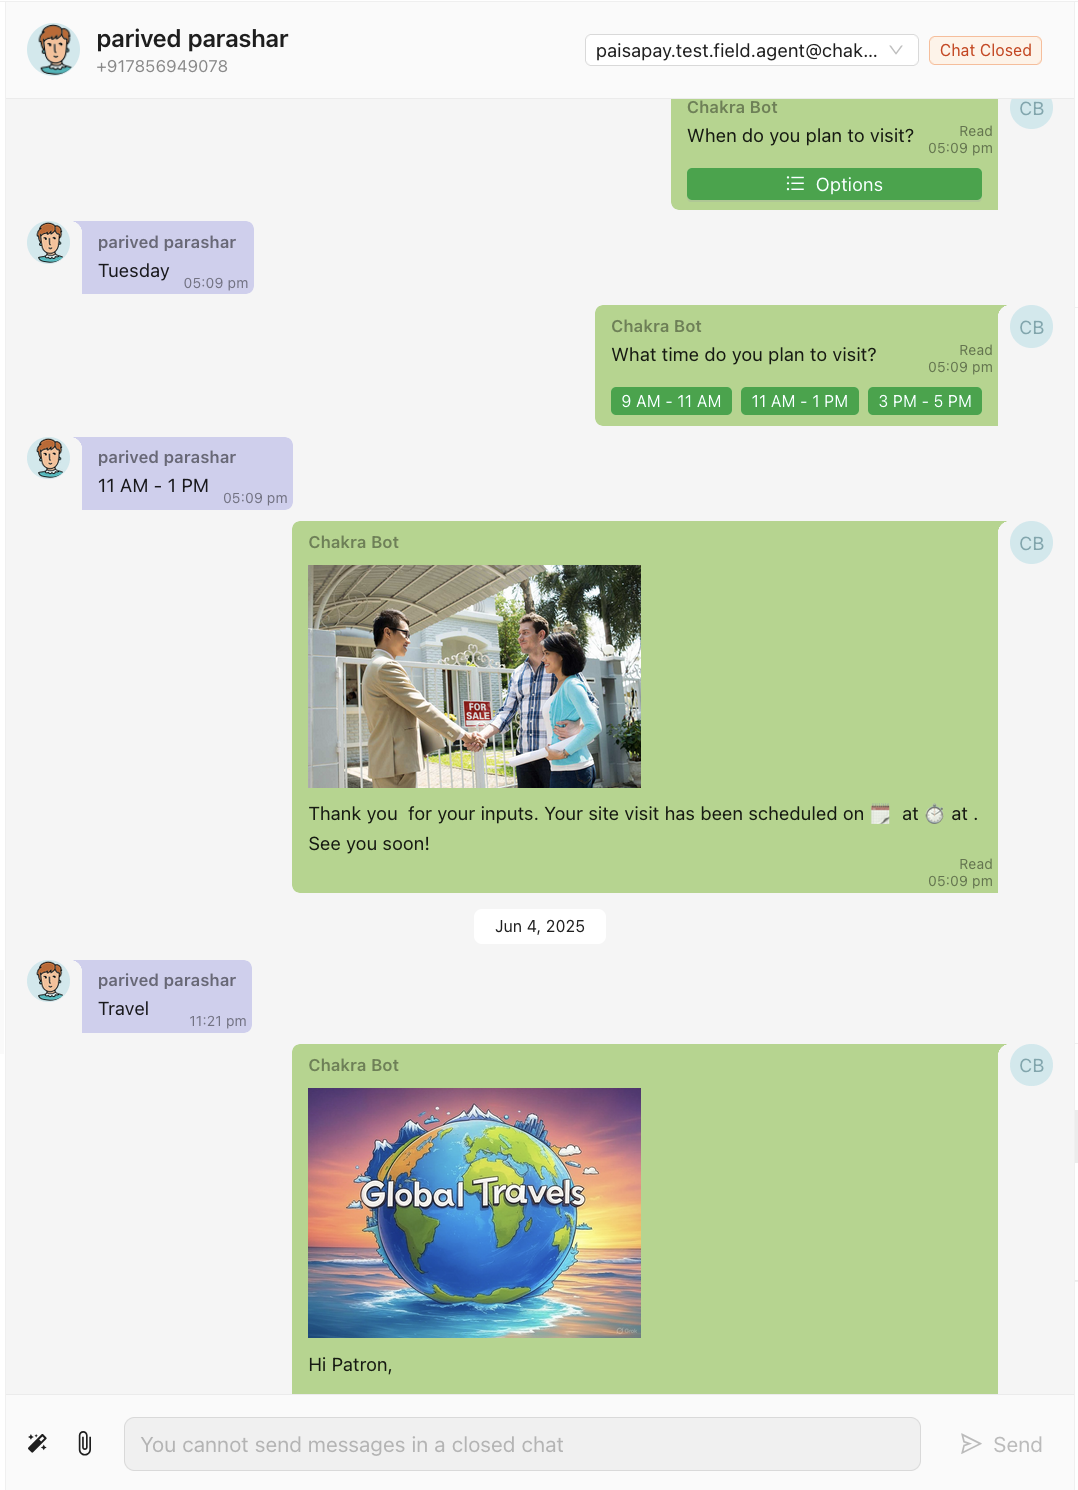
2.1 Chat Window Header
The header displays key information and actions:
- View the customer’s WhatsApp Display Name and phone number.
- Access the contact in the contact list.
- Assign or reassign a chat to a user.
- Close an active chat.

2.2 Chat Conversation Window
This section shows the full conversation history with timestamps and avatars for both the user and the customer.

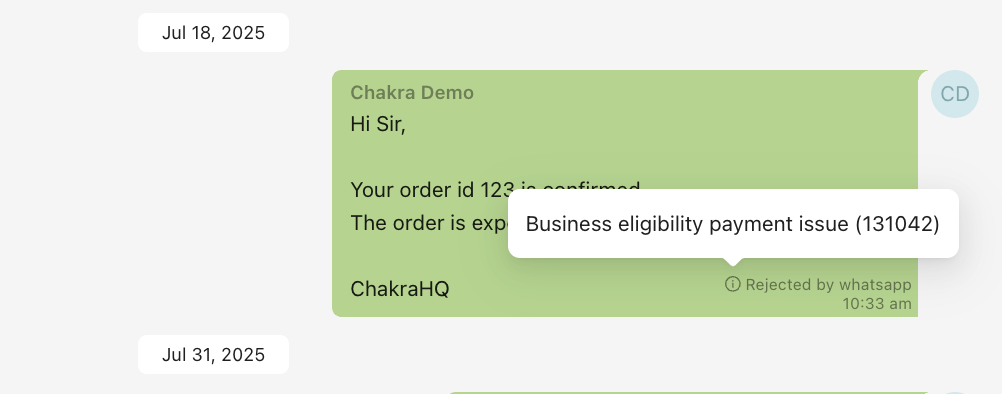
2.3 Check Chat Message Delivery Status
Check the delivery status of messages below the chat message box. For rejected messages, click the ⓘ icon to view the rejection reason.
2.4 WhatsApp 24-Hour Session Window
A WhatsApp chat session begins when a customer messages and lasts 24 hours from their last message. If the session expires, free text messaging is disabled, and you must use a template message to restart the conversation. Chakra automates this by disabling the text input field for expired sessions and displaying a template message widget.
- Note: Sending a template message does not reopen the free text window unless the customer responds.
2.4.1 Send a Template Message for a Closed Session
-
Click
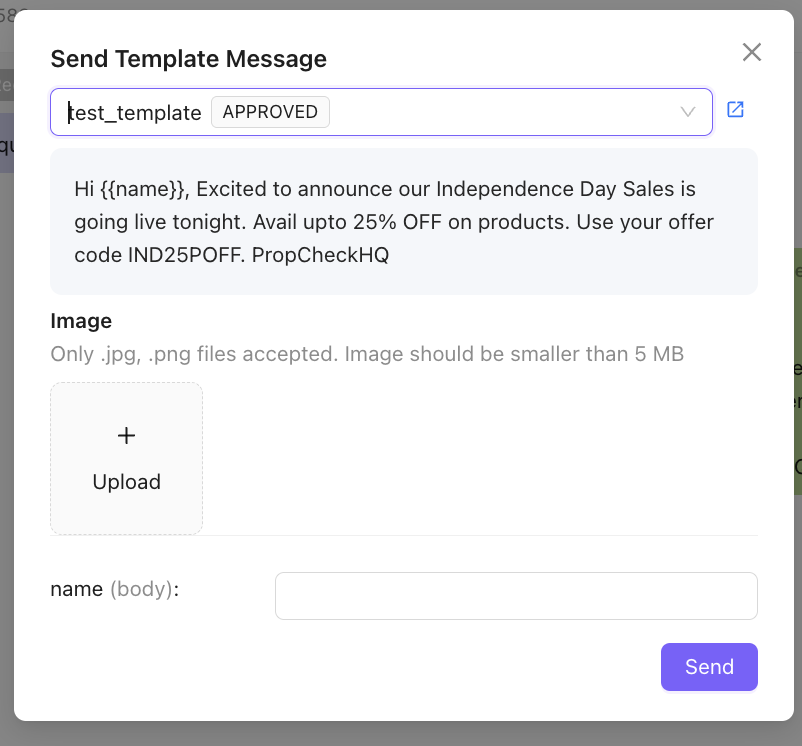
Send template messagein the widget if the chat session is closed.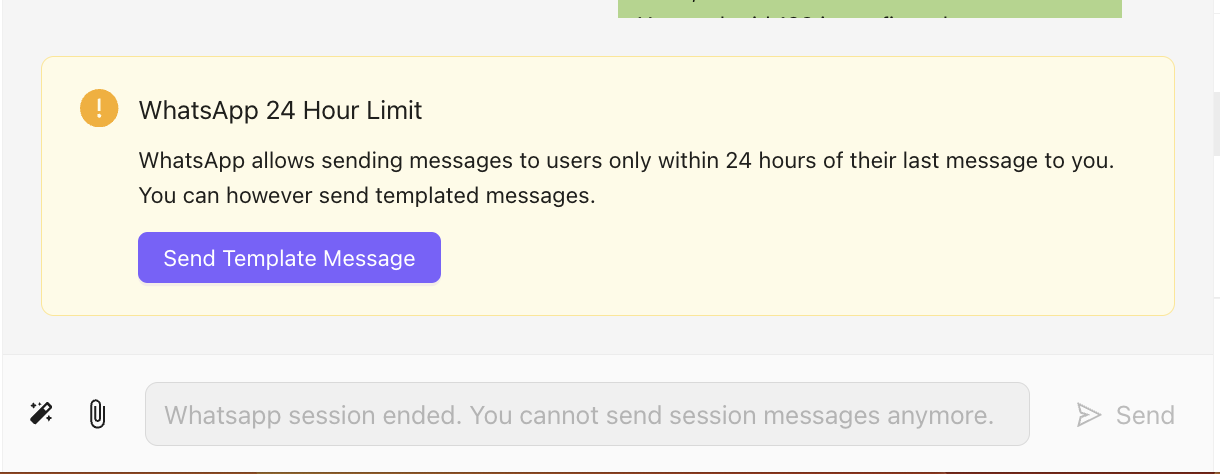
-
Select the desired template.
-
Add any required variables (e.g., image attachments or personalized text).
2.5 Text Message Input
Type and send messages directly to the customer. Two quick-action buttons are available:
- Send an Attachment:
-
Click the
📎icon.
-
Select a file from the file browser.
-
Optionally, add a text message and send.

-
- AI-Assist:
-
Click the
🪄icon and selectEnable AI.
-
In the pop-up, enable AI features and configure the content source as guided.
-
Click
Generate Replyto populate an AI-generated response in the text input field. Edit as needed and send.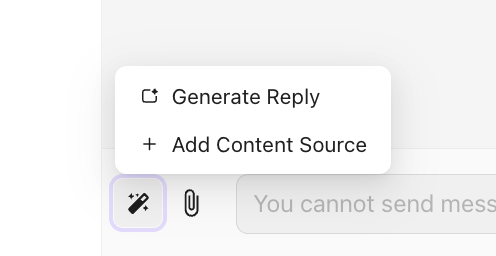
-
2.6 Quick Reply
A quick reply in Chkra is a pre-written text message (+ 📎 attachment option) that lets you respond instantly, saving time by avoiding typing
Create a Quick reply
-
Click on the ϟ icon. Click on
💬 Quick Reply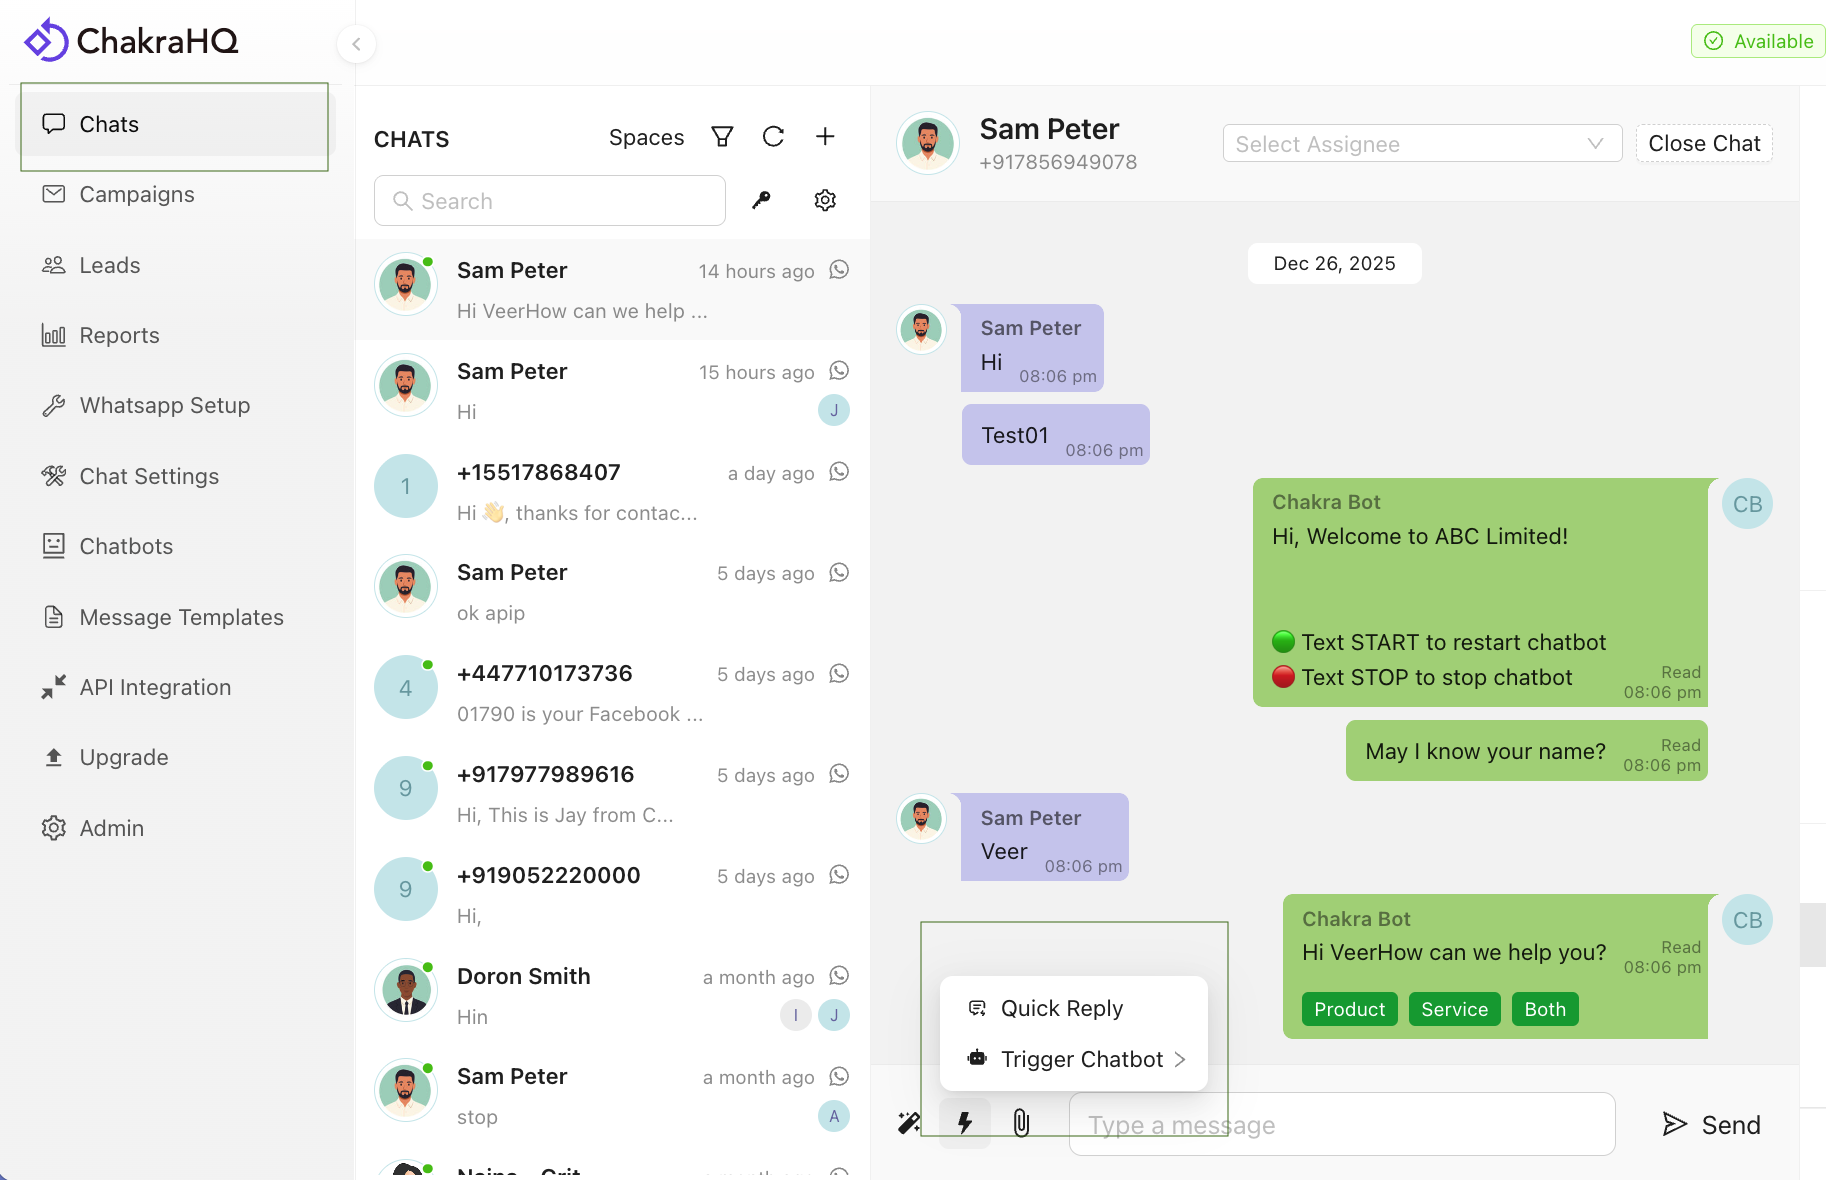
-
Click on
➕ Create New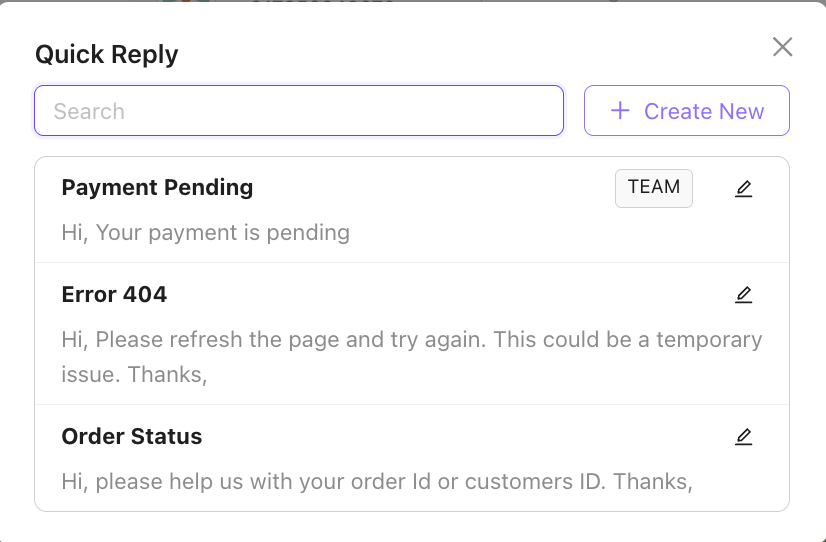
-
Add the Quick Reply
Add Title, Text, Any Media attachment, Show to all Team Members option
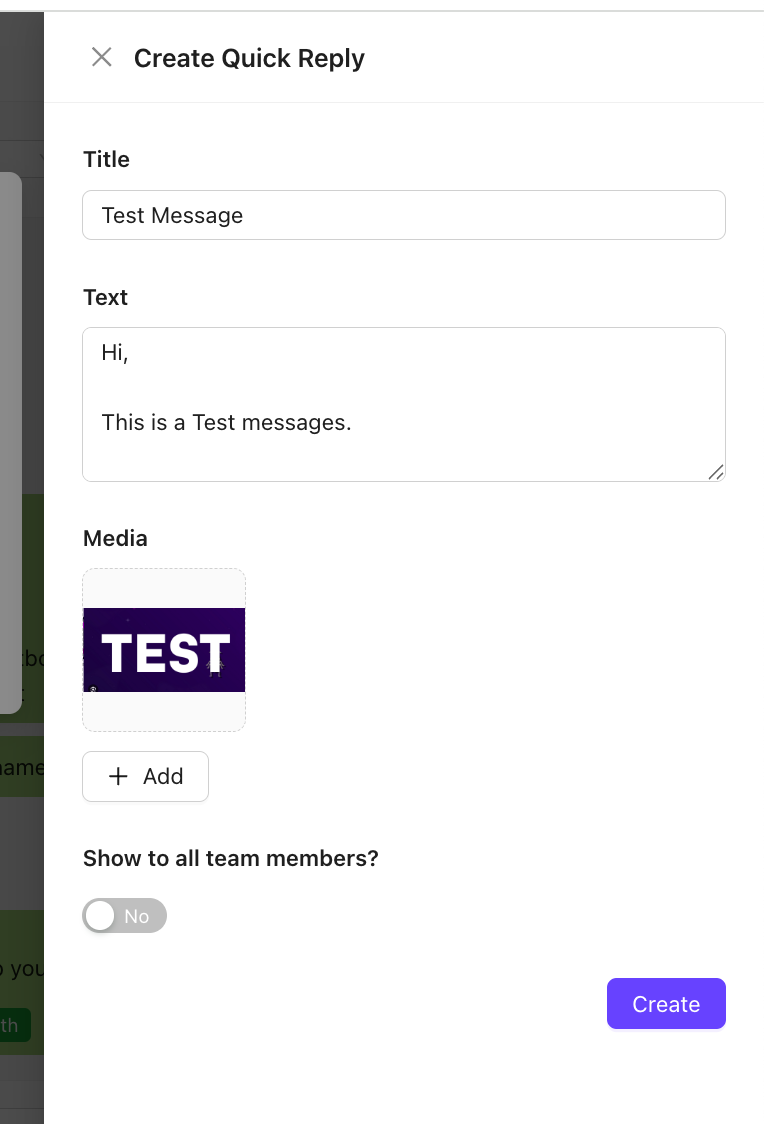
Send a Quick reply
-
Click on the
💬 Quick Reply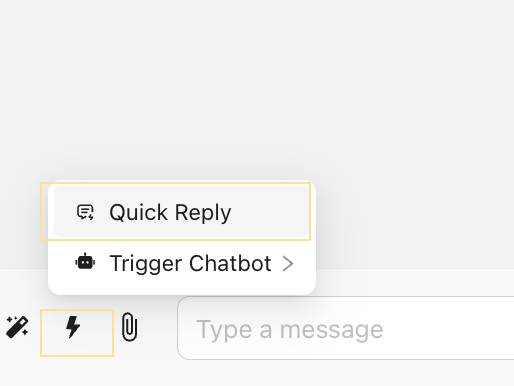
-
Click on the Quick reply card which you wish to use

-
Click on
Send
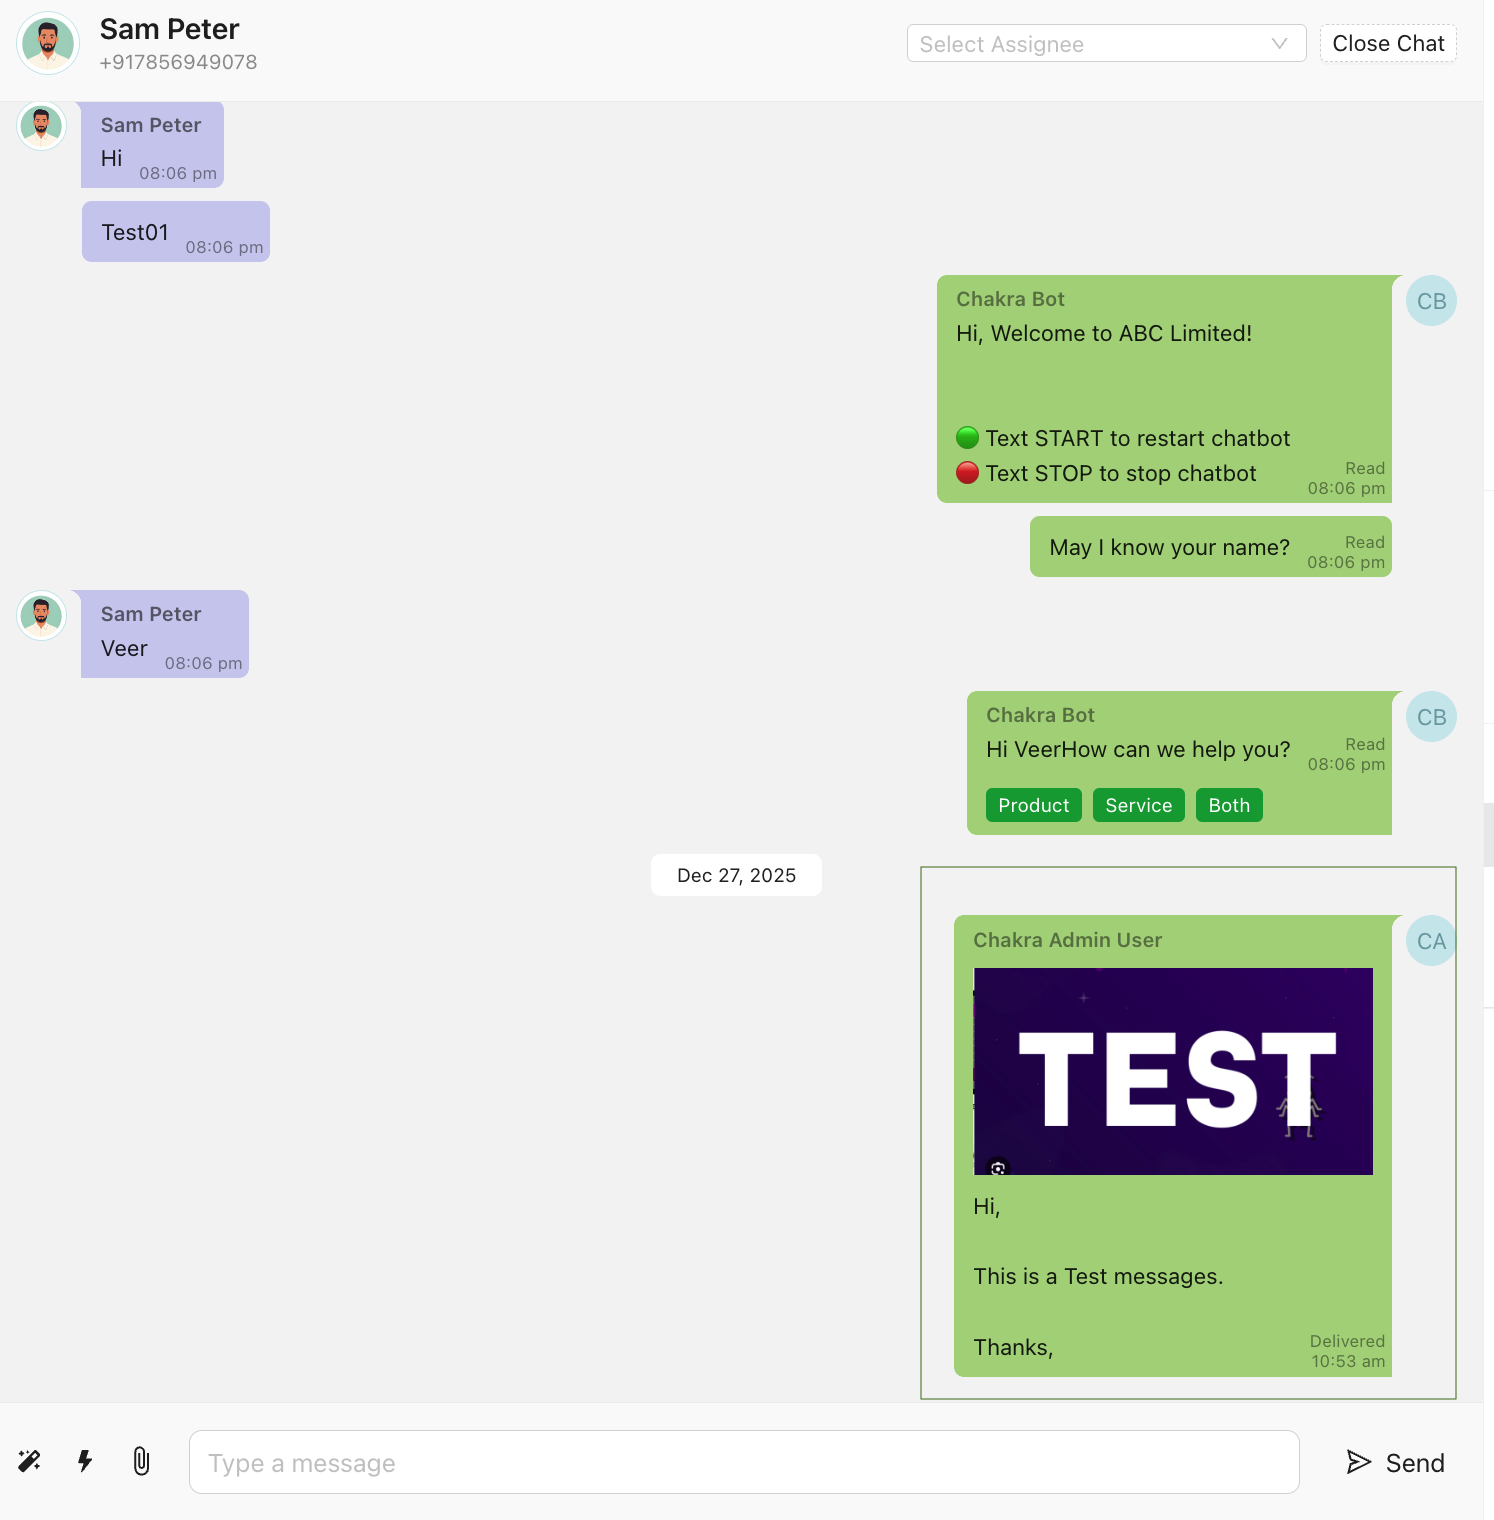
- The messsage is auto filled in the chat text area. Click Send.
- Note: In case of attachmnts, a pop up window comes up. Click Send.
2.7 Manual Chatbot Trigger
- Click on
🤖 Trigger Chatbotbutton Click on the ϟ icon.
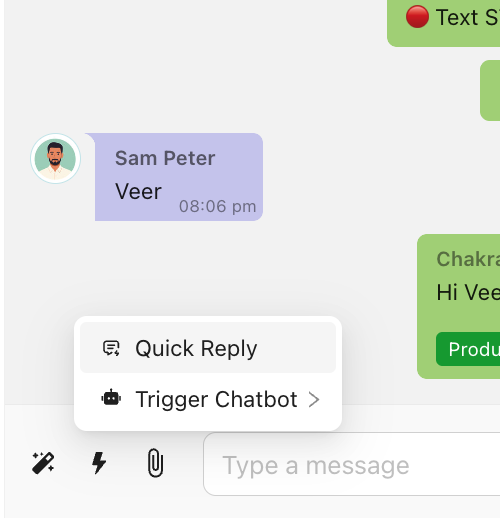
- Choose the desired chatbot from the list
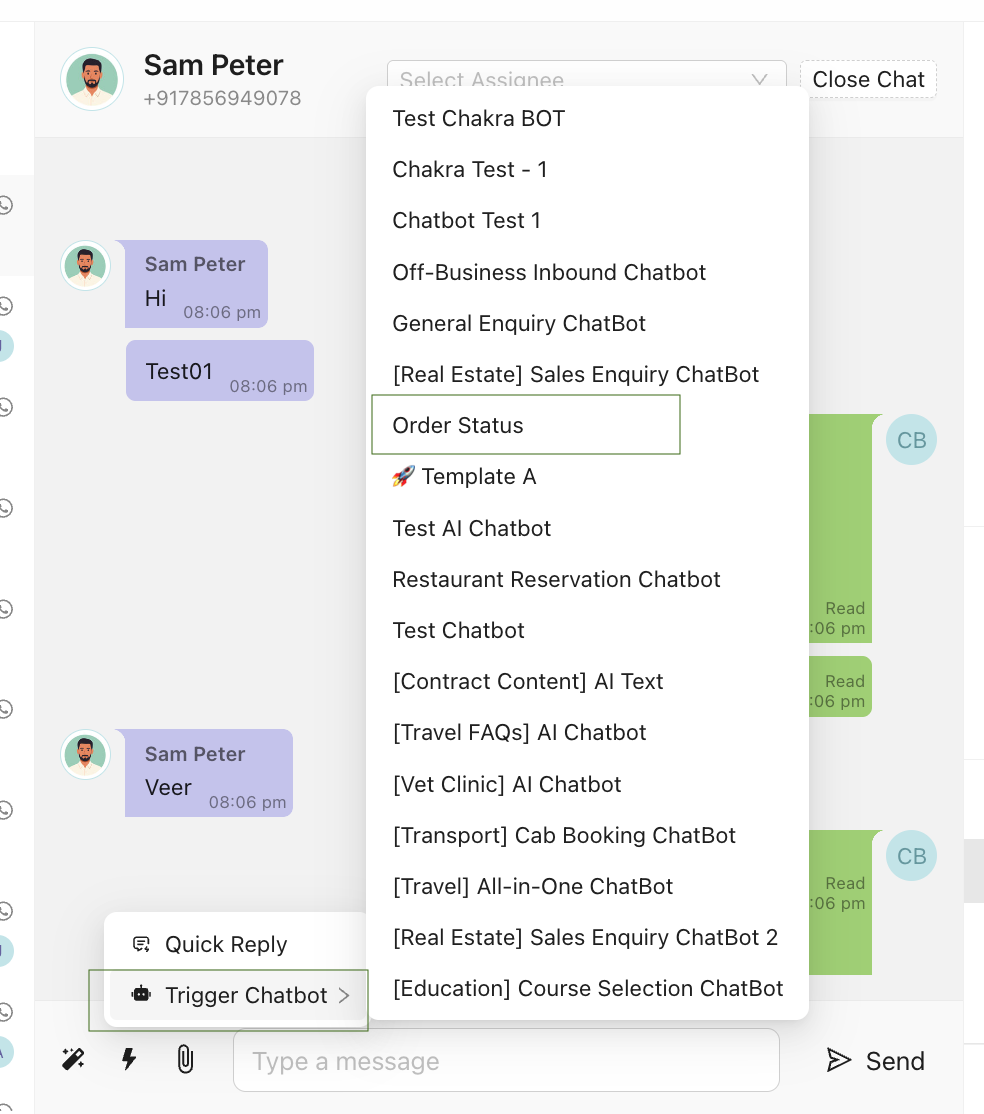
- The Chatbot is triggered
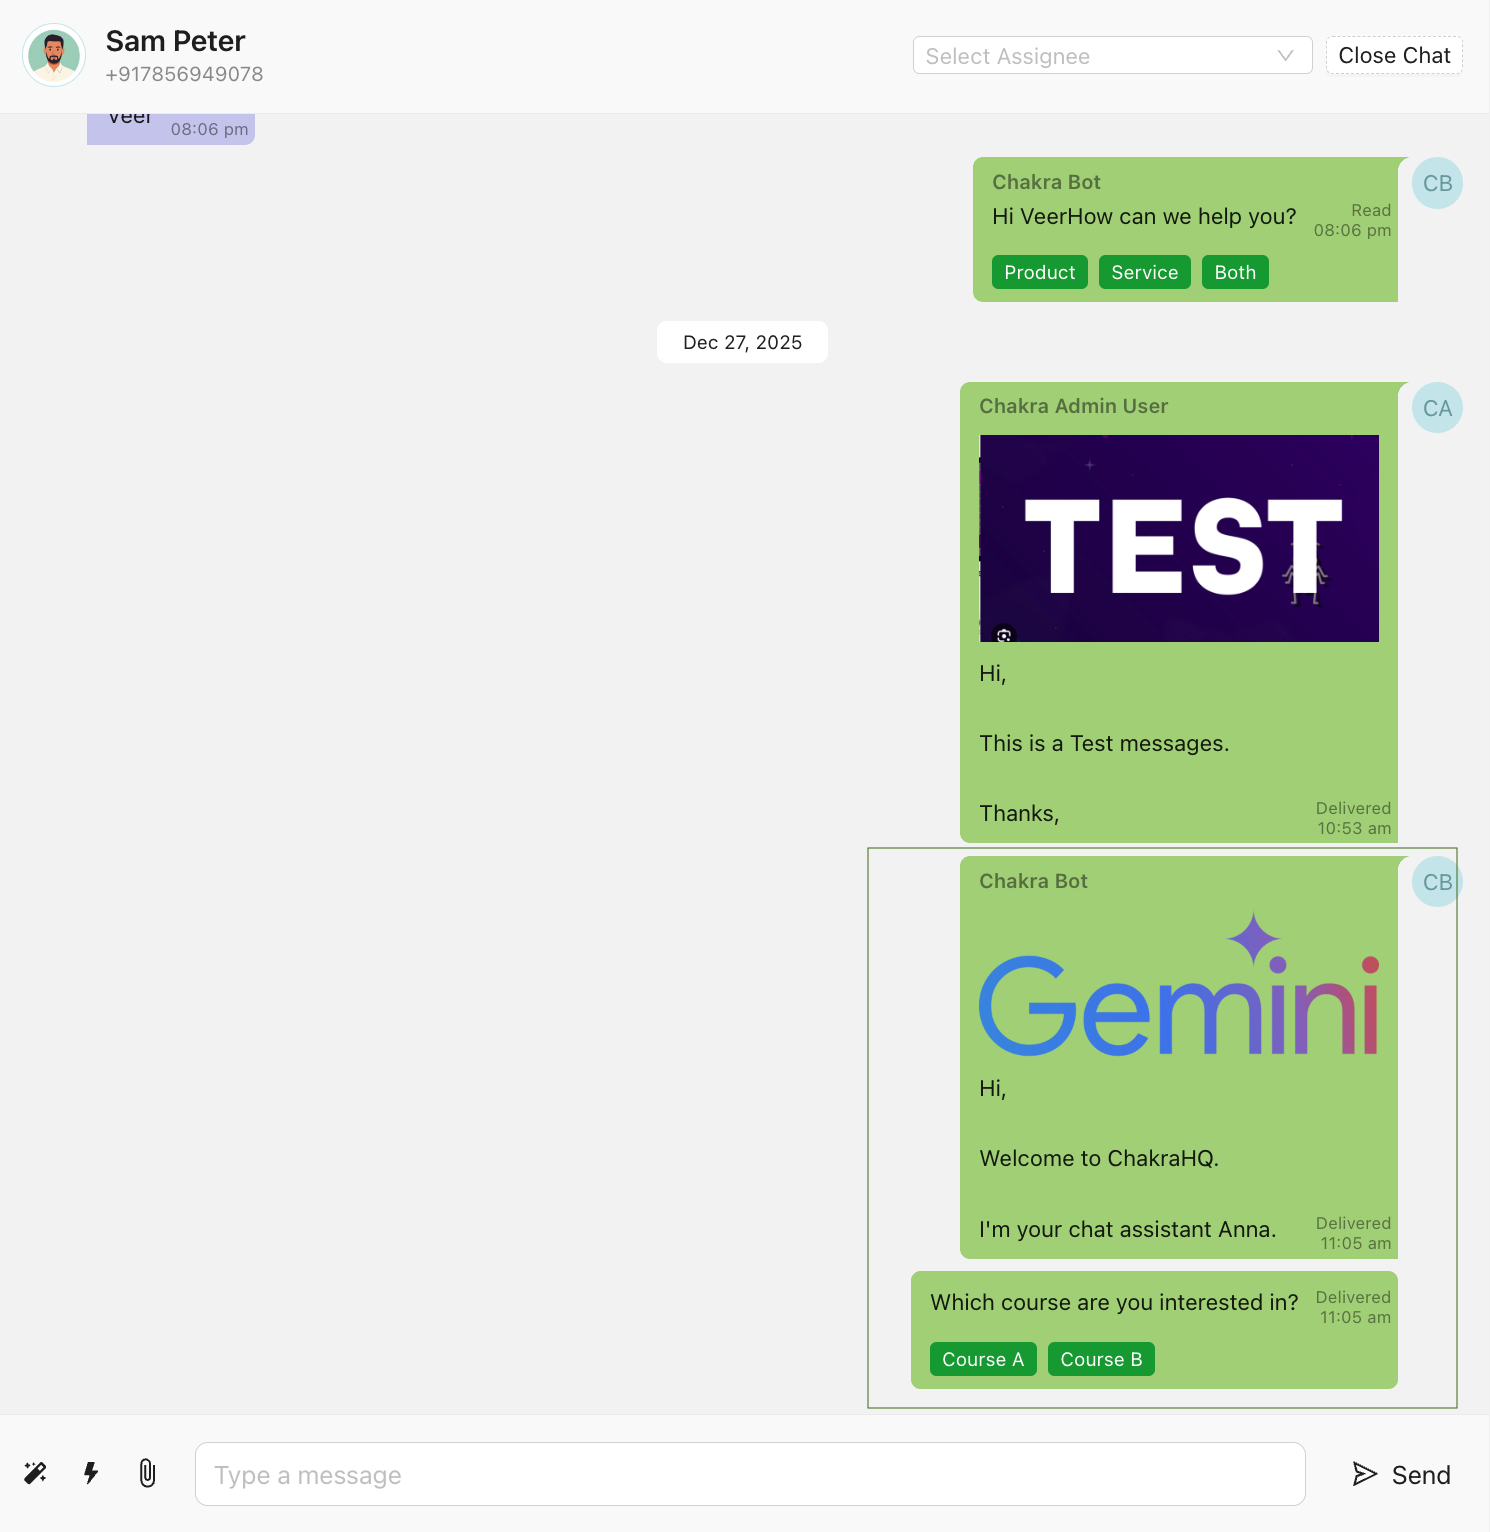
3. Other Chat Details
The right-side panel provides additional context and tools for managing chats.
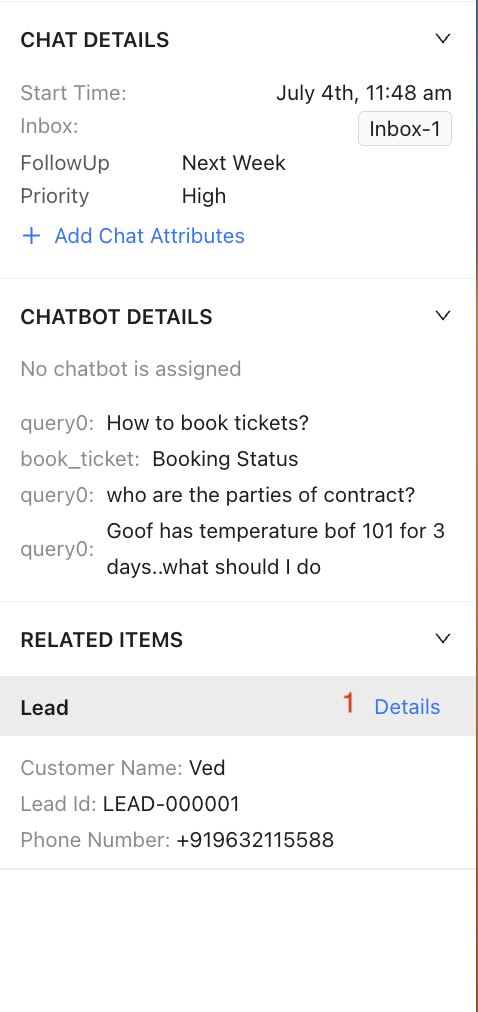
3.1 Chat Details
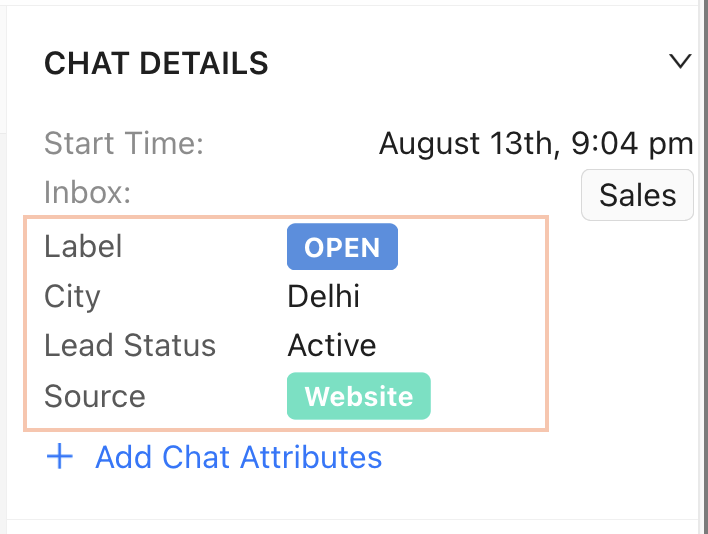
Includes:
- Chat start time.
- Associated chat inbox.
- Chat Tag Attributes. Apply Tags here.
- Option to
add Chat Attributes.
3.2 Chatbot Details
View and manage chatbot-related information:
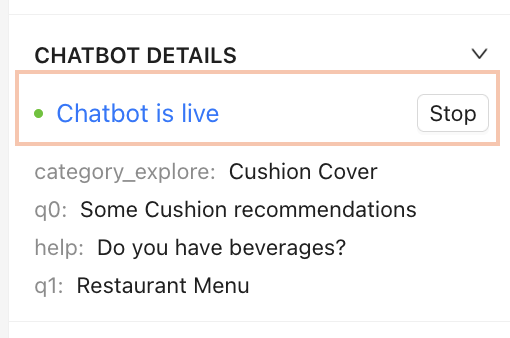
- Active Live Chatbot: Manually 'stop' the chatbot to engage customers directly. If no chatbot is currently active, a message
No chatbot is assignedis displayed. - Captured Responses: See chatbot session responses linked to chat variables.
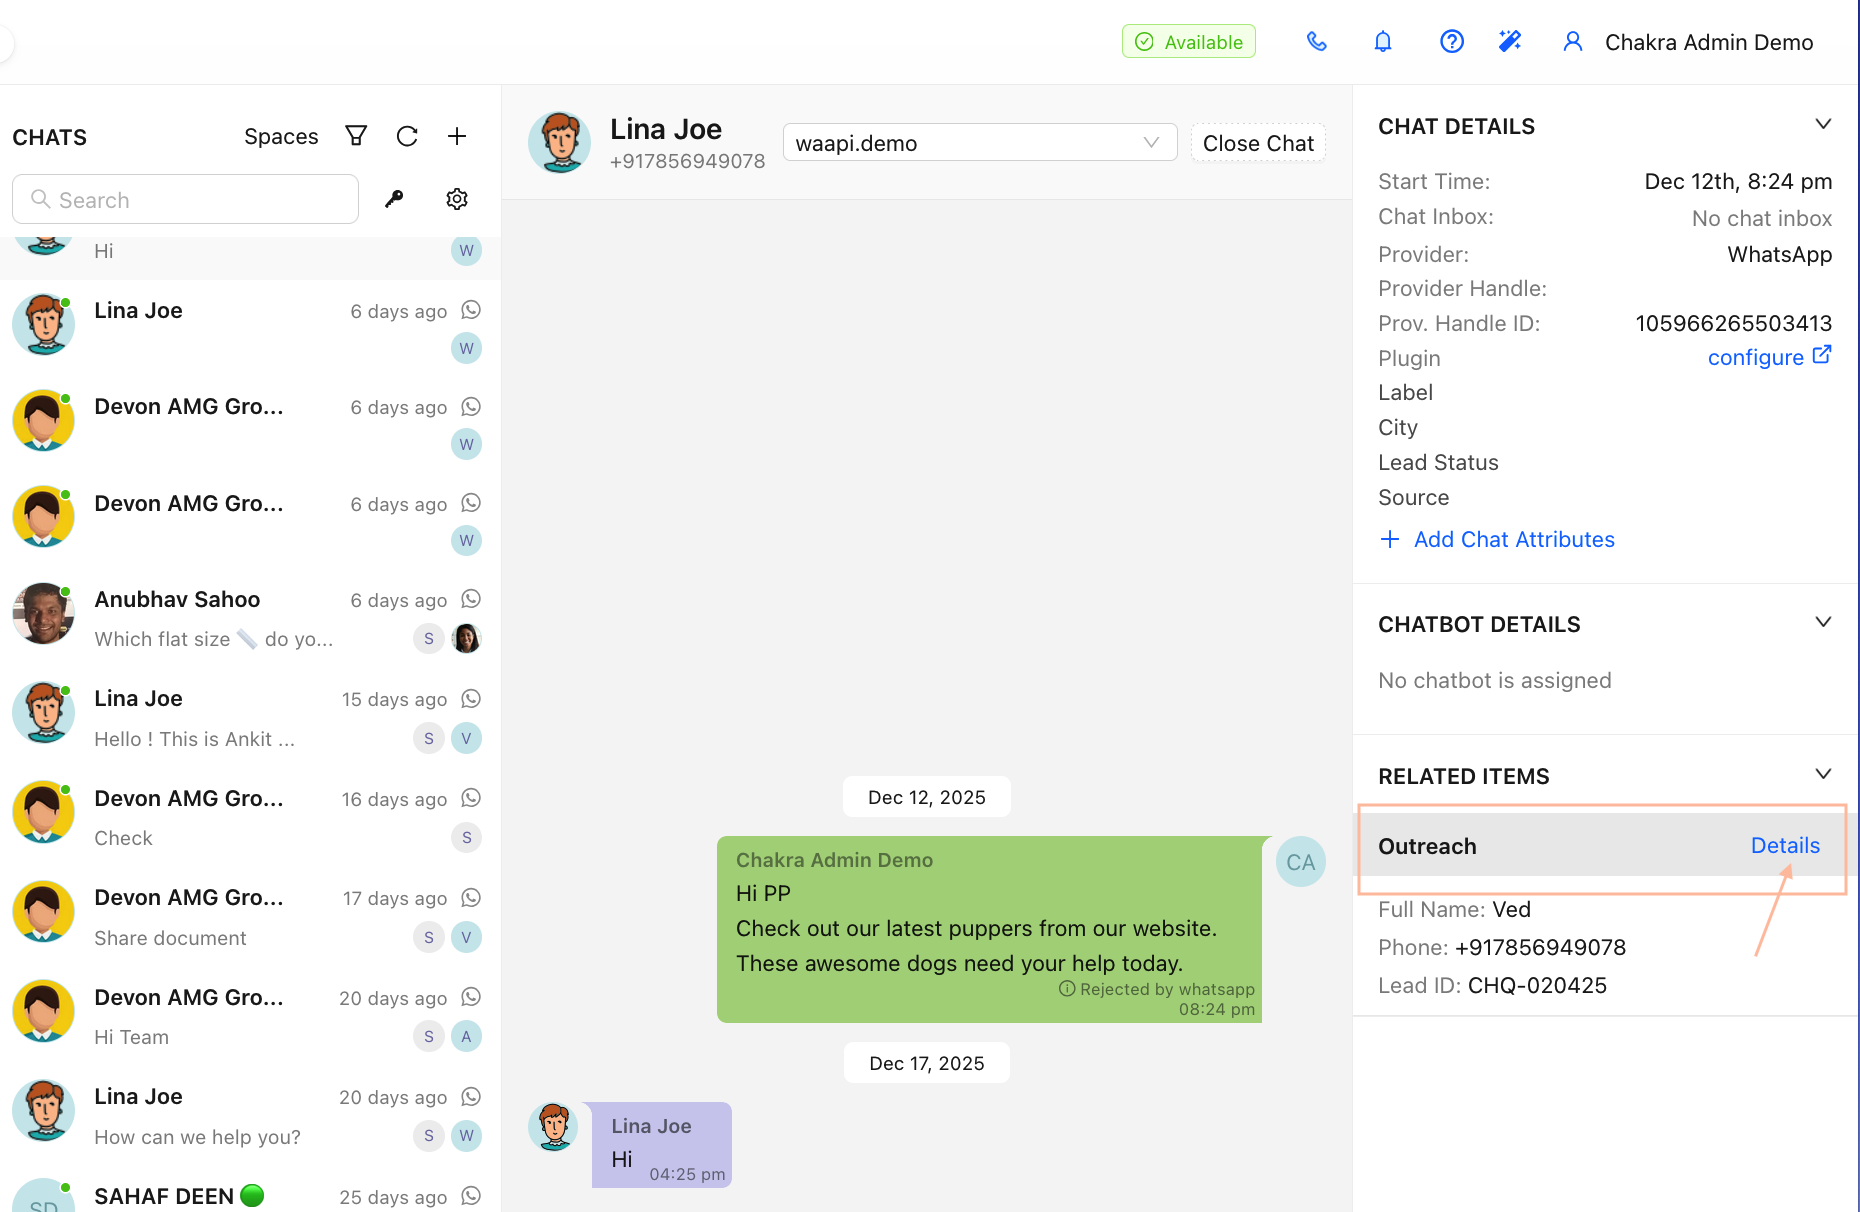
3.3 Related Items
Displays the associated lead, automatically created for new chats. Click Details to access the lead.
For further assistance, refer to additional resources or contact support.